Hello everyone! I hope your New Year has been off to a great start!
We’ve been spending much of our time lately getting ready to hit the road—we have just a little more than two weeks before we leave! While we’re as excited as can be to start the adventure, it’s also a bittersweet process as we fill up our social calendar to say our goodbyes. So for now I’m going to pretend I have plenty of time to discuss that aspect of the journey, and instead we’ll go into how we made a brown Turtle blue!
Shortly after we bought the Turtle, we began dreaming up plans for change. Right away, Andy was envisioning the rack and its sky boxes, beefy new bumper, and fancy new tires. For my part, I could hardly wait to cover it from top to toe in an exciting new color! So while Andy created scale model paper pieces of the roof and the racks he wanted to attach, we yelled out colors and mentally tried them on for size. The moment we imagined the Turtle in a bright Crayola blue, we were sold.
Just to get a reference point, we looked into having it done professionally. Needless to say, it was a lot. There is a lot of surface area on this vehicle! So Andy did some research (those words will be seen frequently on this blog) and decided our best bet was to buy some boat paint and do it ourselves. As we looked further into the process, we were really happy with the plan to use marine grade paint. Unlike car paint, we could paint it with a brush instead of a spray can or gun. And unlike other paints that could potentially be applied with a brush, it is made to be super durable in the elements. When Andy found a brand he liked, we looked at their color options and found, to my delight, the absolutely exact shade of blue I had been dreaming of! It was meant to be.
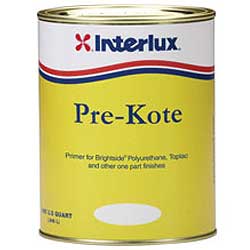
We sanded down the entire Turtle with wet/dry sandpaper, and primed it with white //ws-na.amazon-adsystem.com/widgets/q?ServiceVersion=20070822&OneJS=1&Operation=GetAdHtml&MarketPlace=US&source=ac&ref=qf_sp_asin_til&ad_type=product_link&tracking_id=blueturtlecro-20&marketplace=amazon®ion=US&placement=B0017KKKDO&asins=B0017KKKDO&linkId=fc0af2f1af67f4d14ae20361bec4c6d2&show_border=false&link_opens_in_new_window=false&price_color=333333&title_color=0066c0&bg_color=ffffff“>Interlux Pre-Kote primer. The Interlux paints we used ran between $40 and $50 a quart, but compared to the cost of having the job done, it’s a great deal.

Then it was time for the serious business of painting an RV. Neither of us had any experience here, but thankfully Andy’s love of research saved the day again. The method most commonly used to paint boats is called “Rolling and Tipping.” One person uses a small roller to apply a thin layer of the top coat in small sections, then the other person follows behind and quickly but carefully uses a high quality brush to smooth out the bubbles. It’s important to make each section small in order to be able to blend it all together smoothly before the previous section dries.
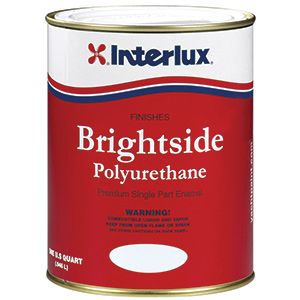
For our project, we used a badger hair brush and //ws-na.amazon-adsystem.com/widgets/q?ServiceVersion=20070822&OneJS=1&Operation=GetAdHtml&MarketPlace=US&source=ac&ref=qf_sp_asin_til&ad_type=product_link&tracking_id=blueturtlecro-20&marketplace=amazon®ion=US&placement=B001BWF718&asins=B001BWF718&linkId=d2af3fdcae720aa23812e2cc28f381b9&show_border=false&link_opens_in_new_window=false&price_color=333333&title_color=0066C0&bg_color=FFFFFF“>Interlux Brightside paint in Sapphire Blue.
Before we began painting, I was incredibly nervous that I would make mistakes and the Turtle would look like a bad kindergarten arts and crafts project. But as we neared completion of the three coats it required to cover the Turtle, I think we both gave up on the need for perfection, as it was astonishing enough that we were just two people and we were painting an RV! The paint goes on super smoothly, and it’s pretty incredible to watch as the brush glides over the bubbles and melts the texture into a glassy sheen. If you look closely at the surface, you can see light striations in the paint, but overall we are extraordinarily proud of ourselves! It took weeks to sand, prime, and paint three coats, but in the end we spent far less than we would have if we would have had it professionally done.
In addition to the blue, we painted the top of the Turtle with Interlux Brightside White, and the bottom with Rustoleum flat black. Though it adds visual interest, the primary reasons were practical. The white top will keep us cooler when the sun is beating down, and the black hides mud and dirt and camouflages hatch doors. We have small cans of all three colors on board, so if the Turtle gets scratched or dinged, we can easily mend it ourselves. We found that taping off the layers still resulted in leaks and a super uneven line, so I just used a small brush to freehand the transitions. So don’t look too closely there. 🙂
I’ll share some lessons we learned for those of you who are thinking of tackling a similar project. But first, some process photos!


It was a bunch of work, but our sense of ownership and accomplishment is a great payoff. Here are a few things we learned throughout the painting process:
- It’s best to paint on a cool, overcast day. Otherwise, the paint dries quickly after rolling, and by the time you begin tipping it’s impossible to blend sections well.
- We had better results when tipping if we lightly dipped the very end of the brush in mineral spirits.
- It’s easier to blend the sections if you tip into the previous section.
- Edge around windows first so you can move more quickly over the main surface. We started by edging as we went, and it made for a more frantic painting session.
- Relax and be realistic. We wanted so badly for our very first vehicle paint job to be as perfect as those we saw in YouTube videos, but as we painted we realized that we’re beginners, and that’s OK. Sometimes bugs land on the paint. Sometimes the paint streaks a little. Sometimes you have to sneeze and the paint dries some while you look into the sun waiting for the sneeze, and then by the time you start tipping again the paint has dried a bit and it smudges, and then you dip the brush into mineral spirits to help it blend better, but you use too much and the now-wetter paint drips down the side and on to your shoes and driveway. After the job is done, those little details aren’t as glaring as they seem when your face is right up against the vehicle.
I’ll check with Andy to get his input about our learning process, and update the list. But that’s what I can think of so far. If we can do it, anyone can! And the results are amazingly satisfying.

