The Build

The Alaska Road Trip Begins!

Well hello there!

A lot has happened since the last time I updated the blog on our roving whereabouts, wild shenanigans and general goings-on, and if I could, I’d catch you up completely on what we’ve been up to since I last reported. But as I sit here writing this post, I realize how long that could take, as we’ve been moving at breakneck Turtle speed for the last few months! (Of course I’m not referring to miles-per-hour speed, as that remains as slow as ever. I’m talking about how much ground we’ve covered, which for us has been a lot in an uncharacteristically short amount of time.)

Instead, I’ve decided to pick up where we are at this moment, which is the beginning of such a fun adventure that I think you’ll agree this is the best place to begin. Because we just crossed the border into Canada, which (in our minds at least) is the official beginning of the Overland Trek to Alaska!

IMG_5838

The general plan is as follows:

The Timeframe: A month driving up to Alaska (July), a month exploring Alaska (August), and a month returning home (September). We’d stay longer, but we’d like to stay ahead of snowy road conditions and by October the roads can start to ice over.

The Route: We are going to loosely follow what some travel guides call the “Gold Rush Route” on the way up, and then follow the Alcan Highway which ends just north of Montana, so we can drop in to see family at the end of the journey.

Must See: Denali National Park, Wrangell-St. Elias National Park, The Cook Family in Anchorage, Harding Ice Fields, Kenai Peninsula, and a moose. (It doesn’t matter which one.) Other than that we’ll play it by ear, as is our general travel style. There’s a lot of Alaska up there and we want to see as much as we can without moving so quickly that we forget to relax and enjoy the quiet moments that we’ve come to love most during our travels. I’ve been surprised to find my sweetest memories are the little surprise spots we stumble across between official destinations, and we try to make sure we leave room for improvisation for that reason.

Aaaaand, honestly, that’s as far as we’ve gotten. It’s tricky to make new travel plans while you’re in the midst of traveling and enjoying your current location! So we’ve become accustomed to making detailed itineraries a day or two in advance and then making more general plans where the upcoming weeks and months are concerned. It’s just no use trying to nail things down when we could see an interesting road and end up somewhere completely different than we’d anticipated!

We just arrived in Canada yesterday, and already we’re just charmed to pieces. It’s very familiar of course, but different enough that we’re excited to see what unexpected twists we’ll encounter as we go.

Unanswered questions include:

  • How different are the regulations regarding boondocking? Can you stay overnight at any turnout or viewpoint along the highway like you can in the states we’ve visited in the US?
  • What are “good” prices for fuel and propane? Our brains are already so tangled by conversions, and then by the time we work out what the prices are in US Dollars we realize that we don’t even know if the price is good or bad for the region we’re in!
  • We were surprised by the questions they asked us at the border, but they let us in so who are we to complain? They had a lot of questions regarding our lack of jobs, even though we explained we were living off of savings, and wanted to know what jobs we had before we left them for life on the road. The agent asked to see bank account balances to ensure we had enough money to cover our trip, which makes sense. He didn’t ask about pets, even though we did have all the documentation for Scout and Gracie including immunization records, etc. The one we’re still puzzled about though is that he asked how many guns we own. Not how many we were carrying with us, but how many do we own anywhere in the world. Interesting, right? The answer is none, so I’m not sure what the outcome would have been had we said we had an arsenal somewhere in the states. But again, we’re not here to tell the man how to do his job, especially since we crossed over in very little time.

IMG_5834

Today we went to Vancouver, BC and had a great time at the Granville Island Market and VanDusen Botanical Gardens before hitting up a few points of interest including the steam clock, a “metaphysical supply store,” the Digital Orca, and the Marine Building. All awesome.

IMG_5882IMG_5917IMG_5927IMG_5953IMG_5964IMG_5971IMG_5983

We love Vancouver!

And now that we’re all up-to-date on the current adventure, here is a sampler platter of the aforementioned shenanigans we’ve been into the last month or two, for those who like pictures of cute animals, lovely scenery, fun friends, and other general niceness.

IMG_3824
IMG_4198IMG_3914IMG_5793IMG_5784IMG_3818IMG_4307IMG_0800IMG_3976IMG_4797 (1)IMG_4843IMG_5413IMG_5342IMG_0667IMG_4364IMG_0680tIMG_4191IMG_5068IMG_0762IMG_0809wIMG_3997IMG_4056IMG_5489IMG_5684IMG_5414IMG_5706IMG_5090IMG_5228IMG_4060IMG_4006IMG_0819dogIMG_5403IMG_4730IMG_4376IMG_4477IMG_3971

Let’s Refurbish a Van – Part 8: Hood Scoops (By Andy)

A post by Andy

{Modified the title theme some. We think of ourselves much more as a big van than a small RV. I now want to start prefacing this and future posts to be more representative of our self-image.}

So, to the meat of the subject. I just finished our hood scoops! Why did I make hood scoops? Well, for one, they look pretty cool and I needed a prominent place to put my new go-fast emblems that I ordered from Amazon.

KIMG0530

Mainly, we are trying to get as much power out of the engine so we can get our heavy old self up the high steep hills. In that vein, I have been playing with the spark timing, carb mixture, and intake airflow. By tweaking and adjusting these parameters we are working to get the most power and efficiency out of our old engine. Specifically, advancing the timing can get the engine to produce more power, but too much spark advance causes engine problems—pinging and preignition. If the engine is cooler, one can run with more advance. Another way to look at it is that with a given timing advance, if the engine and intake air get hotter, then the timing is too far advanced.

Maybe a side note about my “go-fast” emblems. Car companies try to sell cars. Sometime fancy cars come with racing stripes, cool graphics, and badges on the side about engine stuff. A joke among car people is the question “How much horsepower do the stripes add?” The answer is, of course, none. But… they do look cool. Look around, they are everywhere: M3, AMG, Hemi, 440, HiPo. The only thing the badge or stripes could actually do is add an immeasurably small increase in drag, or some unneeded paint weight. They are simply for the people in the car next to you. All the same, they look sporty, so I bought some that state the displacement of our engine and say it is “High Performance”. What I’m saying here is they do nothing, but they truly do look great!

So, I wanted more air to get in and out of the engine compartment to cool the engine, and have the air flowing into the air cleaner be as cool (and dense) as possible. To make sure I had an understanding of the pre-hood-scoop environment, I first taped the probe end of my digital temperature gauge to the air cleaner. Over a few weeks in different driving conditions and different altitudes, we took notes about the temperature measurements of the air cleaner and air filter. You can see the wire to the probe, and the tape holding it in one location.

KIMG0451

Overall, we are in the 150º–160ºF range under the hood after the engine gets warmed up and when the ambient temperature is in the 70º–80ºF range. So, to get more outside air in and more inside air out we need some kind of venting. I looked online, and $50+ plastic vents and scoops can be found, but they were not really van-sized, and seem flimsy. Metal ones can also be found, but are more expensive, and again, really don’t fit. Apparently there is an untapped market of people who want to mod 1985 Ford vans! (Investors be wary—the market may be small.) I finally hit on the idea that rectangle cake pans are about the size I wanted, and they are inexpensive, and they are made of metal designed to withstand 500ºF+. Going with this thought, while we were camping in El Malpais National Monument, I made some cake pan-sized cardboard mockups and spray painted them with a blue that I had.

Test fitting…

I thought that looked good, so a few days later when we were in a town, we got some cake pans.

KIMG0454

KIMG0455

One morning, a few weeks later, when we where camping at the Great Salt Lake, I got out the pans, tin snips, sandpaper, and primer, and got to work remaking our sweet cake pans into even sweeter performance hood scoops (please note the word play).

Here they are.

Test fitting.

We stashed them away for a bit and traveled onward. Another week later we had a free day while visiting our friends the Higdems in Kimberly, ID. I measured, moved, marked, measured, and measured and marked again. Then I started drilling holes in the hood.

Lots of little holes now!

After fitting and drilling the mounting holes, I now knew what piece of the hood (bonnet, for any Brits out there) to cut out. Out with the jig saw.

Another side note here: When putting the Turtle together, we set ourselves up with a few DeWalt cordless tools and the battery charger that plugs into a 12V cigarette lighter. The tool charger is now wired to our solar-charged batteries, so we are using the sun’s energy to drill, cut, and modify our hood. It feels fun to know that when working on projects such as this!

For the final install, I put down a small bead of RTV sealant, aligned the scoops, and screwed in the 6 screws per scoop that I had already pre-drilled. After the RTV cured a bit, I got out our boat paint and went at it.

Included above is, obviously, a photo of what Scout and Gracie were doing at the time. A few days later, at Dave and Ryann’s place, I added more RTV to smooth the transition and put on more paint to finish it all off.

All finished now, after the last painting and with the great go-fast badges installed.

We should call this the conclusions section of the post, for you science people out there. Well, they have been on now for a week, and we don’t move fast, so we have only driven a few hundred miles. We will need to collect more data, but so far the maximum under-hood temperature we have seen in 135ºF, and most of the time it has been in the 100º-120ºF range (and we are actually in hotter weather than when we took our non-hood scoop measurements). We have also driven through crazy heavy rain and, as expected and hoped for, the small amount of water that enters through the scoops has no adverse effects on the engine. Generally, a pretty solid success, and I have since advanced the ignition timing just a bit with no pinging.

Oh, maybe a cost breakdown. The sum total of the cake pans, primer, quantity of screws, RTV, and paint used is less than $20. The go-fast badges were $11 each. Dave suggests I sell it as “The whole project was less than 45 dollars.” I think I shall adopt that tract!

All that for less than 45 dollars!!!

Let’s Refurbish a Van – Part 7: Our Batteries Phase 1 (By Andy)

A Post by Andy

{Note: The work detailed in this part of the post was completed over the summer of 2015, before we moved into the Turtle. I am just getting to writing the post now.}

So, we like to have our computers run, have lights, have the controls for our fridge work, have a charged Wi-Fi hotspot, and have our furnace fan powered to keep us warm. For all this we need electricity, and since we want to be off-grid, we need batteries. We started with this:

HouseBattery

If you are familiar with the Turtle, this compartment is behind the largest access door on the passenger side- the door with the vent in it. In the following photo, I put in a dotted line where the plane of the floor on the inside intersects the compartment.

firstbattery_floorline80

The walls of the compartment above the floor line are plywood, and bump up under the couch inside. The sides and bottom below the line are made of heavy steel. I have deduced the compartment was originally designed for a generator, as there was old 120V AC wiring running to it, an unconnected fuel line that ran into the back, and the door vent.

gimpprocessedimage95

I had a hard time figuring out what all the wires were hooked to, as it was a bit haphazard in the compartment. In the above picture, (1) is a port that goes outside, below the floor of the Turtle. The wires there threaded out of the box, ran a short distance under the Turtle’s floor, then threaded up through the floor to the old inverter. There is a second hole (2) that the wires from the old 100W solar panel and the wires between the battery and main 12V distribution panel were run. (3) is the unused electrical box that had 120V AC wires run to the compartment where the shore power cable is housed.

Maybe I should back up a bit and throw out a few concepts and definitions and explanations for the terms we will be using.

  • Battery: A thing that stores electricity in chemical bonds. Here, we are just referring to 12V lead-acid batteries.
  • 12V/12VDC/DC: 12 Volt Direct Current (DC). This is what cars use for their electricity for headlights, the radio, starting, etc. It is the kind of power all the batteries we talk about will produce.
  • 120v: 120V Alternating Current (AC). This is what is in your house and in businesses you know, the typical wall plug Amy and I look for at restaurants to plug our computers into. It’s generally 120, 121, or whatever it takes.
  • Current: The flow rate of electricity.
  • Voltage: The force pushing the electricity through the wires.
  • Inverter: An electrical box that changes 12VDC to 120VAC. It changes car electricity to house-hold electricity. This is so we can plug our AC computer cords into our DC batteries.
  • Converter: An electrical box that changes 120VAC to 12VDC. The opposite of the above—pretty much a garage battery charger that you use to get your car started after you leave the lights on.
  • Charge Controller: An electrical box that changes the output of the solar panels into DC voltage, hopefully charging the house batteries.
  • House Battery: Now, I probably use this too freely. When I talk about house batteries, and I mean batteries dedicated to our living compartment. If I say house (or household) electricity, I mean 120 V AC. Got to figure this out… but, house batteries are 12V batteries separated from the car system, and dedicated to lights and heat and powering the inverter in the house part of a van. One should be able to run these dead flat, and the car will still start, as they are fully independent circuits.
  • Starting Battery: The batteries under the hood, used for starting the car, sparking the gas when the engine is running, running a radio (if you had a functional one), and lighting the headlights.
  • Shore power: Kind of a boat term, but a source of 120V AC electricity you can plug into. When you pull up at a friend’s house, and pull out your extension cord, and plug into their electricity, they are your “shore power”. (Thanks Alex and Julie, Kari and David, Connie, Mag and John, Dave and Ryanne, Mike and Becky, Blake and Martha, Roger and Mary, Chris, Dad…)

Now, back to the good stuff! To start the battery box rebuilt and modification, I first labeled the wires and removed the old battery. I then cleaned the compartment with baking soda and water to neutralize the sulfuric acid and prevent further corrosion. Lucky, the metal compartment is super stout, so it was still in great shape. As usual, after a final thorough cleaning,  I caulked the seams and painted the compartment with black Rustoleum. I can’t find a picture of the completely empty, cleaned and freshly painted compartment, but trust me, it looked good!


After getting the compartment beautified, I cut and painted a plywood plate to fit into the bottom, bolted and glued it to the metal base of the box, and mounted battery trays to it. I painted up everything with oil-based paint and used stainless steel hardware to affix everything.

Since we had just gotten the Interlux blue boat paint, I practiced the painting technique on the top surface of the plywood base, so it is the same shiny blue as the Turtle exterior. In the following photos, you can see the two new Fullriver 115Ah 12V DC sealed AGM batteries that we started with in there, but just patched into the cleaned up existing wiring we are reusing at this point.


I decided to go with Absorbed Glass Matt (AGM) batteries. They cost a bit more than flooded batteries, but they do not spill, they will not develop corrosion at the terminals, and can be mounted sideways, if that configuration seems important. Additionally, they do not require venting, so they can be safely installed inside the living compartment, if that is necessary. Here is the site. We have been happy with this choice, and as you will find out in future posts, choosing AGM sealed batteries will allow us to make some future cold-weather modifications.

As to wiring, I was just starting to adopt the boat convention for new circuits and runs I would rewire. The convention is as follows: For 12VDC, yellow is ground, and red is positive. For 120V AC, the wires are white, black, and green for ground. Examples of the wires are here:


The reason behind adopting this convention is that at a glance, you can tell which circuit they are supposed to be wired to. Additionally, the boat 120V cable is stranded, as opposed to the household solid copper wire. Stranded wires should always be used in a vibration environment. Logically, then, a van should have no solid copper wires (though most RV builders do actually use cheaper solid copper for the 120V runs). As you might have observed, we have concluded that one should think of their van as a boat, and look to boat paints, wires, latches, and hardware for the upgrades and work. Though the boat cable is a little more expensive, it is paired and tinned for corrosion resistance, and gives a real nice finished look. Additionally, it can be purchased in any gauge.

So, at the end of our Phase 1 battery configuration we had our two new AGM batteries with a combined storage of 230Ah at 12V installed and secured, with the connections cleaned up. With this battery pack, we simply used the old converter to charge them when we were connected to shore power, and the old inverter to make our 120V for our computers when off-grid. At this point in our journey I also had just finished the install of our 300W of solar to charge the batteries (we will cover the panels and solar charging and solar controller in a different post).

That’s Phase 1 for you!

A Broken Turtle Tale: Reserve, NM

In the last post, Andy itemized all our break-downs, according to the definition of breaking down that we’ve agreed upon. The final line item in that list was a break-down in Reserve, New Mexico which we mentioned we’d discuss further later. It’s not so much a story about what went wrong, though that’s exciting too, but about a lucky break in where we broke down and how wonderful it is to be reminded of how kind people are.

The story begins as we left Silver City from the Gila Cliff Dwellings. It was a stunning drive.

IMG_1854

Andy had woken up that morning from delicious dreams of pizza, so we made it the daily goal to find ourselves a slice. As we passed through Reserve, NM we saw The Adobe Cafe had a flying banner advertising pizza, so we took it as a sign and went in. The pizza did not disappoint!

IMG_1862

We wrapped up our remaining slices and got back in the Turtle, started it up. . . and that starter just kept starting and turning over and making crazy sounds, and continuing to start even after Andy pulled the keys out. It was probably three minutes we spent panicking and looking at each other with saucer eyes and running around trying to figure out what to do, but both of us agree it felt like twenty before the starter finally died. We got out, and I popped the hood and began investigating. (Yeah, just kidding of course—Andy did that.) My job was to chat with the friendly locals who came over to make sure everything was all right.

Andy here. What I suspected was happening, and what we finally concluded happened was this: When you turn the key to start, a little electrical current is fed to the started solenoid. The solenoid is a switch that then supplies a large current from fat wires from the battery to the starter (an electric motor), that then turns over the engine. The little solenoid switch got stuck in the connected position, so even after turning the key back, it was still making the connection to supply power to the starter. Starters are not designed to run for long, so the starter overheated, something important inside melted, and it died. To fix the problem, we then needed a new solenoid switch, and a new starter. Took less that 30 minutes to fix, once we got the right parts. We actually carry a spare starter and solenoid with us now…

And I’m telling you, the whole town of Reserve rallied together to help us out! People were driving home to see if they had spare starters, directing us to the auto shop down the road, checking back on us after attending the elementary school play their kids/grandkids were in that evening, and generally just offering any assistance they could. It was really encouraging. Because it was Friday, the shop wouldn’t be able to get parts in until Monday, so we thought we might be marooned for a few days. As a last resort, Andy did his best to revive the patient inside out of the rain, but the thing was D.O.A.

IMG_1867

IMG_1870

In the meantime, Gracie kept us apprised of the goings-on in the neighborhood.

IMG_1894

We met a local who coincidentally is from my hometown of Billings, MT. He offered to take Andy to the nearest town the following day to pick up a starter in Springerville, about an hour away. We were saved! We joined him at the local tavern for a beer and had a great time. Everyone there expressed concern for our stranded state and offered whatever help they could provide for us. But luckily, we had Craig. The next day he arrived to pick up Andy, and the two of them got the part, Andy installed it, and we were all set to go. Thanks Craig! You really saved the day!

We’d also like to thank the entire town of Reserve who made us feel welcome and not at all up that proverbial creek. At any given moment we had a handful of people on call, doing whatever they could to help us out. We had a lovely stay, and if we’re ever in the area we’ll definitely be back!

A Postscript Involving Pie: 

Due to the delay, we knew we were cutting it close if we were going to make it to the destination I’d pinned on our calendar three months ago and had been talking about ever since: an actual town called Pie Town, NM. Can you believe it? It’s a tiny little town with just a few shops, three of the four of them pie shops. And if you’ve met me you know how much I looooooove pie. I couldn’t wait.

Unfortunately by the time we reached Pie Town, all the shops had just closed. I was pretty bummed out. As we drove through town, we noticed that Pie-O-Neer Pies had cars parked out front, so we pulled in, but the Closed sign was in the door and I was re-bummed. Then just as we began to back out, a petite smiling woman in a stylish hat popped out of the door and shouted to us, “Do you want pie?” We said YES! She said they only had three slices left, but we could come take a look. We said we’d take the lot, and they even threw in an extra slice for us. It was a very glorious day for me. We took them to go, and I waited impatiently for us to reach our evening destination outside of the Very Large Array. We found a perfect spot at a turn-out right by the entrance road.

If you look in this picture, you can barely make out the VLA on the horizon. (It looked much closer in person.)

IMG_1906

IMG_1899

Then we ate pie!

IMG_1898

We ate them sampler-style, and loved all three. We had enough leftovers to enjoy two more dessert occasions as well.  We’ll definitely drive out of our way to return to Pie-O-Neer Pies in the future. What a treat!

So although reading the list that Andy put together may seem like a series of unfortunate events, they all make for great stories, and some of those stories even end in pie.

Turtle Broke Down! (By Andy)

A Blog Post by Andy:

About a month ago, we left Las Cruces, New Mexico at a decent time, as we were wanting to get a good start on the 40-mile drive to Hatch, and get there well before 11:30. Should be a breeze. After maybe 15 minutes on the highway I noticed the temperature gauge go above the middle. I like to watch gauges—it’s a hobby. And it continued to go up. I thought I could smell a little antifreeze. And the gauge was still going up. The gauge went far to the right—to the max—so I slowed and pulled to the shoulder. At that point, the white smoke was billowing, billowing, billowing out from under the hood, and the sweet smell of antifreeze was in the air. (The steam actually soaked the carpet on the passenger side after we opened that door.) Did not take the time to snap any pictures at this point, but I jumped out and got the hood open to find:

IMG_1363

The top radiator hose had ripped open and emptied the contents of the radiator onto the hot engine. Quite a scene. After identifying the problem, Amy asked, “So what do we do?” I replied, “Well, I’ll climb up to the rocket boxes, get the spare hose, get some tools out, let the engine cool for a minute, install the new hose, refill the radiator with water from our blue jugs on the back, and we’ll continue to Hatch.” That is why I look happy in the picture!

IMG_1359

IMG_1354

Anyway, in 20 minutes we were back on the road. Pretty pleased with that! And, we made it to Hatch to have a pair of the signature green chile cheeseburgers from Sparkys—we have agreed that it is one of the best burgers we have ever had!

Anyway, that’s just a short day-in-the-life. It did spur us to revisit the following conversation. . .

We had a bit of a debate about what it means to “break down”. I had thought it meant that we had to have a tow truck involved. Amy thought it meant having to pull off the road due to car trouble that prevented the Turtle from operating on its own. After some talk, we decided that a break-down shall be defined as an unforced stop or non-start event that would cause someone who does not work on cars to need to call for help. With that definition, here are a few other break-downs we have had:

  • Bend, Oregon: Ignition system failure that took a few days to fix (mentioned in a prior post).
  • Driving toward Montana from Idaho the engine died. This was related to the Bend electrical problem, that I temporally fixed on the roadside, and made a lasting repair later.
  • Driving from Bozeman to Billings, MT: A/C compressor seized, causing the belt to have “a few hot spots”. In layman, that is black smoke and melting, burning rubber. Cut away belt and cooled the hot spots, and got back on the road. (Amy’s note: Andy tried to minimize this event by saying it was “just a few hot spots”. . . I saw the firedrops falling steadily from under the hood and now whenever he describes things like “a few hot spots” or “just some sparky bits” I have a good grasp of the level of danger we’re dealing with. Andy is a known under-exaggerator.)
  • Billings, MT: Hard start, then flooding, then backfire, then small engine fire. Got it cleaned up, and started after some fiddling.
  • Billings, MT: Old carb started flooding crazy, and would die if the RPM was slow, so it was a stressful two-footed drive to Bozeman (one foot on the gas, one on the brake), trying to keep the RPM’s high enough, with a lot of Neutral to Drive shifting at stops. Installed a sweet new Holly Street Avenger carb after that.
  • Bozeman, MT: battery overcharging and stuff…
  • Spearfish, SD: Could not start. It was cold, so I got out some starting fluid. The fuel line to the carb loosened and leaked, and trying to get it running ultimately ended with the fire extinguisher. Got better hose clamps and fixed it all up the next day.
  • Somewhere in Montana, pulling a long, steep hill the engine would seem to starve of fuel and putter. Had to pull over, and rev the engine with no load to refill the carb bowls, then get back on the road. At least that what we think caused the problem. We finally made it over the pass.
  • Others, including an overnight stay in Reserve, NM that was more vacation than stranding. Details to follow.

Amy’s Note: Andy felt pretty pleased that in the last year and a half, by his definition, we’d only “broken down” once. When we discussed the issue and I asserted that by most people’s standards we’d broken down many times, I have to admit how pleased I am that he doesn’t conform to other people’s definition of breaking down, since he is Boy Scout Level prepared to deal with any issues that arise. He keeps radiator hoses on hand, for dog’s sake. We’ve never felt hopeless, despite the amount of smoke and fire flying out of the engine.*

*Family members, please note that I am a serial exaggerator, but also that things have gone wrong as things can do, because our trusty Turtle is an old one, and still we are mobile and safe and continue to move down the road. Andy’s got it under control. 🙂


Let’s Refurbish a Van – Part 6: Roof Rack (by Andy)

A post by Andy

{Note: The work detailed in this post was completed over the summer of 2015, before we moved into the Turtle. I am just getting the time to write the post now.}

So, we have stuff to carry. And we want a place to store our solar panels. And we want to stay cool. And, if possible, look cool. So, we need to put together a roof rack…

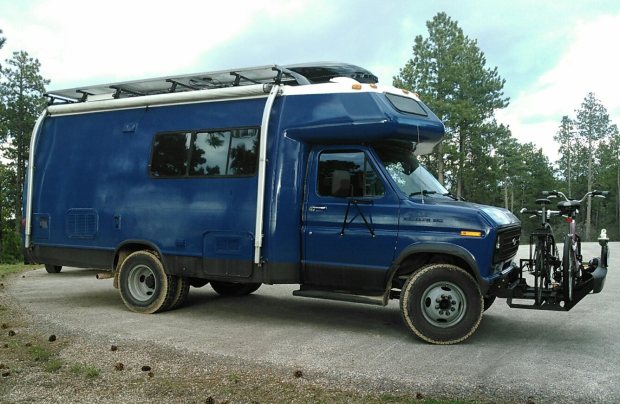
Here are a few pictures of the old RV when we got it. It had an aluminum ladder that was old and worn, along with the typical RV aluminum tube luggage rack at the back- all bits with some of the mounts loose. We also had a big plastic storage box bolted to the top, but it was cracked and would certainly leak. As you can see, there was also one solar panel and a mount for what I’m pretty sure was a TV antenna. Good stuff, but it was all pretty worn, as it had all traveled for close to 30 years and more than 250 thousand miles.


We wanted our rack and top equipment to do a few things for us:

  1. Have a dry and accessible place to store camping and fishing and other fun gear, out-of-season clothing, and some spare parts and equipment.
  2. Have the rack removable, so we can maintain and fix the roof when the need arises.
  3. Have a location to mount the planned solar panels.
  4. Design the rack to provide us shade.
  5. Have a system that we can change, add more solar to, move things around, etc.
  6. Be able to fill and seal up all the holes prior people made when mounting things to the roof, and have a system where moving forward we will not be drilling into the roof any more.

Anyway, roof racks look great! I hear they can be useful too. In truth, we have pretty limited room and storage inside, so having a bit of room up top for our extra supplies and garage-like stuff was essential for a successful voyage.

So, to the step of getting the old stuff off and sealing up the holes. Pretty much unbolt the bolts and pry everything else off. I then used fiberglass impregnated epoxy body filler for all the big holes (I love epoxy!), maybe adding wire to support it as it cured. I then added Geocel Proflex on the seams. I read about and tried a few things, but to date, it is my go-to for exterior sealing. Here is a link.

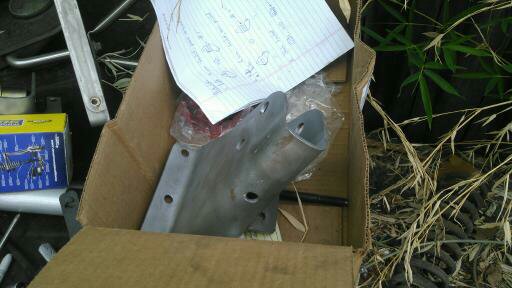
For the (many) smaller holes, I would first clean and fill with the Geocel, then screw in a stainless steel screw the size of the hole, then cover the head of the screw with another layer of Geocel. It is a technique I read about on the internet, and it seems to have worked well so far. Again, it is not worth buying any hardware but stainless or grade 8. It does cost a little bit more, but use the savings you get for doing this yourself to get the good hardware. Plus, you don’t have to worry about some interior rust and redoing the work down the road. After sealing the holes, I put down Rustoleum on all the modified spots. The following pictures show the antenna hole through the roof, and some of the removed parts scattered in the yard.

We were lucky enough to have a friend who worked for Yakima who gave us a VIP discount card for one purchase. With the card, we got 12 A1 rain gutter towers, 6 78″ crossbars, 12 wide body rain gutters, end caps, two 12-peice lock core sets, a Loadwarrior basket, and some cargo nets. A truly impressive amount of wonderful Yakima pieces at a great savings. Boxes and boxes of sweet components!

From REI, Amy and I used our one-item 20% member discount and each of us bought a Skybox Pro 12, shipped to the Portland REI for free. We got the long and narrow boxes to configure end-to-end, and not take up too much roof area width-wise. We effectively have the roof racks for 4 vehicles, all to put up top the Turtle. It added up to a lot of initial investment, but it has been working well, and added an important comfort to be able to store a reasonable amount of things to make our small world flexible, and I think it actually has a sleeker look being made from components—as opposed to a custom-fitted rack. Since we were doing all the work ourselves, we decided to invest a bit more on some nice new hardware. After popping down to REI and loading our new Skyboxes (in their own boxes) onto the top of the old Scout, we stopped for a bite in downtown Portland. Seems fairly reasonable to me, but I imagine to some people we made a sight…

The sky boxes, along with the other hardware, sat in the house for quite awhile. After stripping and sealing the roof, it was only logical to finish painting the Tutle blue, then do the white roof paint, and then finally get to the point where we could install the new roof rack. Consequently, this is what our place looked like for quite an amount of time. (As you can see, our front room was used to store a number of Turtle parts until they were ready to install.)

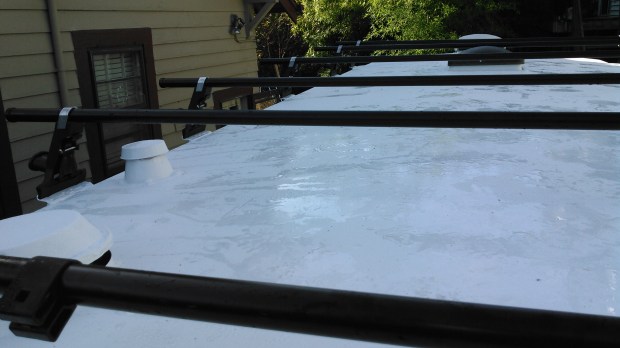
The pictures are few here, but after most of the painting was finished, I mounted the wide body mounts. I measured, marked, measured again, checked, and had the geometry figured out. On the corner of the Turtle roof, I would drill my two holes, fill with Geocel, cover the mounting surface with Geocel, align the bracket, screw in two (you guessed it) stainless steel lag bolts, then cover the seam and outside with Geocel. After it all cured, we repainted with the Interlux. It looked nicer with the black brackets and shinny bolts before the sealant and paint, but I didn’t want to risk it. And, just so you know, the asymmetric spacing along the length of the roof is due to needing to align the crossbars so they will not interfere with a roof vent when open, but also allow for the mounting points of the skyboxes. Here are the brackets installed:

kimg0798

It is a nice feeling to know that at any point we could unlock (all keyed alike, now) the 12 towers, unscrew, and remove the whole rack if we had to do some maintainence on the topside. Anyway, the pictures are limited at this point, but following are some involving the tower, crossbar, and rack install.

kimg0804

You might notice that the Yakima basket lost out to the solar panels. The basket is in the storage unit presently, and it would be great to get it up there at some point. When we were building and installing the rack, though, the geometric logistics were far too difficult for the time allocated. Anyway, to install the solar panels, I bolted two pieces of 12′ 6061 T6 aluminum square tubing to the crossbars with stainless steel carriage bolts and nuts fitted through the Yakima Universal Snaparounds.

I picked up used ones super cheap here. By the way, ReRack in Portland are nice people and can save you some money on roof racks, so check them out if you are in the area. Back to topic, after getting the aluminum properly spaced and installed, I then drilled and screwed the solar panel brackets to the the aluminum. That step was a breeze. Solar panels installed, photo taken probably a month in.

kimg0938

As to keeping it all cool. We planned on (and did), paint the roof surface with a couple of coats of Interlux topsides white boat paint. We actually painted the roof vent covers white as well. The assumption is that paint will reflect much of the sun’s heat, and be able to withstand the UV rays. So far, everything looks pretty good up there. We have some cracks in the paint where the caulking we used was not completely cured before we painted (I don’t blame the paint, we had time constraints), so we have some washing and fixing of some seams to do. Otherwise, all looks pretty good. A common approach for keeping a bit cooler is to have a couple of roofs, effectively carrying your own shade along with you.

The above old-school Rovers have a second roof with an airgap for passive cooling in the hot sun. (Side note, did anyone notice the tall skinny tyres the rovers are running on?) With the spacing added from the rack towers, and mounting the solar panels and boxes above the crossbars, we have a impressive air gap and continous shade on over 50% of the roof.

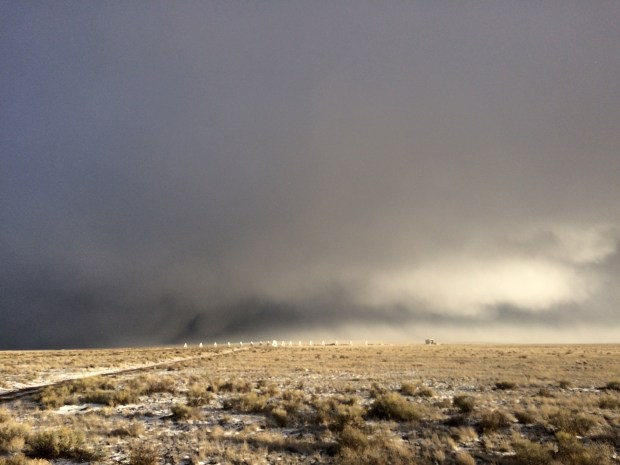
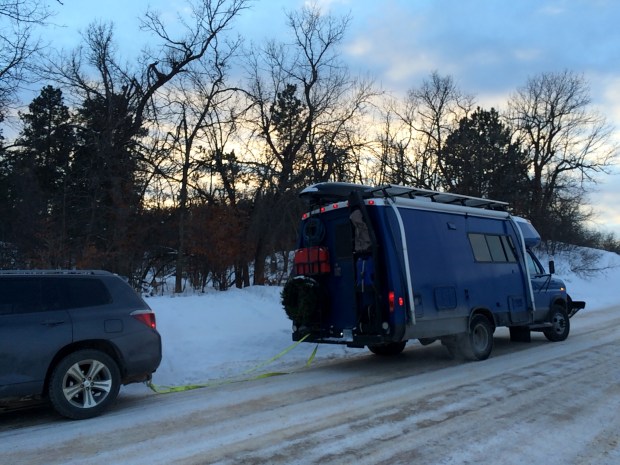
Currently, there is a middle strip free for walking, in which I will fit an additional panel at some point, then simply make some cheap synthetic or plywood panels and paint them white to increase our shade to close to 100%. So far, though, we have been to the Badlands of South Dakota in the summer, and have stayed with the ambient temperature with thoughtful venting and minimal electric fans.

To me, the goal is not to be cooler than the outside, all we need to do is not be hotter than the ambient temperature in all kinds of weather.

kimg0184

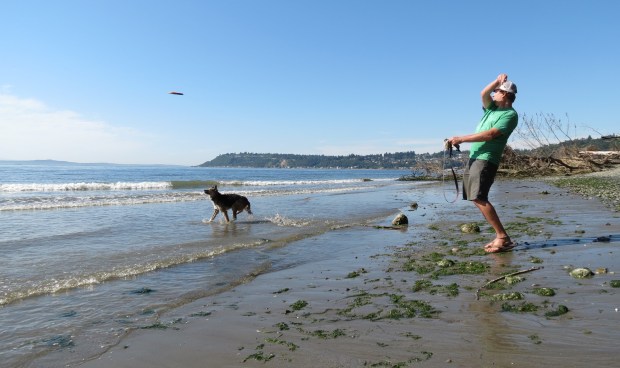
Oh, almost forgot, we want to access the roof! We need to clean the solar panels, get stuff into and take stuff out of the boxes, check on all the paint and seals, and most importantly, be able to climb up and yell with arms outstretched like you are in a movie! Anyway, the ladder…

We actually bought a car roof rack ladder as a start. The almost $200 ladder (seems crazy) was well worth the money, in the time saved. It always feels pretty weird to buy something new, remove it from the box, then start cutting it right away. So, the ladder, welding, adding more rungs for the proper length, and fixing the folding function.

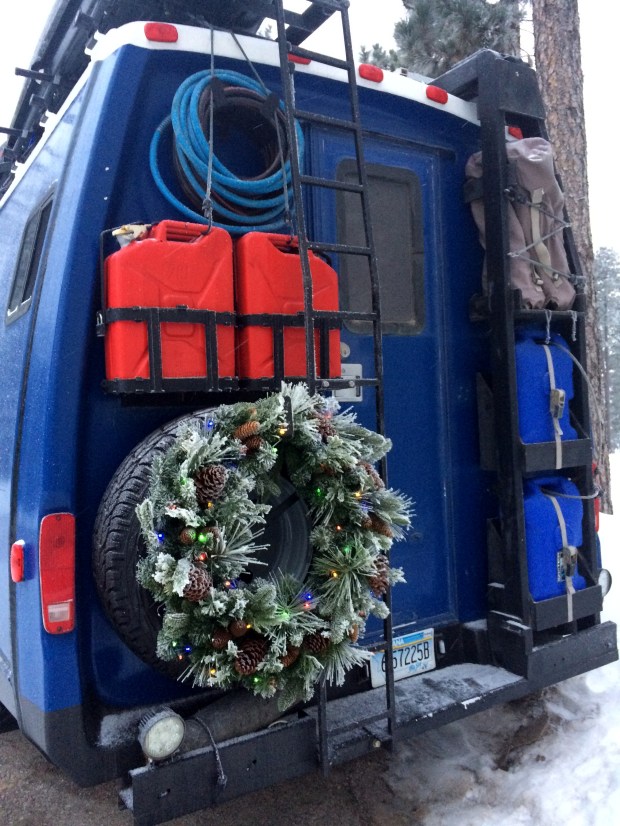
Some close-to-final pictures here. We started with a 9-rung foldable ladder, and ended with a 12-rung rigid ladder that bolts to the bumper and the top rack. Again, it was designed to bolt to the bumper and rack, so it is removable…

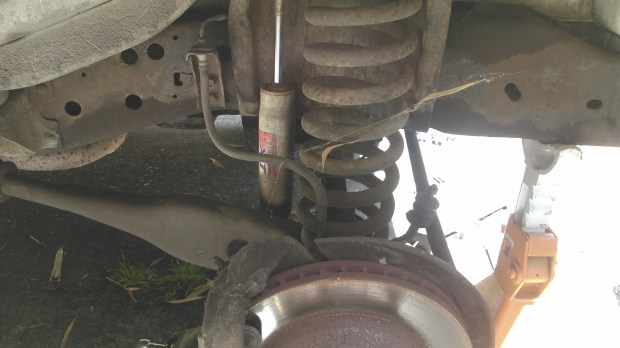
I’m pleased with the removability of the ladder, because we crushed it a bit when we backed into a tree one day, about a week after it was finished and installed. The ladder was subsequently unbolted, straightened, and remounted. From the side, it now does have a bit of ripple (below the designed joint and by the spare tire)—this is what we call life.

kimg0186

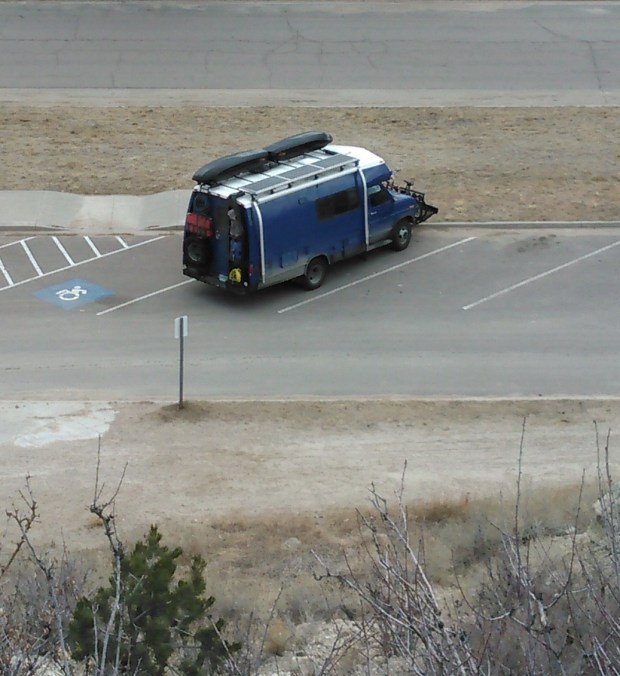
To sum up a bit, up in the boxes right now we have a few fishing poles, extra wire and parts and unfinished projects, cloth for sewing projects, extra window insulation, snow shoes and masks and fins, river tubes, my old tent. A pair of driving lights I have yet to wire up. Some cheap speakers I plan on installing in the doors. You get the picture. We call it our attic.

img_1863

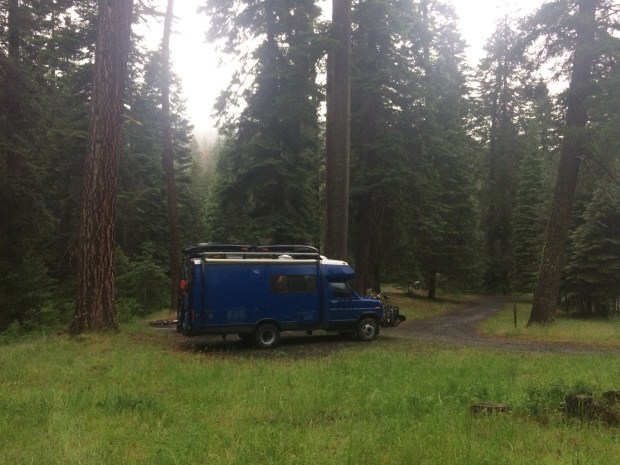
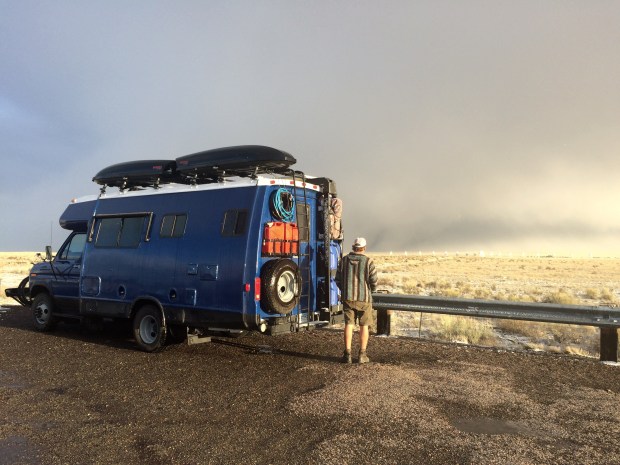
We have a completed rack now. It holds our solar panels, is our attic, and still has room to exapand.


Let’s Refurbish a Van – Part 5: Suspension (By Andy)

A post by Andy.

{Note: The work detailed in this post was completed over the summer of 2015, before we moved into the Turtle. I am just getting the time to write the post now.}

We wanted a little more ground clearance, fender and frame spacing for the taller tires, and a good, safe ride. We initially hoped to find an off-the-shelf lift kit. . . no soap. People make them for Ford trucks and Broncos, nothing for 80’s vans. I suppose that makes sense; the van market must be pretty small. So I guess we’ll just have to design and install a complete suspension overhaul and customization ourselves. This is where we started…

KIMG0366.jpg

In the front we have what Ford calls a twin I-beam suspension with what I infer is an aftermarket sway bar, and the rear is just a simple leaf spring configuration, though there are functional aftermarket Firestone airbags that have been added.

Let’s address the rear first; that is comparatively easy. We found some 2″ lift blocks from Action Van (http://www.actionvansuspension.com), that fit between the axle and leaf spring. Action Van actually makes full lift kits, but only for ’92 and newer Ford vans. Lucky, the rear suspension was the same, so we were able to use their blocks for the back.

With some breaker bars on the end of the socket wrench and a little groaning, the blocks were pretty easy to install. Lots of jacks and heavy-duty jack stands were employed in this step! Here is a poor photo of the suspension when I was starting the modification.

1433618343139.jpg

Here is a photo of the installed blocks. Always remember that it is a good idea to drive a bit and then retorque all the bolts for suspension components after making changes- things can settle under the vibration.

kimg0176

After adding the lift blocks, the rear airbags were adjusted by cutting, drilling, and painting 2″spacers from hollow square tubing and bolting into place between the axle and bottom of the air bags with new grade 8 hardware. Sorry for the bad photos (at the time, the important thing was to get stuff done, so the documentation suffered), but what you can see in the following is the original airbags and the blocks and hardware cut, drilled, and painted.

And a current photo of the final installed version- a little dirty, as we have been trekking about for a little over a year now.

Pretty straight-forward modification, and after a few thousand of miles everything is very solid.

cropped_1

Now the front suspension. The modifications needed were: 1) taller coil springs 2) adding air bags 3) fitting the new shocks 4) dropping the sway bar 5) dropping all 4 I-beam pivot points 6) replacing all the suspension bushings in the process.

I was able to find taller MOOG coil springs and front airbags, cranked everything apart, and got those pieces installed.

You can see that at this point with the added spring height but no change to any of the I-beam pivot points, the camber is extreme.

KIMG0371.jpg

The next step was to remove the suspension mounts. This was a true pain, as there were many frame rivets to remove. Depending on the accessability, I would drill, grind, hammer, cold chisel, or simply swear at for long enough to remove. I would consider it a solid success if I came home from work, spent all evening, and got only one removed. I blocked it out, but there were somewhere between 16 and 20. Anyway, after getting the pivot points removed, I made some drawings describing the desired changes needed to drop the pivot points 2″ lower, then took the parts to a fabricator. I weld myself, and made the grill guard, and all other metal modifications on the Turtle, but I wanted really great welds on these parts, so we paid to have someone with more skills do the modification. Plus, it was pretty darn magical to just drop the parts off and pick up the finished pieces a few weeks later. So, some of the suspension pieces back from the welder:

1440187262716

Painting, almost ready to install. I had ordered new MOOG bushings for all the pivot points, so these were installed at this point too.

1440192040722

Except for reusing a few special Ford bolts, the bolts and frame rivet locations were replaced with 1/2″ grade 8 hardware. Some current pictures of the completed front suspension.

Here is a photo of the dropped sway bar pivots with the new greasable bushings installed, again, everything is grade 8 hardware. I never buy anything else (except maybe stainless for chassis fixturing or the interior).

kimg0182

New Bilstein shocks were ordered for all four corners. The stock fit for the rear has enough travel to handle the 2″ lift, so we got the heavy-duty RV ones, and that was easy. We had to calculate the new front geometry to size the front, and went extra fancy with the front shocks and got an external reservoir setup. They look cool! (I ordered them from shockwarehouse.com, part number 25-177480 and 24-184663.)

Here is the front suspension a year into our travels. I was replacing the brake pads, so I took the opportunity to clean everything up, and also paint the hub with Rustoleum. We have had no problems with the suspension thus far.

kimg0047

The lift was added to enable us to have the taller tires, and to have more ground clearance. There have already been a number of cases where we figure we would have likely damaged something on the underside if we did not have the clearance we have. Additionally, with the clearance and narrow tires, we have made it through some pretty deep snow without problems. It has proven to be a successful modification. Plus, it makes the Turtle look cool!

Andy Wears Shorts in the Snow: Christmas In South Dakota

Happy New Year, everyone! Woo hoo!

2016 was a super exciting year in the Turtle, and the coming year should be equally full of challenges, victories, and vistas (and frisbee sessions for Scouty).

img_6685

Before I get into our plans for the upcoming months, let’s catch up with some photos of what we’ve been up to since we left Yellowstone National Park last month! Since that very chilly week living in single-digit temps, we’ve learned a bunch about what we needed to do in order to better winterize the Turtle. So before we left Montana, we headed back to Mom’s house in Bozeman and got busy buttoning everything up with layers of insulation over the windows, extra curtains to divide the colder cab and loft from the warmer living portions of the Turtle, and some modifications under the hood.

Naturally Andy was in charge of the under-the-hood tasks, and he spent the week in Mom’s garage finalizing work on the second alternator. With that new addition we can charge our house batteries while we drive, as the solar panels aren’t getting a lot of sun in these winter months. Not surprisingly, this guy took the opportunity for a wiring project and really brought it to the next level. Give an engineer an electrical mission, and he’ll buy all the toggle switches Home Depot has in stock and create a panel worthy of the dashboard of a UFO. I still need to take a photo of the installed panel, but the process picture gives you a pretty good idea of the extent to which this guy takes on a project!

img_6628

Meanwhile, in between my winterizing duties, I got an extra week to hang out with my mom, sister, brother-in-law, nieces and nephews. We crafted, played video games, and I took on a request for a Photoshop job: Clive wanted to see himself in his “boat” on the water. . . “with a beard!” Turns out that kid could totally pull off a beard.

Even Gracie appreciates how awesome these kids are.

The snow continued during our stay, much to Scout’s delight. This border collie LOVES snow! He leaps through the drifts with abandon, and runs back and forth between us, trying to encourage us to run along with him.

img_6680

Gracie, on the other hand, finds the warmest covered spot and settles in.

img_6690

After getting used to living as locals, it was hard to leave all my favorite people. It was such a treat that we were able to spend so much time with them though. In the Pre-Turtle days, we were typically limited to a week each year at most for visiting family. So I can’t get too greedy when I just got to hang around for a whole couple of months!

Once the improvements were complete, and I felt confident that the kids were ready to love The Legend of Zelda without further encouragement from their auntie, we left Bozeman. After a quick stop in Billings to see Blake, Martha, Harper, and Grant, we then made our way toward South Dakota. We drove by Little Bighorn Battlefield right before it closed for the day, and took a brief walk through the grounds as the chilly winter sun set.

Then with the heater on full blast, we moved on to Gillette, WY for the night where I got so unbelievably sick. (I’ll only include this because I promised in a previous post that I wouldn’t overlook the portions of full-time vandwelling that are challenging, and this was just AWFUL.) I’ve gotten sick a few times since we moved into the Turtle, but they were mostly mild illnesses that were inconvenient but tolerable. I’ve never gotten violently ill while living in the Turtle until that night in Gillette, and it definitely was more challenging than getting sick in a house.

I thought I had food poisoning, as I got sick so abruptly, but in retrospect I think it was likely a severe flu. I was vomiting so much all night (essentially into a pit toilet) that I got massively dehydrated, and unfortunately since we were in freezing temperatures our water tank had frozen and cracked and we had been carrying water around in jugs. As luck would have it we were low on water that night, so I was rationing water and sucking on ice cubes and trying not to step on Andy on the pull-out couch as I got up every 20 minutes to vomit. And the next day we had to move along, so I was sleeping fitfully on a bed rocking and bumping at 65 mph on the freeway. Glamorous!

So, there you go. Full-time vandwelling is not all roses. But for the record, I’m not trading it for anything!

At any rate, while I was in my sicky fog Andy got us to Spearfish in time for Christmas with his family. Much to Scout’s delight, the ground was covered in snow, with a whole bunch more in the forecast.

img_7103

And much to Andy’s delight, there were plans to assemble a Lego train which would travel around the Christmas tree! I’m not sure how many total man hours were spent around the table between Will, Ellie, Andy and myself, but Andy outshone us all with his dedication to the cause, as well as his impressive Lego skills.

Between the four of us we created quite a spectacular Christmas train, if I do say so myself.


Ellie and I worked on Rudolph’s Christmas Car which led the way, and created bunches of Lego presents. Will put together the engine, the middle cars, the flatbeds, and made a magnificent cubist Christmas tree. Andy made a tippable car that he’d originally intended for imaginary molten metal, but that Ellie and I filled with our gifts instead. He also made a caboose equipped with a crane to hoist and deliver the packages, and it really works, and it’s awesome.

Each day we were surprised by the dramatic change in weather. One day: blizzard. (Andy wore shorts all day.)

The next day: sun.

The next day: more snow.

The next day: more sun!

Snow.

Sun.

You get the idea.

Highlights of our time in South Dakota also included:

  • Testing out the newly-wired Hella lights. . .
  • Learning about the difficulties of dumping tanks in winter when all the RV sites for miles around are closed for the season. . . (For those interested parties, it includes making friends with the on-site owner of a closed RV site and graciously being given permission to use the facilities if you can find it and not break anything, digging through the snow until you find the port, boiling hot water, filling a container with hot water, pouring it over the frozen cap until you can open it, taking a photo while your significant other waits for your assistance.)

img_7137

  • Being co-planner for a stuffed animal beach wedding. . .
  • Waiting to see how Andy will alter the “LOVE” Valentine’s decorations his sister put on the mantle. . .
  • Towing stranded passengers out of a snow drift. . .

img_7195

  • Finding Gracie tucked into cozy spots on the coldest days. . .
  • Scout just driving around town. . .

img_7226

  • And knowing Christmas is officially over when you see the Christmas tree ablaze.

img_7206

Coming up: We’re done with snow and are going to Mexico!

P.S. If you enjoy following along with our blog, don’t forget to click the “Follow” button, and you’ll get an email whenever we post! 🙂


Leaving Bozeman Harbor

We’re back on the road! It’s super, super exciting. When you’ve spent a year roaming and adventuring and then suddenly sit still for a while, the call of the road is stroooong. But even though we were looking forward to moving on down the road, we got a lot of valuable things accomplished in Bozeman Harbor, mostly lots of family time, and it was two months very well-spent.

We originally posted up for a bit to do some Turtle work before winter hits, and after a year of being in the Turtle, we finally finished the bathroom! Andy really killed it on the vanity and faux toilet tank. The “tank” is actually storage (our favorite word these days), but he even made a little flusher you can pull, whose only practical function is to be charming. Andy always goes the extra mile!

You could say it’s come a long way from when we first bought the Turtle. . .

I’d like to make it clear here that it didn’t look like the above photo while we’ve been living in it. . . That’s a BEFORE “before” photo. 🙂 We got a good amount of progress done before we hit the road, but as you can see in the photos below, the vanity was still completely inefficient for storage and took up a ton of room in the small space. And we still had that sink in there, which we didn’t find useful since there’s a kitchen sink three steps from this one, and we’d rather have the storage! But with all the work we had to do in the rest of the Turtle before hitting the road, this portion of the renovation was put on the back burner.


But now it’s done! And we loved our extended stay in Bozeman. We parked the Turtle at my Mom’s house, and while Andy reveled in his huge garage/shop space and engineered all kinds of new fancy Turtle improvements, I got to spend lots of quality time with my mom, sister, brother-in-law, nieces and nephews. I had the best time getting to be a local for a while, and my love tank is filled to the brim. 🙂

We even had a pasta party night, where we made homemade 4-cheese ravioli, sausage ravioli and fettuccini, and three kinds of sauces. If you’re thinking about inviting me to a party, I can promise I’ll come if it’s this kind of party.

img_5959


We had a fulfilling and productive stay in Bozeman, and I was only able to leave knowing that we’d be back for one more short stint since I have to return on the 8th to walk the green mile go to a dentist appointment. In the meantime, let’s go to Yellowstone National Park!

img_6209


Let’s Refurbish a Van – Part 4: Curtains

Of all the updates one can make to an RV, in my opinion the most drastic change for the least amount of effort is the curtains. It’s a way to infuse color, pattern and texture into the small space, especially in a vehicle like the Turtle, which has zero wall space for art. We almost have zero wall space for walls! Even if you aren’t a world class seamstress, it’s a simple shape to tackle, and honestly nobody even notices if your hemlines wobble a bit. I really encourage you to give it a try!

IMG_3047

When we got the Turtle, I knew I wanted to plan all my color choices around the curtains. It’s the best place for statement patterns, and I love-love-love a bright and colorful interior space, so I wanted to see what was available before making further paint or fabric decisions. Actually, it was the first decision I made at all, and I think I had the fabric in hand within the first week of owning the Turtle! I love a whimsical graphic print, and the green shade is so friendly and cheerful.

IMG_0108

When picking your curtain fabric, I highly recommend choosing outdoor fabric. This may sound obvious, but the selection of outdoor fabric is often pretty slim, and the allure of an entire store full of pattern and color choices seems like a fine trade-off for less sturdy material. But the outdoor fabric won’t fade as quickly as other fabric. It’s also mold and mildew resistant, which doesn’t seem like a big deal until you’re boondocking on the Oregon coast and the hygrometer reads 93% humidity and the windows are weeping and mold is knocking at the door. The last thing you want is to find your curtains flocked with green fuzz! Ours stood up to the damp like a champ.

Something to keep in mind about outdoor fabrics, though, is that due to their durability, they are slightly more stiff, and don’t bunch or ripple like regular fabrics. But if you take that into consideration, you can work around it by reducing the ripple a bit or giving your curtain rod span a few extra inches to account for the thickness when the curtains are pulled open.

IMG_3219

IMG_3228.JPG

As you can see, I opted for a gentle ripple, and at the top and bottom it’s still pretty thickly bunched. Additionally, since we don’t have a ton of room on either side of the windows in the Turtle to add rod span, that extra fabric to make the ripples does take up a little window space when they’re pulled open. So it’s good to pick the fabric you like, then decide how you’re going to mount the rods and how much the ripple will affect the length of each panel.

With that in mind, it’s time to determine yardage so you can buy that awesome fabric you found! What I needed to consider with our curtains was the fact that the Turtle’s walls are curved, so I’d need rods on the top and bottom to avoid them hanging far from the wall at the bottom. (I’d actually recommend this even for straight walls, as it keeps more light out and doesn’t blow around.) So I hemmed pockets on top and bottom, and made a double-fold hem on all sides. The double-fold isn’t necessary, but it’s a nice detail. Just fold the hem over, press it with an iron, then fold it over again, press it, pin it, sew it down! Do this to all four sides before sewing the pockets so the rods can slide through.

IMG_3233

Then fold the top and bottom pockets over, press them, pin them, sew them! This part can be tricky if you’re using two rods, as it needs to be nearly perfect so that the curtains stay taut but don’t pull on the rods or just not fit altogether. Even after explicit measuring, I ended up spending some quality time with my seam-ripper as I tried to get the fit just right.

IMG_3220

Oh, did I mention I had a hard time getting the fit right? Yes I did. It was difficult getting them to not balloon out, and when I took them in they strained the rods since they were a little too short. In the end, I had to make another pocket and sew it to the top of the curtains. This made it easier because I could adjust the pocket right on the rods and pin it in place before sewing it. If I did it again, I’d just plan on approaching it that way to save a headache! Luckily I love the way it looks, and if anyone asks, you can tell them I totally did it on purpose.

IMG_3232

IMG_3229

For the rods, I bought some dowels from Home Depot and some wood end pieces from JoAnne for the finials. Cheap! Andy sanded, stained and varnished them for me, and screwed the finials into the dowels. The benefit of doing it this way was that we could cut them to the exact size we needed inexpensively, and the wood end pieces already had holes through them, so screwing them in was really simple.

IMG_3217

Andy’s genius came in handy as we tried to figure out a way to mount the rods. He found some utility tool hangers at Home Depot that fit our rods perfectly and hold onto them tightly enough that they don’t slide back and forth. We painted them white, and done!

IMG_3218

For the tie-backs, I just sewed a strap with some navy fabric I found in the remnant bin at Mill End, and attached one end of each to some stainless steel eye screws I’d screwed into the wall.

IMG_3222

The other end I attached to stainless steel S-hooks.

IMG_3223

They wrap around the panels to hold them back, and then when the curtains are open, we just re-hook it so it stays out of the way (and so Gracie isn’t as tempted to bat it around).

IMG_3234

And there you have it! Inexpensive custom curtains that make a statement, liven up your small space, and are a nice splashy backdrop for pictures of your pets.

IMG_2948

If you have any questions about the process, let me know! As with any How-To post, I’d be happy to explain any parts in greater detail to help get you started on your own project. 🙂