cool

All Kinds of Parties: Billings & Bozeman, MT

As October neared its end, we found ourselves back in Bozeman, MT to visit my family as we continued our journey south. It’s still beautiful there!

IMG_4395

IMG_4398

IMG_4419

The weekend before Halloween, we drove over to Billings to spend the weekend with our good friends Blake and Martha. (Martha is taking this photo, so she is not pictured. Sorry Martha.)

IMG_4553

We were excited to have time this year to make Halloween costumes, and while we stayed with Blake and Martha we’d planned to dress up and go out with some friends. Andy was a steampunk mad scientist, and after he put the outfit on I realized that this isn’t too far a cry from his real persona.

IMG_4476

I was a steampunk mechanic, and the moment I put on the bustle I’d made (from curtains at Goodwill) I decided it was the one thing that’s always been missing from my daily wardrobe.

IMG_4479

IMG_4550

Once the group arrived at Blake and Martha’s, Martha unveiled the snacks that she had prepared (with some help from Andy and Blake, they’ll want you to know). Aren’t they adorable?

IMG_4482

And isn’t the group adorable?

Halloween.jpg

Off we went to a local pub downtown, where the Halloween party was just beginning. (Wonder Woman did not join us on this portion of the outing.)

IMG_4505

IMG_4500

IMG_4489

IMG_4540

IMG_4516

We had a blast! It was a fun night, and a super-fun weekend hanging out with good friends. We watched a couple World Series games, ate some Chalet Market sandwiches (my favorite), Blake, Andy and Harper carved pumpkins. . .

IMG_6144 1.JPG

And then suddenly Blake had to go back to work. BOOOOO!

IMG_E4493.JPG

He was probably relieved.

It was still sunny in Billings when we pulled away.

IMG_4474

And no sooner were we in Bozeman than the snow began to fall.

IMG_4613

Though Gracie enjoys snow as much as any adventure cat, she preferred my mom’s warm bed. And when it wasn’t available, she’d wait outside the door for her turn.

IMG_4605

The rest of us enjoyed playing outside.

IMG_4598

IMG_4617

IMG_4622

IMG_4624

IMG_4632

IMG_4649

IMG_4651

Then we’d come back inside to visit Gracie.

IMG_4390

The last time we visited Bozeman, we made good use of my mom’s kitchen and cooked up a number of tasty feasts for the three of us. Andy and I both love to cook, and do quite well with our three small burners, two pots, one small pan, and limited counter space in the Turtle. (We had authentic Pho while cozied up inside our tiny house in Deadhorse! It was pretty fancy.) But a complete kitchen with lots of space and a full sized oven is a treat we can’t resist. Andy had his heart set on cooking a turkey, and if you’re going to cook a turkey, you may as well make stuffing, and if you’re going to make stuffing, you ought to make mashed potatoes and gravy and also bake a pie, right?

It was weeks until Thanksgiving, but it seemed like the plan was shaping up into a real party. We christened it Fall Feastival, and invited my sister’s family and a few friends over, and Andy spent all day carefully preparing the turkey.

IMG_4678

IMG_4685

Meanwhile, Clive and Scout and I played in the snow. That boy can really throw a frisbee, even with winter gloves on. Scout was very impressed.

IMG_4689

My sister and I contributed to the meal a bit, but mainly it was Andy’s show and he was happy to have full reign over the kitchen. He made stuffing and gravy so good we all considered drinking it straight out of mugs.

IMG_4692

IMG_4702

It was a genuine feast! The turkey was without a doubt the best I’d ever had. Andy really knocked it out of the park! I made a pumpkin pie cheesecake and hot chocolate for dessert, just in case we didn’t feel we’d spoiled ourselves enough already.

IMG_4711

Afterwards we played a little Pin the Tail on the Turkey, which Liam, Clive, and Bella all helped put together.

IMG_4716

IMG_4719

IMG_4723

IMG_6145 1.JPG


IMG_4738

It was a wonderful celebration! Maybe the First Annual? Any excuse for a feast.

The Fall Feastival marked the end of our visit to Bozeman, so on we traveled toward our next stop: Spearfish, South Dakota. It’s always so hard to leave my people, but we’re grateful to see them as often as we do these days.

I mean, if we didn’t live in the Turtle, I may have never seen this work of art:

IMG_4387

Liam made The Eye of Sauron’s girlfriend.

Like I said—my people.

Yukon Gold

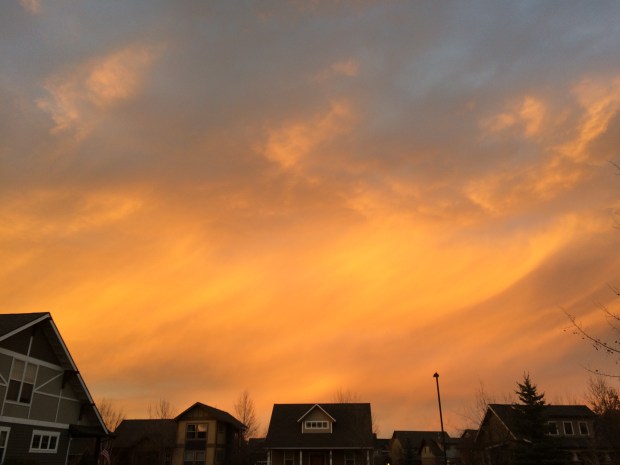
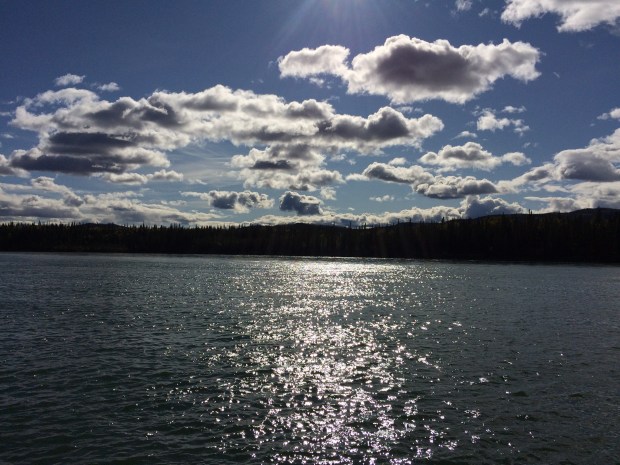
The first thing I said as we drove back into Yukon was, “Wow, the skies are just as big as when we left!” Yes, it’s the same sky as everywhere else, but somehow in Yukon I was constantly aware of the magnitude above me more than other places. It’s beautiful.

IMG_1775

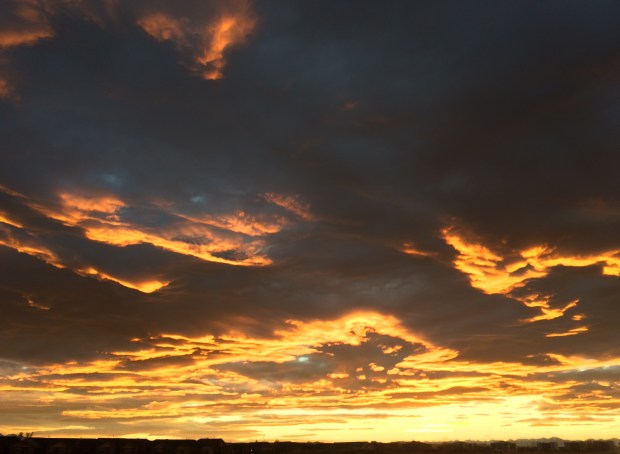
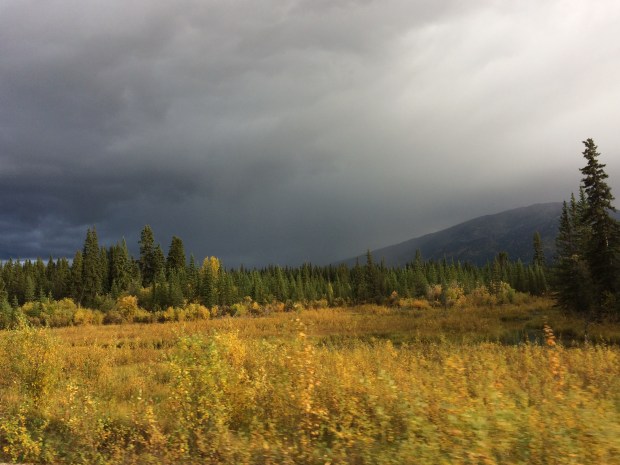
It was an exciting time to be my camera, because I had that thing working full time during our drive through Canada. The fall colors were really beginning to explode, and I filled up the camera to capacity every day. I’m sure if Andy asked you to quote me on the trip it would be a three-way tie for, “That YELLOW!” “That RED!” and “That ORANGE!” And that’s only if gasps don’t count.

IMG_1851

IMG_2134

IMG_1746

IMG_1782.jpg

IMG_2177

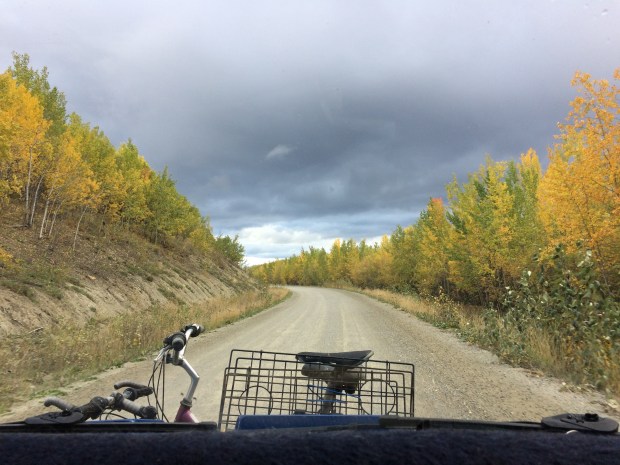
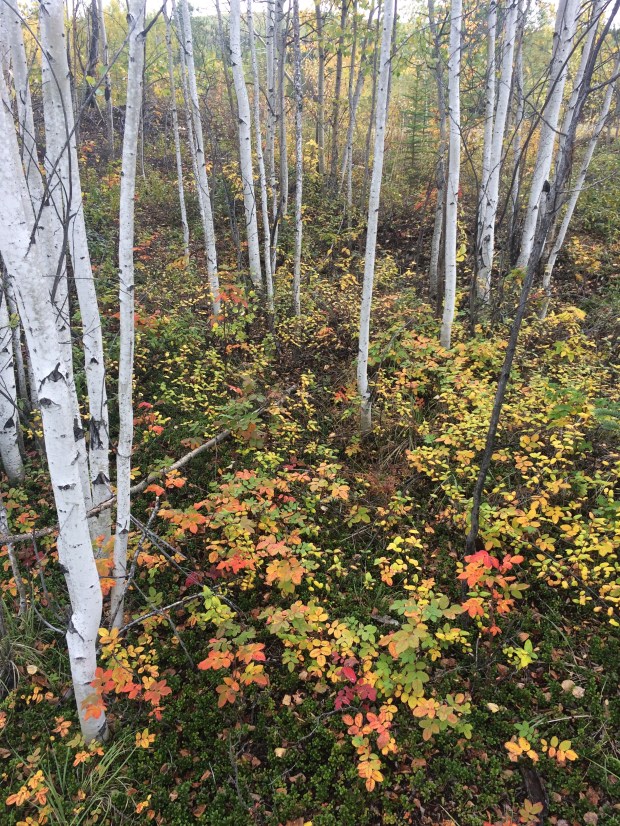
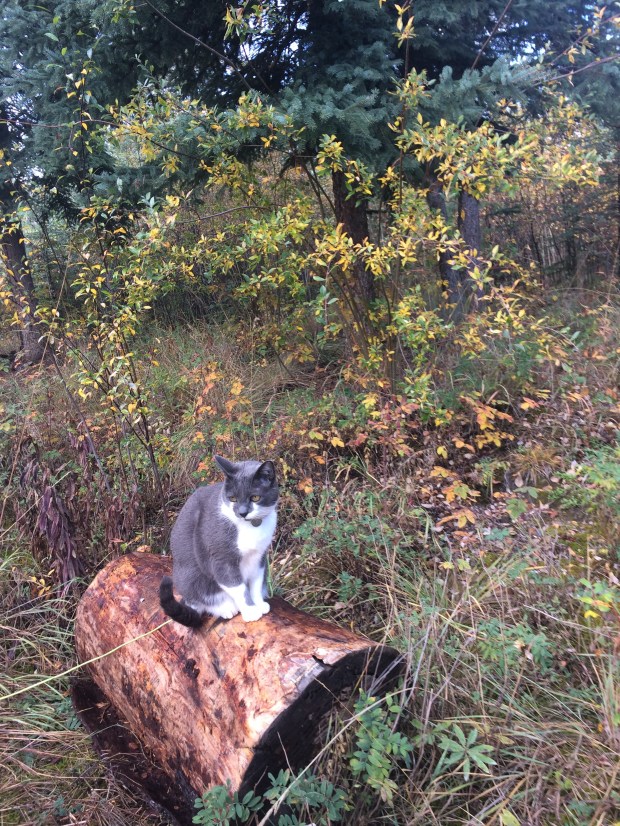
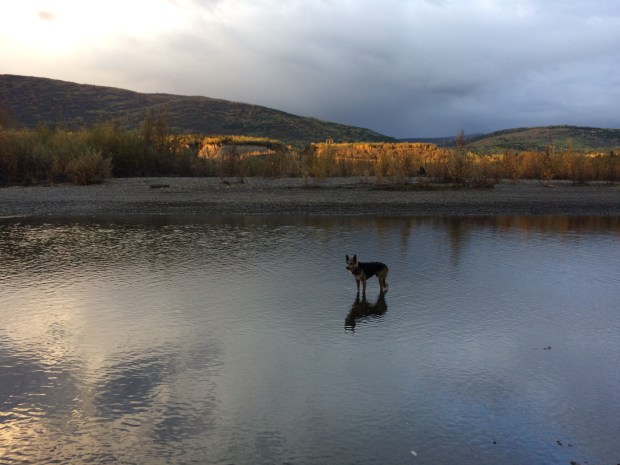
After spending a few weeks high up in wintery weather, the temperate fall was a welcome change. Scout and Gracie also got to spend more time outdoors, so everyone was enjoying Yukon to the fullest.

IMG_1759

IMG_1791

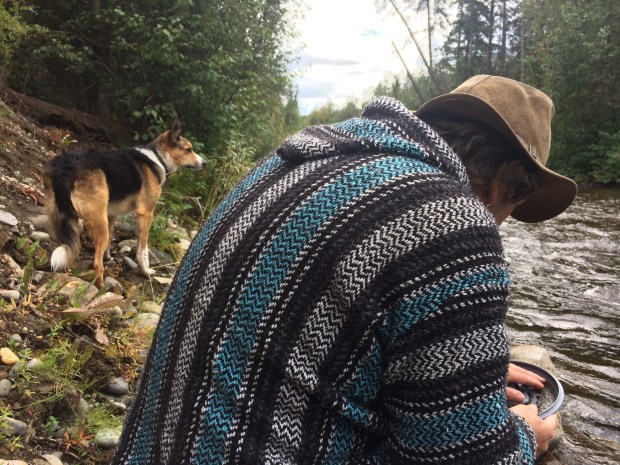
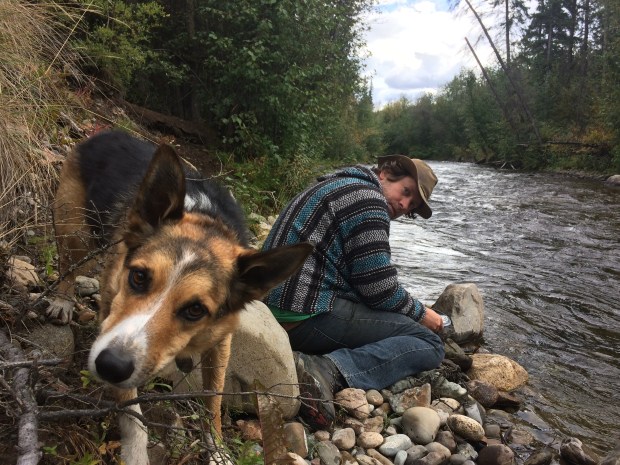
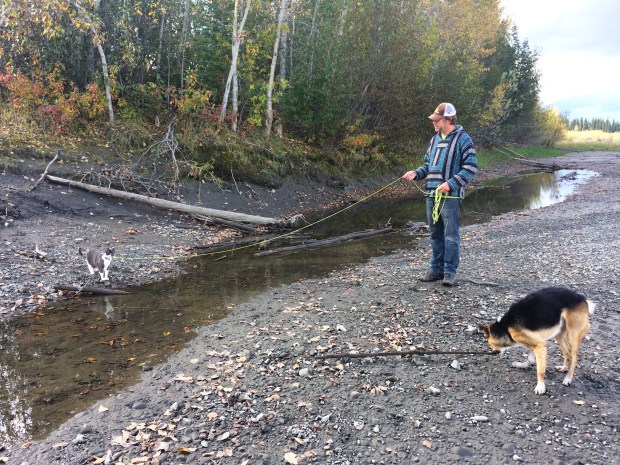
On our original trip through Yukon, Andy had mentioned wanting to pan for gold, and as we drove farther through the province, we realized we still hadn’t tried our hand at fortune-hunting yet. We found a nice spot to pull out by the river, took our pot lids, food scoops and a very excited doggy down to the water, and got to work.

IMG_1784

IMG_1796

It was a lot of fun and pretty exciting, even though we didn’t see any sparkly signs that we were in a good spot for panning. We wished we’d started sooner in the trip, because I could have panned for hours and hours in any river around.

IMG_1809

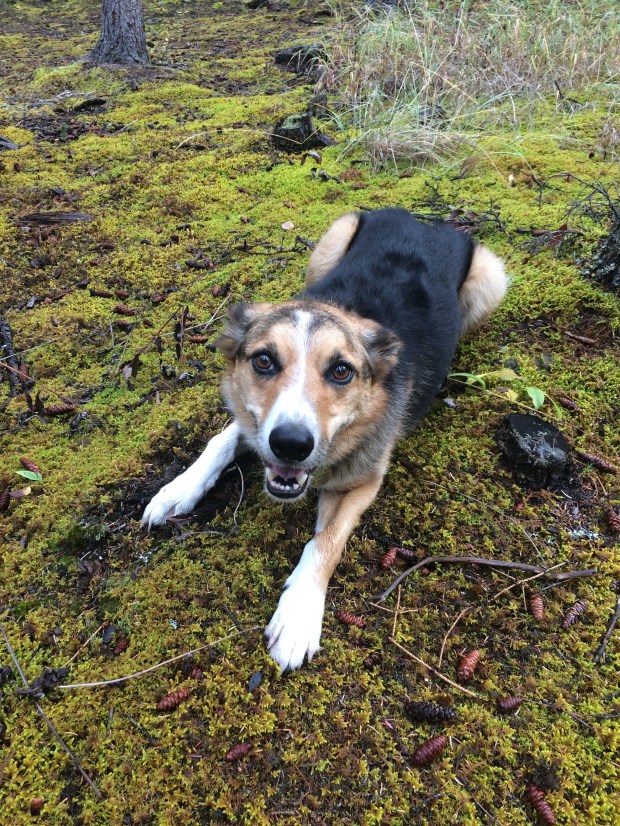
Scout had other plans for our time outdoors and tried all his best methods to convince us to throw all the sticks he found by the river.

IMG_1824

IMG_1834 (1)

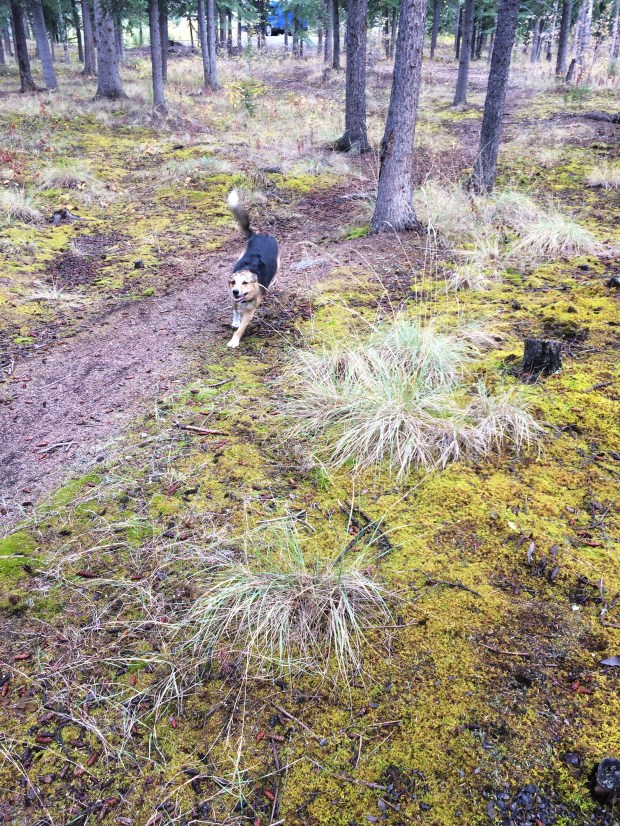
So on the walk back to the Turtle, we threw sticks, played hide and seek behind the trees, and then on the last leg Scout just bounded up and down the path with general Border Collie joy.

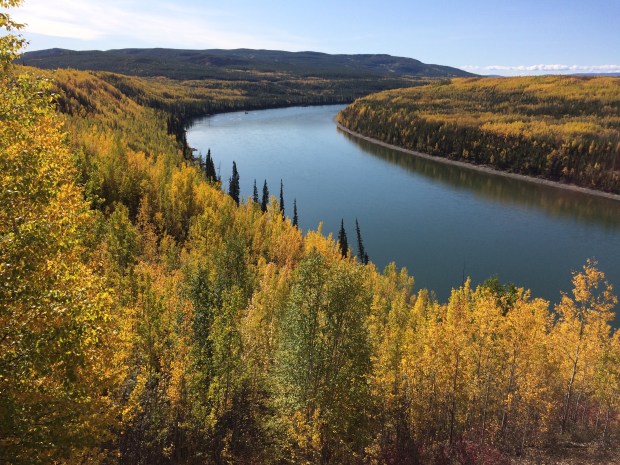
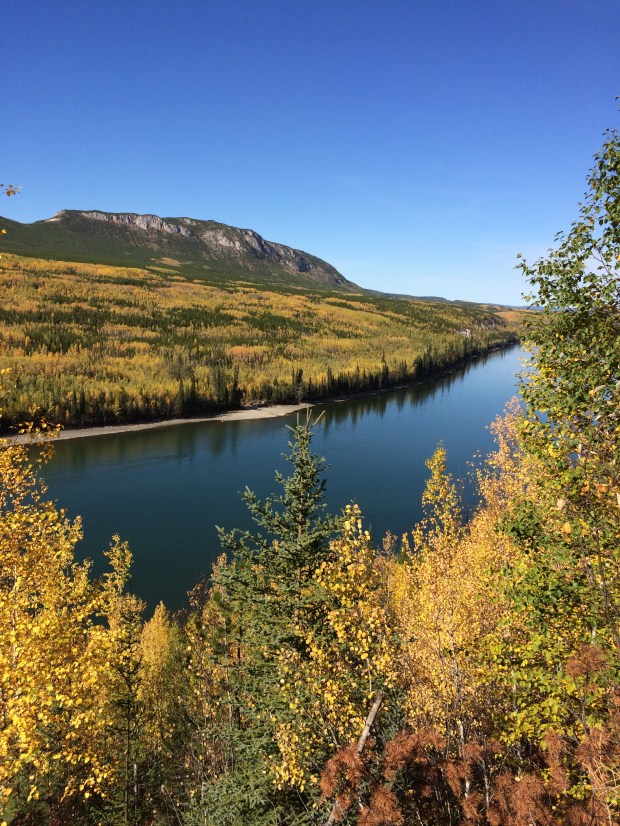
Farther down the road Andy wanted to check something under the hood, so we pulled over for a riverside picnic. Though the Yukon is so wide it looks like a lake!

IMG_1867

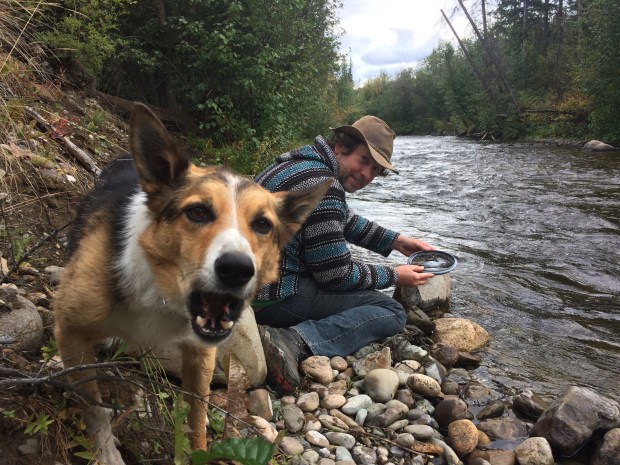
We panned for gold again after lunch, but no luck. We did see a fresh bear paw print in the mud near us, so we decided to make it a quicker stop and get back on the road.

IMG_1873

IMG_1891

IMG_1912

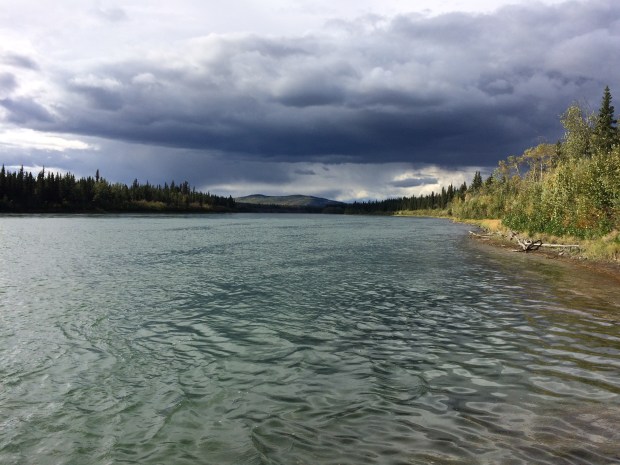
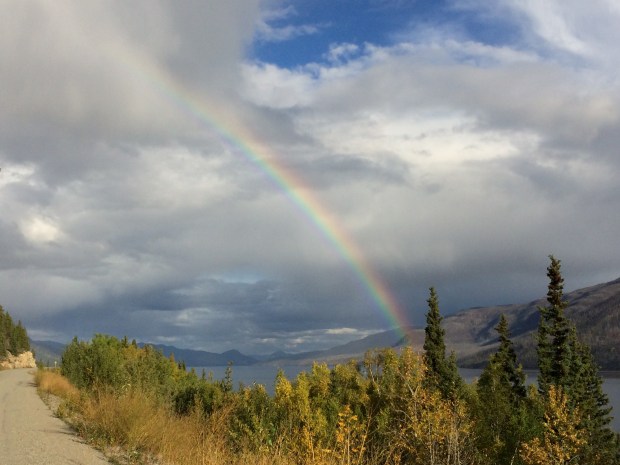
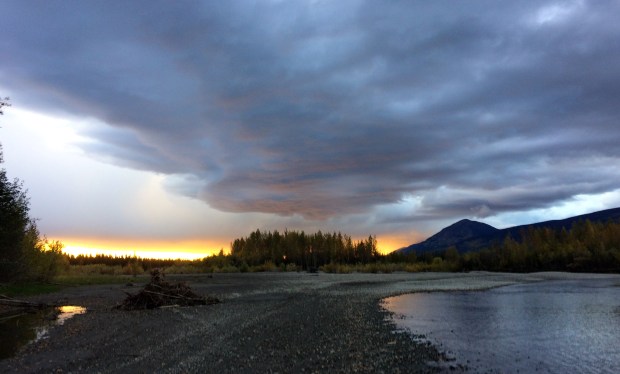
We could see some storms ahead, which made the light moody and surreal.

IMG_1982

When the most spectacular rainbow poured out of the sky, we followed it for a full 15 minutes before it evaporated back into the air.

IMG_1959

The storm moved all around in the distance, and when we stopped outside Taro for the evening, we could actually see the sheets of rain traveling east along the riverbank.

IMG_2012

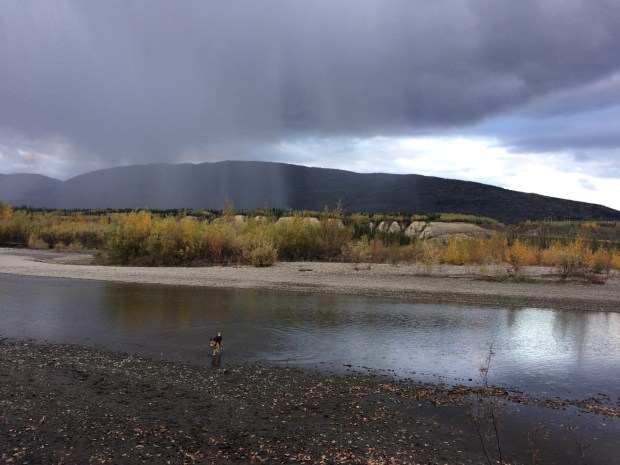
It never hit us directly, so we basked in the after-storm light and played outside until the sun went down.

IMG_2037

IMG_2026

Everyone had a successful day, I think.

IMG_2054

We had to try one last gold panning session before we left, so we played outside for a bit before packing up.

IMG_2085 (1)

IMG_2099

IMG_2062

As I put the panning implements in the Turtle, I laughed at how instantly messy it gets in there, between the toys we keep out to use later, the mud we inevitably and consistently track in, the rocks I can’t stop collecting and have no room for, the boots laying on the floor that we removed to change into “gold-panning shoes”, the travel pamphlets shoved into the front console, among the other regular chaos specific to Turtle life.

I decided to take a picture for posterity, since in 20 years we’ll want to remember the reality of our lives and not just the pretty pictures immediately post-clean-up. Right as I took out my camera, Scout came running to the door to see what I was up to, and the smile on his face and mud on his paws inadvertently made the photo complete: the reason we live this lifestyle, messy as it may be. At the end of the day, we all have that goofy smile on our faces.

IMG_2257

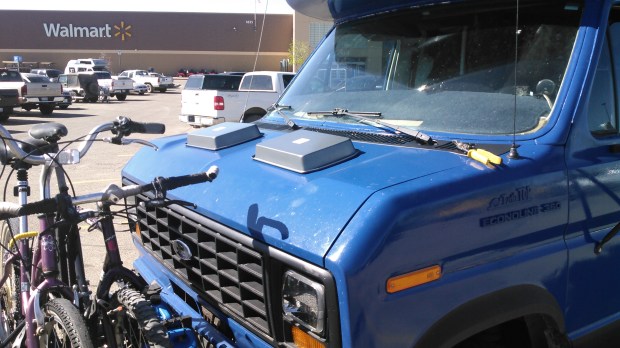
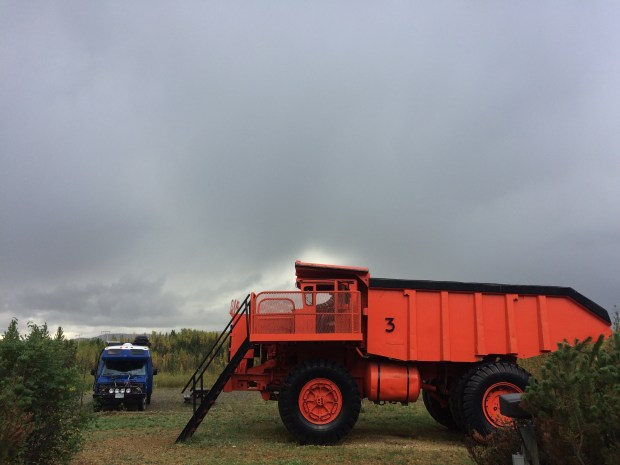
There weren’t many gas stations around, so we stopped in Taro for a fill-up and an ogle at this awesome orange beast.

IMG_2112

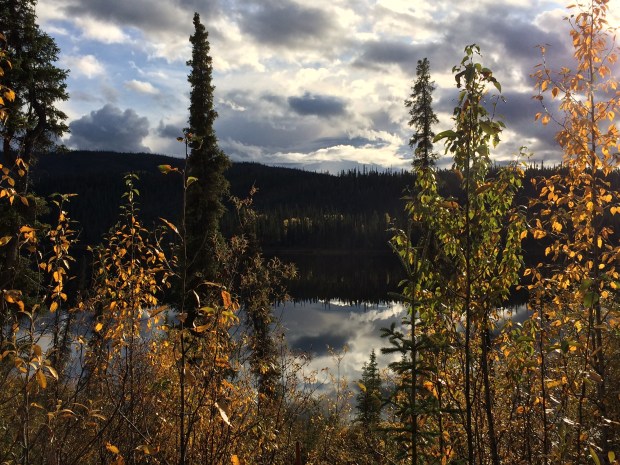
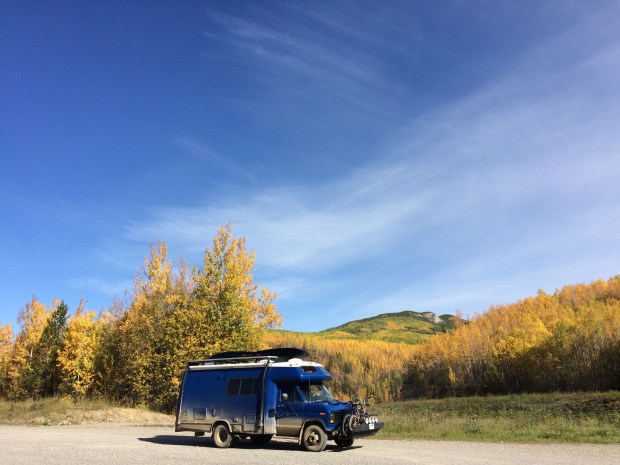
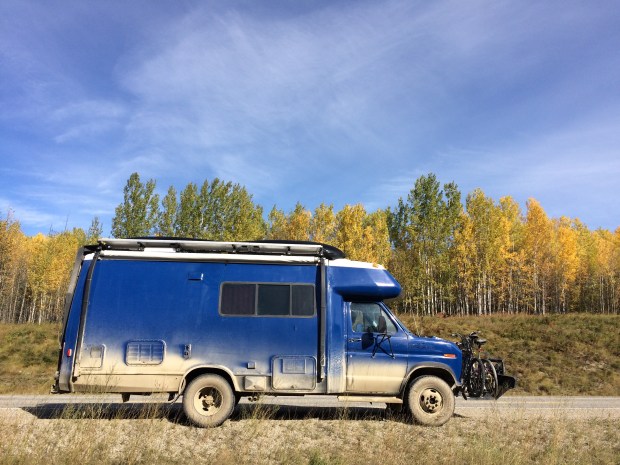
Then back onto beautiful Highway 4 toward Watson Lake, which we’d be passing through one more time on our way into British Columbia and Alberta. But first we had to stop at what was to become our Favorite Campsite Ever, a free pullout on postcard-worthy Finlayson Lake.

IMG_2259

Due to the burn ban, we hadn’t been able to have a fire for months, and it seemed like fate that the ban had been lifted right as we came upon this site, complete with cut firewood scattered around for the taking.

IMG_2261

We were sitting just a little elevated from the water, overlooking the lake. There was no one around except the two people flying sea planes nearby. It was crisp, cool and clear, and we were on cloud nine that we got to live there for a whole day.

IMG_2266

IMG_2279

IMG_2287

IMG_2294

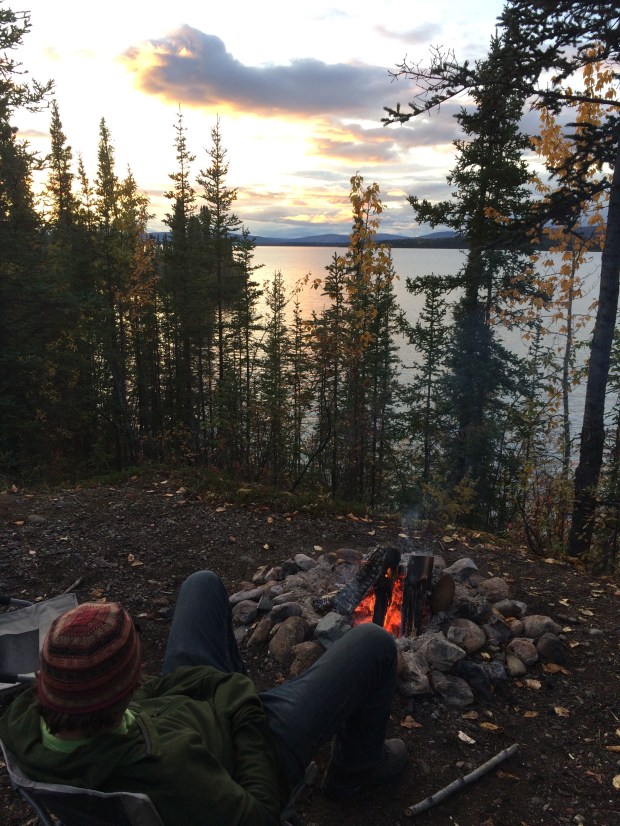
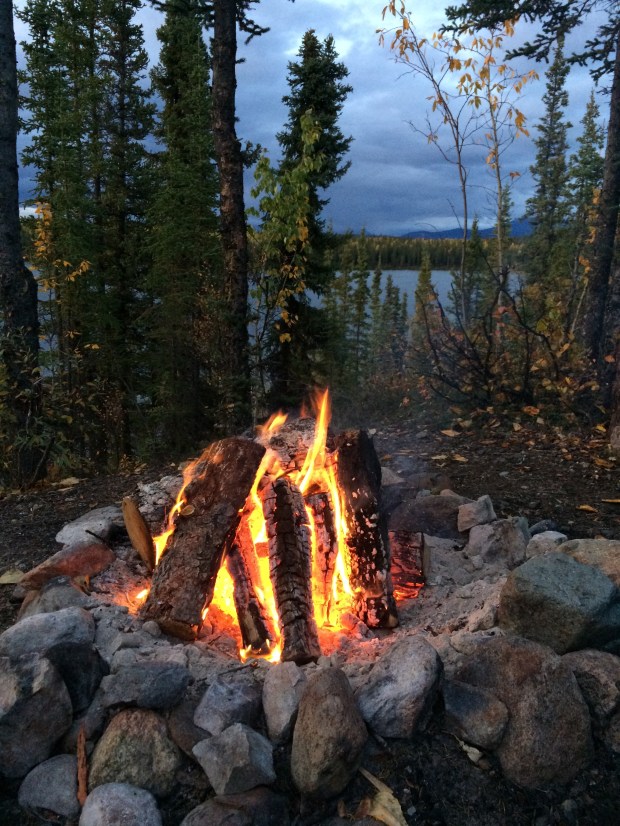
It was such a perfect spot that I took a quick video of the fire so that in future years we can relive the moment.

If we didn’t have the winter weather nipping at our heels, we would have stayed for days. But that chill wasn’t far behind, so we moved on toward Watson Lake.

IMG_2312

IMG_2648

We thought it would be fun to go visit our signs at the Signpost Village, especially because it’s not too often these days that we’re somewhere familiar. There they were!

IMG_2345

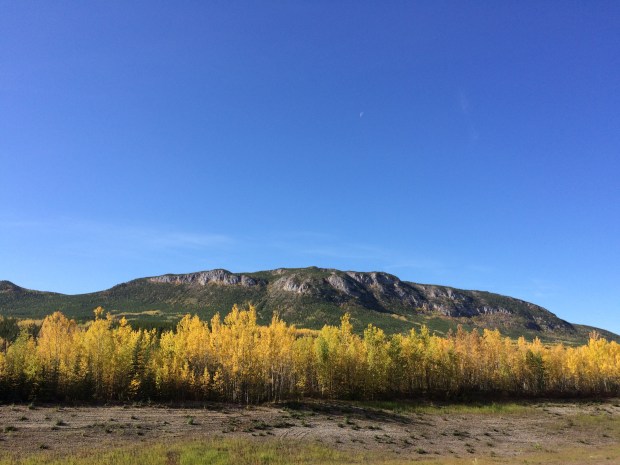
Then on we drove into the endless green and gold mountains and valleys of British Columbia.

IMG_2428

IMG_2431

We had a garbage bag to toss, so we pulled over at a viewpoint to use the waste bins, and accidentally stumbled across this vista.

IMG_2441

IMG_2443

And this was the view from the other side of the parking lot! Beautiful British Columbia, indeed.

IMG_2474

IMG_2492

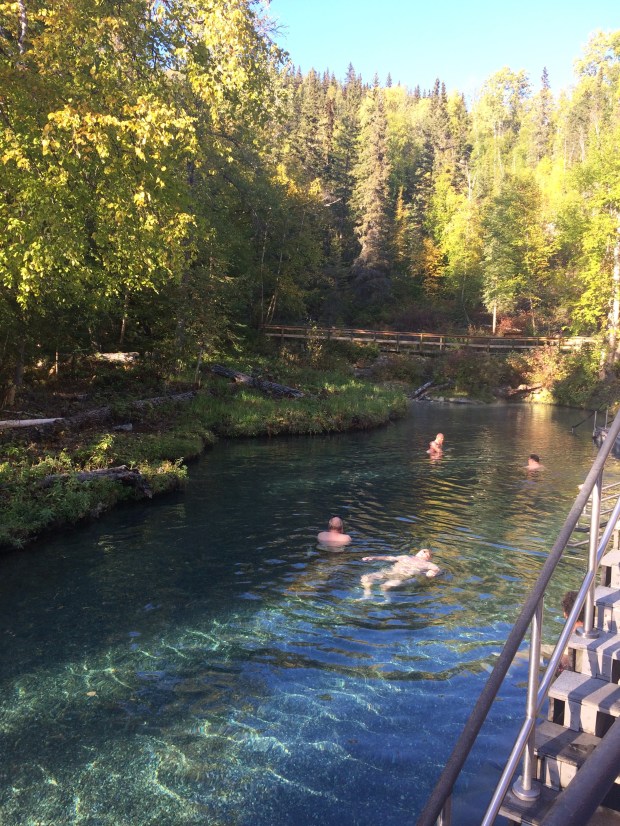
And then to add even more icing to the British Columbia cake, we stopped at Liard Hot Springs and accidentally had the time of our lives. We’d read about it over and over while researching the area, but didn’t think much more of it than “Sure, we could stop at a hot springs; that sounds nice.”

It was wonderful. It’s a provincial park and not privately-run, so for starters it’s really affordable. The day use fee is just $5 per person, but the hot springs fee is waived if you’re camping, which is $26 a night. That’s actually a little on the spendy side for boondockers, but it’s also really nice to have water and garbages at your disposal now and then, in addition to the free hot springs. So we paid for our site, got settled and then went straight to the hot springs.

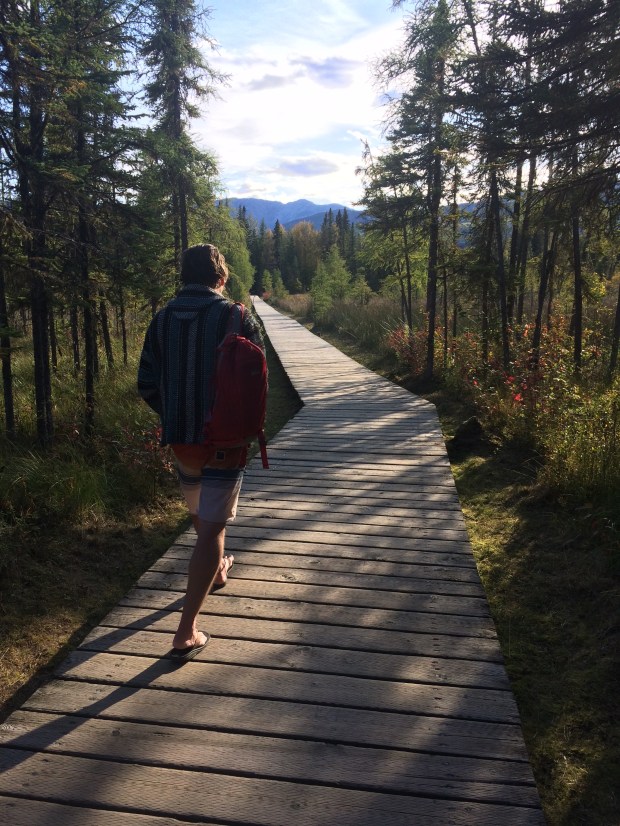
It’s a beautiful walk down the boardwalk to the springs, over the warm marsh that is very popular with the wildlife, especially during winter.

IMG_2527

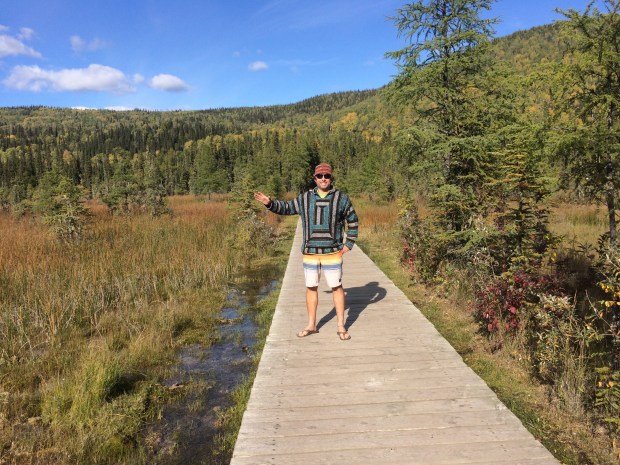
For a developed hot springs site, this one is surprisingly untouched in all the best ways.

IMG_2532

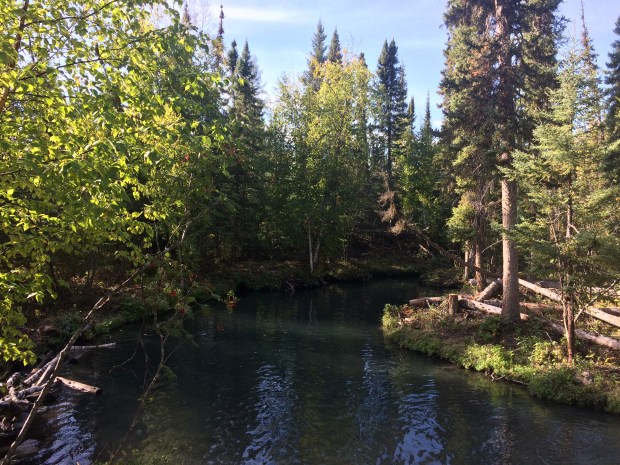
There are bathrooms, changing rooms, and a deck, but other than those few comforts it’s just a lovely pond that’s a piping hot 110-120 degrees at the source and then cools the farther away it travels from there. So the upper pool stays super toasty, and the lower pool is a perfectly warm and slightly deeper swimming pool.

IMG_2540

We loved it so much we spent a few hours there on our first trip before going back for dinner and some travel planning.

IMG_2544

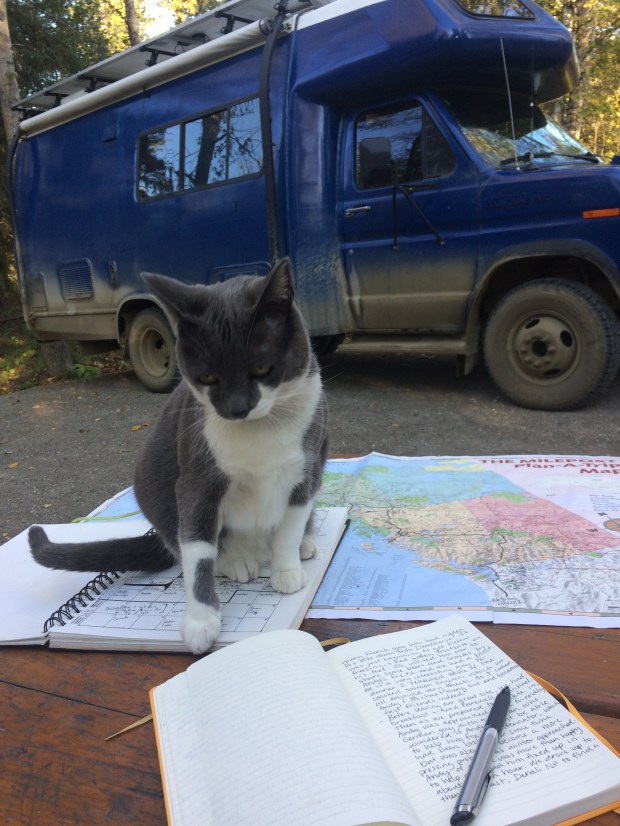
The Anti-Project always has other plans, but luckily she has a short attention span and was soon on the prowl for buggies while we got a little work done.

IMG_2568

IMG_2576

As we planned we decided we weren’t ready to leave the hot springs already, so we decided to stay another day, then went back for our night soak. Liard doesn’t have closing hours since it’s a natural springs, so we got to soak until late when we were ready for bed.

The next day was another sunny fall day, perfect for multiple trips to the hot springs.

IMG_2592

IMG_2613

That night as we splashed around the warm lower pool and visited with some other travelers, the Northern Lights came out in enormous green flickering bands that twisted and arched from one side of the sky to the other over our heads. We laid on our backs and floated in the steaming water, watching the lights and laughing out loud at how perfect it all was.

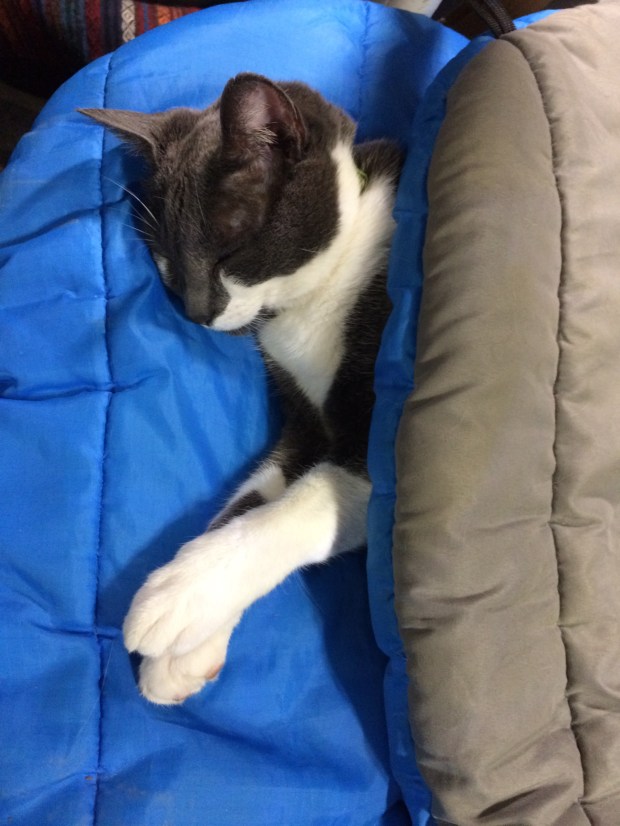
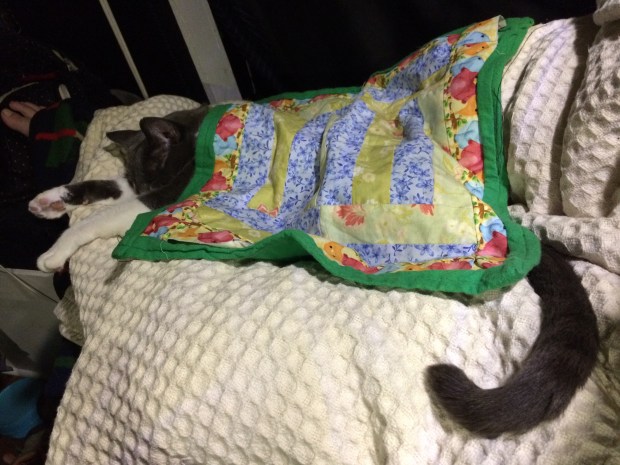
When we got back to the Turtle, it was late and we were all warm, cozy and ready to snuggle up. While we got ready for bed, Gracie crashed out under her own personal quilt that my niece Ava made for her before we could even make it up to the loft!

IMG_2635

With plans to return as soon as possible—especially in the snowy winter months—we got everyone ready to move on.

Gracie’s preferred and self-appointed travel spot is in a clothes bin in the closet, which is kept open for her as we drive. Usually when it’s time to go she hears the engine start and hops into her spot, but if she doesn’t sometimes we have a conversation about it to give her a chance to get in before we start moving. And it’s adorable.

And with the huge skies of the Yukon in our rear view mirror, we set our sights on the road ahead.

Let’s Refurbish a Van – Part 8: Hood Scoops (By Andy)

A post by Andy

{Modified the title theme some. We think of ourselves much more as a big van than a small RV. I now want to start prefacing this and future posts to be more representative of our self-image.}

So, to the meat of the subject. I just finished our hood scoops! Why did I make hood scoops? Well, for one, they look pretty cool and I needed a prominent place to put my new go-fast emblems that I ordered from Amazon.

KIMG0530

Mainly, we are trying to get as much power out of the engine so we can get our heavy old self up the high steep hills. In that vein, I have been playing with the spark timing, carb mixture, and intake airflow. By tweaking and adjusting these parameters we are working to get the most power and efficiency out of our old engine. Specifically, advancing the timing can get the engine to produce more power, but too much spark advance causes engine problems—pinging and preignition. If the engine is cooler, one can run with more advance. Another way to look at it is that with a given timing advance, if the engine and intake air get hotter, then the timing is too far advanced.

Maybe a side note about my “go-fast” emblems. Car companies try to sell cars. Sometime fancy cars come with racing stripes, cool graphics, and badges on the side about engine stuff. A joke among car people is the question “How much horsepower do the stripes add?” The answer is, of course, none. But… they do look cool. Look around, they are everywhere: M3, AMG, Hemi, 440, HiPo. The only thing the badge or stripes could actually do is add an immeasurably small increase in drag, or some unneeded paint weight. They are simply for the people in the car next to you. All the same, they look sporty, so I bought some that state the displacement of our engine and say it is “High Performance”. What I’m saying here is they do nothing, but they truly do look great!

So, I wanted more air to get in and out of the engine compartment to cool the engine, and have the air flowing into the air cleaner be as cool (and dense) as possible. To make sure I had an understanding of the pre-hood-scoop environment, I first taped the probe end of my digital temperature gauge to the air cleaner. Over a few weeks in different driving conditions and different altitudes, we took notes about the temperature measurements of the air cleaner and air filter. You can see the wire to the probe, and the tape holding it in one location.

KIMG0451

Overall, we are in the 150º–160ºF range under the hood after the engine gets warmed up and when the ambient temperature is in the 70º–80ºF range. So, to get more outside air in and more inside air out we need some kind of venting. I looked online, and $50+ plastic vents and scoops can be found, but they were not really van-sized, and seem flimsy. Metal ones can also be found, but are more expensive, and again, really don’t fit. Apparently there is an untapped market of people who want to mod 1985 Ford vans! (Investors be wary—the market may be small.) I finally hit on the idea that rectangle cake pans are about the size I wanted, and they are inexpensive, and they are made of metal designed to withstand 500ºF+. Going with this thought, while we were camping in El Malpais National Monument, I made some cake pan-sized cardboard mockups and spray painted them with a blue that I had.

Test fitting…

I thought that looked good, so a few days later when we were in a town, we got some cake pans.

KIMG0454

KIMG0455

One morning, a few weeks later, when we where camping at the Great Salt Lake, I got out the pans, tin snips, sandpaper, and primer, and got to work remaking our sweet cake pans into even sweeter performance hood scoops (please note the word play).

Here they are.

Test fitting.

We stashed them away for a bit and traveled onward. Another week later we had a free day while visiting our friends the Higdems in Kimberly, ID. I measured, moved, marked, measured, and measured and marked again. Then I started drilling holes in the hood.

Lots of little holes now!

After fitting and drilling the mounting holes, I now knew what piece of the hood (bonnet, for any Brits out there) to cut out. Out with the jig saw.

Another side note here: When putting the Turtle together, we set ourselves up with a few DeWalt cordless tools and the battery charger that plugs into a 12V cigarette lighter. The tool charger is now wired to our solar-charged batteries, so we are using the sun’s energy to drill, cut, and modify our hood. It feels fun to know that when working on projects such as this!

For the final install, I put down a small bead of RTV sealant, aligned the scoops, and screwed in the 6 screws per scoop that I had already pre-drilled. After the RTV cured a bit, I got out our boat paint and went at it.

Included above is, obviously, a photo of what Scout and Gracie were doing at the time. A few days later, at Dave and Ryann’s place, I added more RTV to smooth the transition and put on more paint to finish it all off.

All finished now, after the last painting and with the great go-fast badges installed.

We should call this the conclusions section of the post, for you science people out there. Well, they have been on now for a week, and we don’t move fast, so we have only driven a few hundred miles. We will need to collect more data, but so far the maximum under-hood temperature we have seen in 135ºF, and most of the time it has been in the 100º-120ºF range (and we are actually in hotter weather than when we took our non-hood scoop measurements). We have also driven through crazy heavy rain and, as expected and hoped for, the small amount of water that enters through the scoops has no adverse effects on the engine. Generally, a pretty solid success, and I have since advanced the ignition timing just a bit with no pinging.

Oh, maybe a cost breakdown. The sum total of the cake pans, primer, quantity of screws, RTV, and paint used is less than $20. The go-fast badges were $11 each. Dave suggests I sell it as “The whole project was less than 45 dollars.” I think I shall adopt that tract!

All that for less than 45 dollars!!!

We Love NPS: Carlsbad Caverns, Guadalupe Mountains, White Sands & Gila Cliff Dwellings

It’s no secret that we love the National Parks System. In fact, part of our five-year plan (or as close as full-time wanderers get to a plan) involves taking occasional breaks from the road to work at National Parks and Monuments as we travel around. Not only will it be soooo fun to live at a park, but we can also make a little extra travel money while giving back to the Parks System that has basically been our landlord for a good portion of the last year and a half. We’ve boondocked on NPS land at National Parks, campgrounds, and dispersed camping areas. And not only to we get access to astonishingly beautiful and unique gems around the United States, we’ve also been provided at many sites with potable water, RV dump stations, showers, bathrooms, and garbage services. Oh, and a surprise favorite—ranger talks around campfires under the stars! At Wind Cave the fireflies were flying around us as we walked to the amphitheater to hear a ranger tell us all about the history of bison in South Dakota, and another ranger sang us a song on her ukulele that she wrote about Native American folklore. Pretty fancy, right?

Immediately after hitting the road, we got our NPS annual Interagency Pass and it’s no surprise that we’ve gotten our $80 worth and feel pretty happy about it! The last few weeks have been especially National Parks-y.

We began the streak at Carlsbad Caverns National Park, hiking down to the Big Room from the Natural Entrance.

IMG_0900

IMG_0910

IMG_0914

There were some beautiful intricate formations on the way down, but the real thrill was the 1.25 mile loop around the Big Room at the bottom. We’ve been in a bunch of caves, but never anything like this! The photos do it no justice, but the scale of these stalactites and stalagmites is staggering.

IMG_0935

IMG_0951

IMG_0955

IMG_0956

IMG_0963

IMG_0964

We were thankful for the railings along the path, which made it possible to just stare upward with our mouths hanging open, pinballing our way down the walkway. It’s Andy’s Favorite Cave To Date, and for me it’s Tied For First with all the other caves I’ve explored. (I just really like being in caves.)

We stayed the night somewhere outside the park, and then the following day—Easter Sunday!—we arrived at Guadalupe Mountains National Park for a holiday hike.

IMG_0985

IMG_0996

Of course we had to investigate the potable water situation, and they had a nice spigot near the RV camping area, so we made a note of it and hiked on into the hills. This park is home to El Capitan, which is a celebrity rock, and Guadalupe Peak, which is the highest mountain in Texas. We didn’t hike either of them; it was 90 degrees with full sunshine, so neither of us felt bad about choosing a less strenuous trail.

IMG_0999

IMG_1006

IMG_1039

IMG_1046

After the hike and a water fill, we proceeded to El Paso for a Costco run and then on to Alamogordo and saw. . . well, look.

IMG_1059

IMG_1066

That’s right; it’s the World’s Largest Pistachio! It’s a sculpture at the McGinn’s Pistachio Tree Ranch, which is a really fun stop if you’re in the area. There’s a lot to see and eat there. We sampled dozens of flavored pistachios and pistachio candy, bought some bags to take home, and got some pistachio ice cream to eat under a pistachio tree by the huge pistachio sculpture.

I’ve never written the word “pistachio” so many times in my life combined.

IMG_1069

IMG_1070

IMG_1073

Then another stop in Alamogordo at the Alameda Park Zoo, recommended to me by my buddy Daren who used to live in the area. And I’m so glad he did; we wouldn’t have thought to stop by this tiny zoo in a park in the middle of town, but it was one of the coolest zoos either of us has ever visited! It’s only $2.50 to get in, the grounds are lovely and nicely manicured, and the animals are happy and well-cared for in their clean and green enclosures.

IMG_1085

IMG_1097

IMG_1101

We left the zoo while we still had plenty of light so that we could make the big climb up to Cloudcroft, an adorable town 19 miles outside of and 4,000 feet higher than Alamogordo. And our little Turtle made it! We may have been going 2 mph, but we made it! We stopped at the scenic train trestle outside of Cloudcroft, and then found a cool dispersed campsite nearby to stay for the night.

IMG_1139

IMG_1186

We stayed two days, and drove back down.

. . .Don’t get me wrong, lots of fun things happened in Cloudcroft, but I promised you a National Parks post so I’m going to try to stay on topic here. 🙂

IMG_1204

A lot of National Parks that we go to feel like being on another planet, which is a shared characteristic of all the parks I’ve liked best. So you can probably guess my approval rating for White Sands National Monument! This place was bizarre in the very best way.

IMG_1212

IMG_1225

IMG_1238

It was magical. Hills and hills as far as the eye can see of gypsum sand.

It played tricks on our minds, as hills of white usually mean snow and winter, but it was 85 degrees and we were roasting! I made a sand angel anyway. Also strange was the sensation that we were walking on sand in that heat, but it wasn’t hot on our feet at all.

IMG_1250

IMG_1269IMG_1282

Before we began walking back to the Turtle, Andy joked that we should fill our bucket with water and make a white sand castle. We both got quiet and looked at each other, and then went to get the bucket.

IMG_1334IMG_1338

The next day we went to Hatch, NM to get ourselves the epic green chile cheeseburger at Sparky’s that some hot springs friends had told us about a few months ago.

IMG_1367

IMG_1370

It was legitimately one of the best burgers I’ve ever had. Thanks for the recommendation, guys! On our way out of Hatch, we got some green chiles from a roadside market, Andy hassled one of the locals, and then we hit the road for Spaceport America.

IMG_1380

Spaceport America is incredible to see, even though it’s not open to the public right now. We’d read that there was a visitor’s center, but it’s in nearby Truth or Consequences (actual town name) so we just got a long-distance view of “the world’s first purpose-built commercial spaceport” and some really neat info from the hospitable guard at the gate. The sci-fi nerd in me was already picturing the next time I drive out there, this time with my flight ticket in hand. To infinity and beyond!

IMG_1470

That night and the next we stayed at Elephant Butte Dam in Truth or Consequences. We swam, read by the water, got some sun, and threw Scout’s frisbee into the water a thousand times before continuing onto the next leg of our journey.

IMG_1493

Which was Gila Cliff Dwellings National Monument! Another new favorite, and another great NPS spot to visit at the top of a very windy road that tops out at about 8,300 ft. The Turtle was wheezing, but we made it up this one too! And the reward was worth it.

IMG_1681

IMG_1649

IMG_1660

IMG_1697

IMG_1702

IMG_1705

IMG_1716

IMG_1722

IMG_1731

IMG_1678

There are free campsites all around the monument, as well as an oasis just right outside—a privately-owned hot springs with three pools and camping available. If they hadn’t been booked up, we would have gladly stayed the night too!

IMG_1774

But we already had a site we’d found the night before that we loved, so we were happy to return to our little house by the river.

IMG_1614

IMG_1794

IMG_1598

It was a great place to relax and catch our breath before moving on to the next National Park! It was also a great place for catching other things too.

IMG_1816

After returning our new friend to his home by the river, we returned to the road—the Turtle’s natural habitat! And on to the next National Park—the Turtle’s second home.

Let’s Refurbish a Van – Part 6: Roof Rack (by Andy)

A post by Andy

{Note: The work detailed in this post was completed over the summer of 2015, before we moved into the Turtle. I am just getting the time to write the post now.}

So, we have stuff to carry. And we want a place to store our solar panels. And we want to stay cool. And, if possible, look cool. So, we need to put together a roof rack…

Here are a few pictures of the old RV when we got it. It had an aluminum ladder that was old and worn, along with the typical RV aluminum tube luggage rack at the back- all bits with some of the mounts loose. We also had a big plastic storage box bolted to the top, but it was cracked and would certainly leak. As you can see, there was also one solar panel and a mount for what I’m pretty sure was a TV antenna. Good stuff, but it was all pretty worn, as it had all traveled for close to 30 years and more than 250 thousand miles.


We wanted our rack and top equipment to do a few things for us:

  1. Have a dry and accessible place to store camping and fishing and other fun gear, out-of-season clothing, and some spare parts and equipment.
  2. Have the rack removable, so we can maintain and fix the roof when the need arises.
  3. Have a location to mount the planned solar panels.
  4. Design the rack to provide us shade.
  5. Have a system that we can change, add more solar to, move things around, etc.
  6. Be able to fill and seal up all the holes prior people made when mounting things to the roof, and have a system where moving forward we will not be drilling into the roof any more.

Anyway, roof racks look great! I hear they can be useful too. In truth, we have pretty limited room and storage inside, so having a bit of room up top for our extra supplies and garage-like stuff was essential for a successful voyage.

So, to the step of getting the old stuff off and sealing up the holes. Pretty much unbolt the bolts and pry everything else off. I then used fiberglass impregnated epoxy body filler for all the big holes (I love epoxy!), maybe adding wire to support it as it cured. I then added Geocel Proflex on the seams. I read about and tried a few things, but to date, it is my go-to for exterior sealing. Here is a link.

For the (many) smaller holes, I would first clean and fill with the Geocel, then screw in a stainless steel screw the size of the hole, then cover the head of the screw with another layer of Geocel. It is a technique I read about on the internet, and it seems to have worked well so far. Again, it is not worth buying any hardware but stainless or grade 8. It does cost a little bit more, but use the savings you get for doing this yourself to get the good hardware. Plus, you don’t have to worry about some interior rust and redoing the work down the road. After sealing the holes, I put down Rustoleum on all the modified spots. The following pictures show the antenna hole through the roof, and some of the removed parts scattered in the yard.

We were lucky enough to have a friend who worked for Yakima who gave us a VIP discount card for one purchase. With the card, we got 12 A1 rain gutter towers, 6 78″ crossbars, 12 wide body rain gutters, end caps, two 12-peice lock core sets, a Loadwarrior basket, and some cargo nets. A truly impressive amount of wonderful Yakima pieces at a great savings. Boxes and boxes of sweet components!

From REI, Amy and I used our one-item 20% member discount and each of us bought a Skybox Pro 12, shipped to the Portland REI for free. We got the long and narrow boxes to configure end-to-end, and not take up too much roof area width-wise. We effectively have the roof racks for 4 vehicles, all to put up top the Turtle. It added up to a lot of initial investment, but it has been working well, and added an important comfort to be able to store a reasonable amount of things to make our small world flexible, and I think it actually has a sleeker look being made from components—as opposed to a custom-fitted rack. Since we were doing all the work ourselves, we decided to invest a bit more on some nice new hardware. After popping down to REI and loading our new Skyboxes (in their own boxes) onto the top of the old Scout, we stopped for a bite in downtown Portland. Seems fairly reasonable to me, but I imagine to some people we made a sight…

The sky boxes, along with the other hardware, sat in the house for quite awhile. After stripping and sealing the roof, it was only logical to finish painting the Tutle blue, then do the white roof paint, and then finally get to the point where we could install the new roof rack. Consequently, this is what our place looked like for quite an amount of time. (As you can see, our front room was used to store a number of Turtle parts until they were ready to install.)

The pictures are few here, but after most of the painting was finished, I mounted the wide body mounts. I measured, marked, measured again, checked, and had the geometry figured out. On the corner of the Turtle roof, I would drill my two holes, fill with Geocel, cover the mounting surface with Geocel, align the bracket, screw in two (you guessed it) stainless steel lag bolts, then cover the seam and outside with Geocel. After it all cured, we repainted with the Interlux. It looked nicer with the black brackets and shinny bolts before the sealant and paint, but I didn’t want to risk it. And, just so you know, the asymmetric spacing along the length of the roof is due to needing to align the crossbars so they will not interfere with a roof vent when open, but also allow for the mounting points of the skyboxes. Here are the brackets installed:

kimg0798

It is a nice feeling to know that at any point we could unlock (all keyed alike, now) the 12 towers, unscrew, and remove the whole rack if we had to do some maintainence on the topside. Anyway, the pictures are limited at this point, but following are some involving the tower, crossbar, and rack install.

kimg0804

You might notice that the Yakima basket lost out to the solar panels. The basket is in the storage unit presently, and it would be great to get it up there at some point. When we were building and installing the rack, though, the geometric logistics were far too difficult for the time allocated. Anyway, to install the solar panels, I bolted two pieces of 12′ 6061 T6 aluminum square tubing to the crossbars with stainless steel carriage bolts and nuts fitted through the Yakima Universal Snaparounds.

I picked up used ones super cheap here. By the way, ReRack in Portland are nice people and can save you some money on roof racks, so check them out if you are in the area. Back to topic, after getting the aluminum properly spaced and installed, I then drilled and screwed the solar panel brackets to the the aluminum. That step was a breeze. Solar panels installed, photo taken probably a month in.

kimg0938

As to keeping it all cool. We planned on (and did), paint the roof surface with a couple of coats of Interlux topsides white boat paint. We actually painted the roof vent covers white as well. The assumption is that paint will reflect much of the sun’s heat, and be able to withstand the UV rays. So far, everything looks pretty good up there. We have some cracks in the paint where the caulking we used was not completely cured before we painted (I don’t blame the paint, we had time constraints), so we have some washing and fixing of some seams to do. Otherwise, all looks pretty good. A common approach for keeping a bit cooler is to have a couple of roofs, effectively carrying your own shade along with you.

The above old-school Rovers have a second roof with an airgap for passive cooling in the hot sun. (Side note, did anyone notice the tall skinny tyres the rovers are running on?) With the spacing added from the rack towers, and mounting the solar panels and boxes above the crossbars, we have a impressive air gap and continous shade on over 50% of the roof.

Currently, there is a middle strip free for walking, in which I will fit an additional panel at some point, then simply make some cheap synthetic or plywood panels and paint them white to increase our shade to close to 100%. So far, though, we have been to the Badlands of South Dakota in the summer, and have stayed with the ambient temperature with thoughtful venting and minimal electric fans.

To me, the goal is not to be cooler than the outside, all we need to do is not be hotter than the ambient temperature in all kinds of weather.

kimg0184

Oh, almost forgot, we want to access the roof! We need to clean the solar panels, get stuff into and take stuff out of the boxes, check on all the paint and seals, and most importantly, be able to climb up and yell with arms outstretched like you are in a movie! Anyway, the ladder…

We actually bought a car roof rack ladder as a start. The almost $200 ladder (seems crazy) was well worth the money, in the time saved. It always feels pretty weird to buy something new, remove it from the box, then start cutting it right away. So, the ladder, welding, adding more rungs for the proper length, and fixing the folding function.

Some close-to-final pictures here. We started with a 9-rung foldable ladder, and ended with a 12-rung rigid ladder that bolts to the bumper and the top rack. Again, it was designed to bolt to the bumper and rack, so it is removable…

I’m pleased with the removability of the ladder, because we crushed it a bit when we backed into a tree one day, about a week after it was finished and installed. The ladder was subsequently unbolted, straightened, and remounted. From the side, it now does have a bit of ripple (below the designed joint and by the spare tire)—this is what we call life.

kimg0186

To sum up a bit, up in the boxes right now we have a few fishing poles, extra wire and parts and unfinished projects, cloth for sewing projects, extra window insulation, snow shoes and masks and fins, river tubes, my old tent. A pair of driving lights I have yet to wire up. Some cheap speakers I plan on installing in the doors. You get the picture. We call it our attic.

img_1863

We have a completed rack now. It holds our solar panels, is our attic, and still has room to exapand.