DIY

A Quick Photo Catch-Up

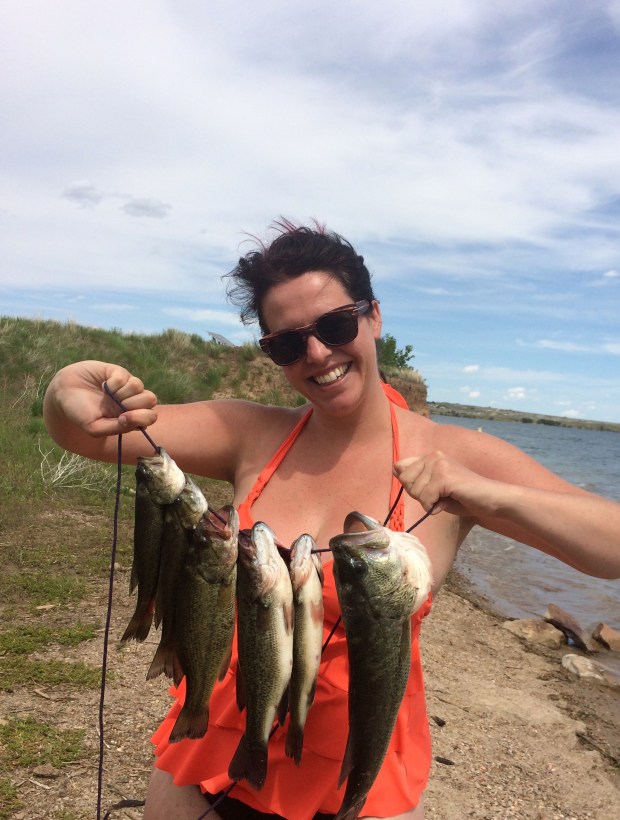
Wow, what a busy month it’s been! We’ve been super-duper on the go, so instead of trying to document all the fun in words I’ll do a quick photo-heavy catch-up instead. And actually, we’ve been so busy that I haven’t even been taking many photos! So that helps expedite things, doesn’t it?

We left Seeley Lake in July and drove up to Great Falls, Montana, where Andy grew up. His parents both still live there, so we were looking forward to spending some time with them, and I was excited to be taken on the Hometown Tour. (Don’t quiz me on it though; we were so busy we didn’t even find time to drive by his old house! Next time.)

Northern Montana is as beautiful as you’ve heard it is.

IMG_4314
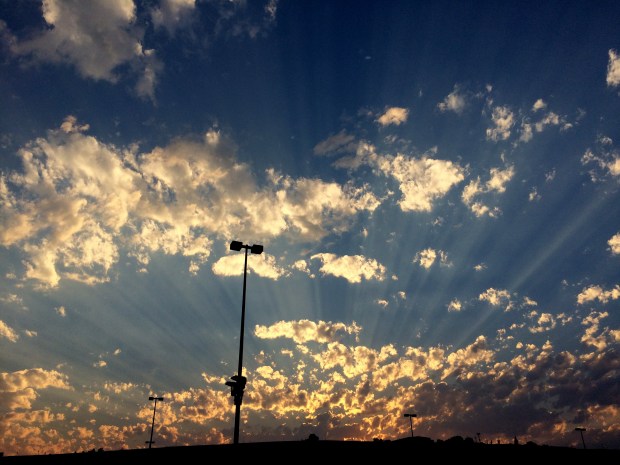
This picture was literally taken from the Home Depot parking lot. 

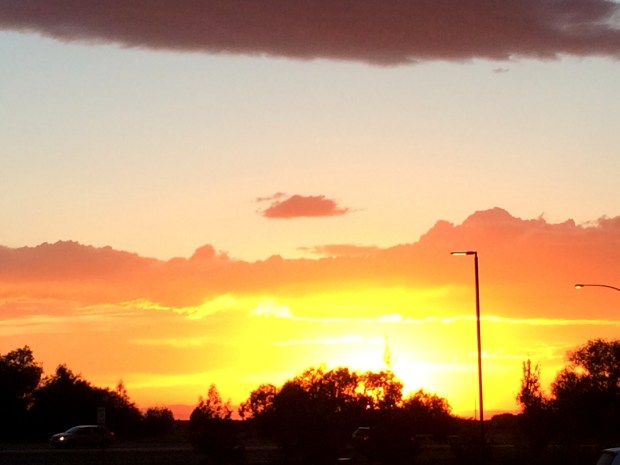
We spent much of the time at Andy’s dad’s place outside of Great Falls, and were treated to one beautiful sunset after another, along with lots of delicious home-cooked meals and great conversations!

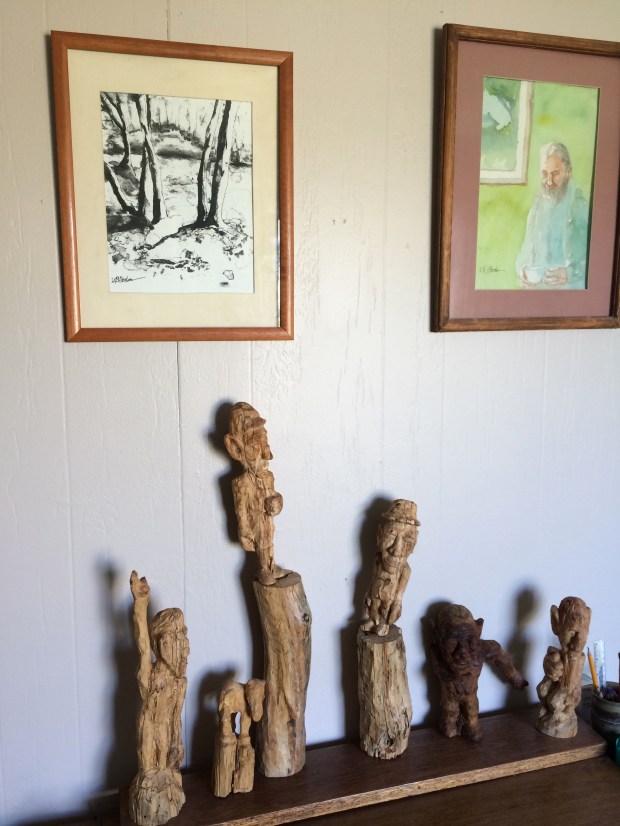
A wonderful bonus surprise during this trip was the discovery that Andy’s dad is a fabulous and inspiring artist. I’ve always been taken with Andy’s Renaissance man-ness, and it turns out it’s inherited! From sketches to paintings to carvings, the house is a veritable art gallery.

IMG_4438

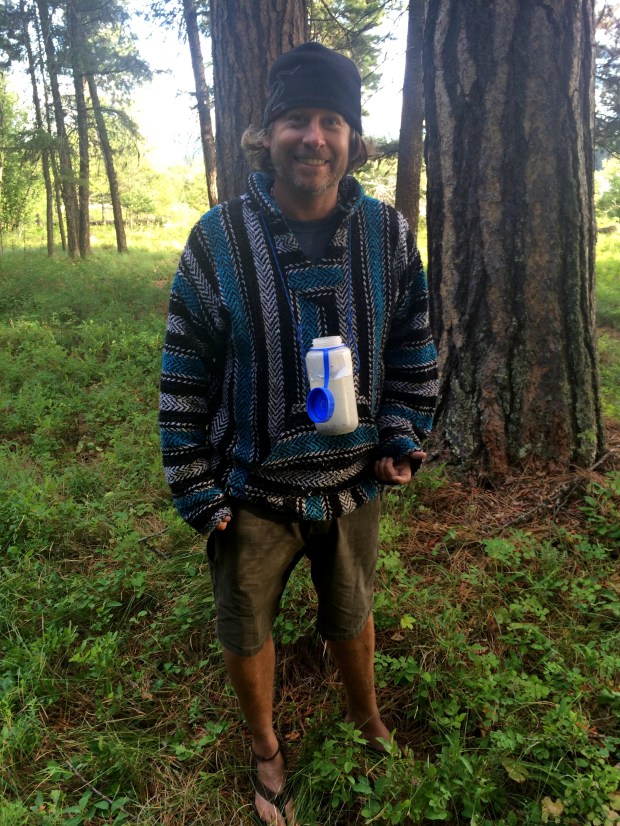
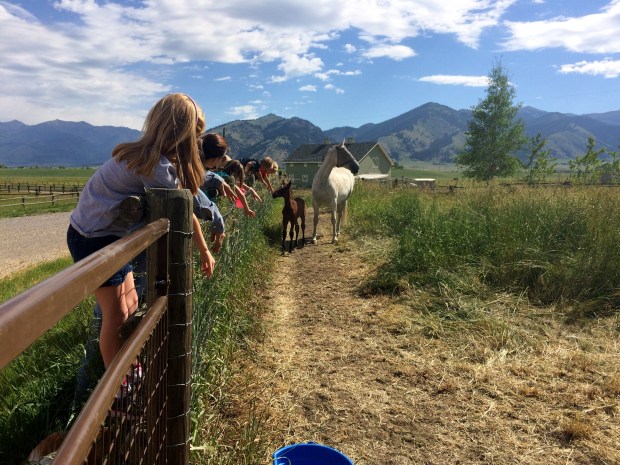
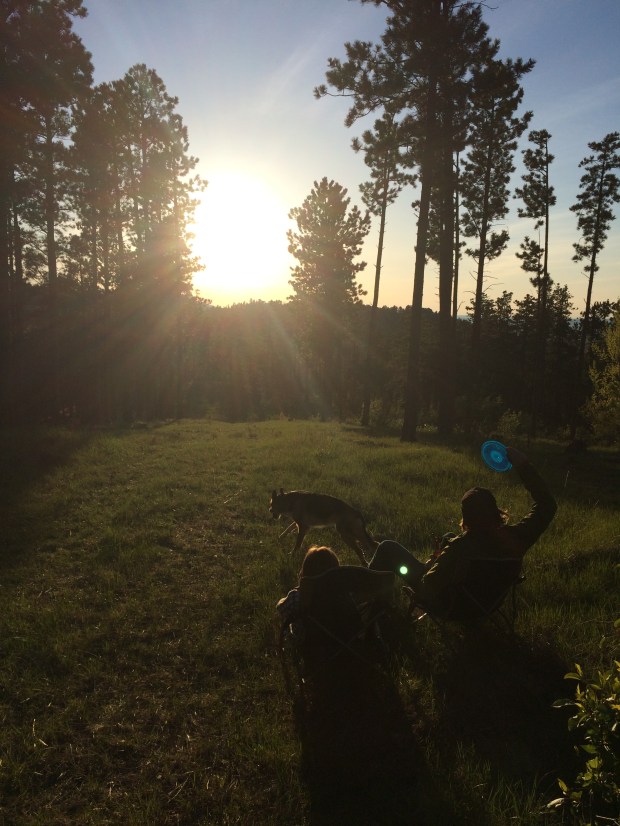
Though Andy had to work much of our time there, we managed to get outside a fair amount, helping Andy’s dad with some upkeep on the cabin he built some time ago. The location is wonderfully silent and overlooks fields, the Sun River and lines of lush trees.

While I stained the cabin, I got the feeling that I was being watched. I turned around expecting to see Scout pleading for frisbee time, but instead I was startled to see a herd of cows closely watching my every move!

IMG_4405

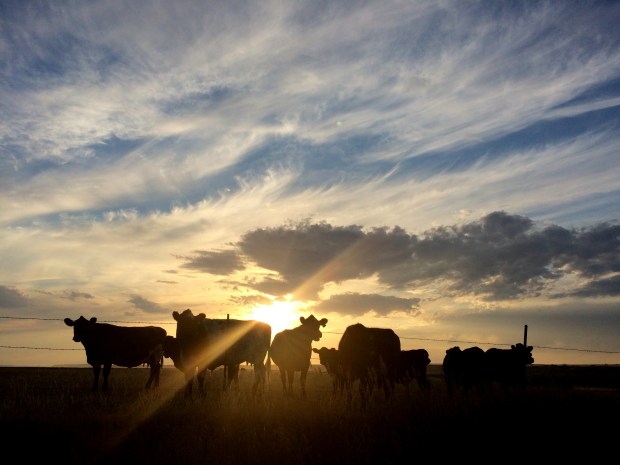
They stood over me and oversaw my work until the sun set. It was hilarious.

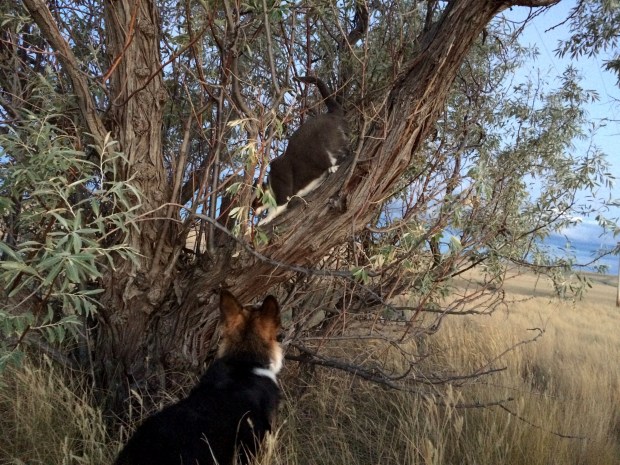
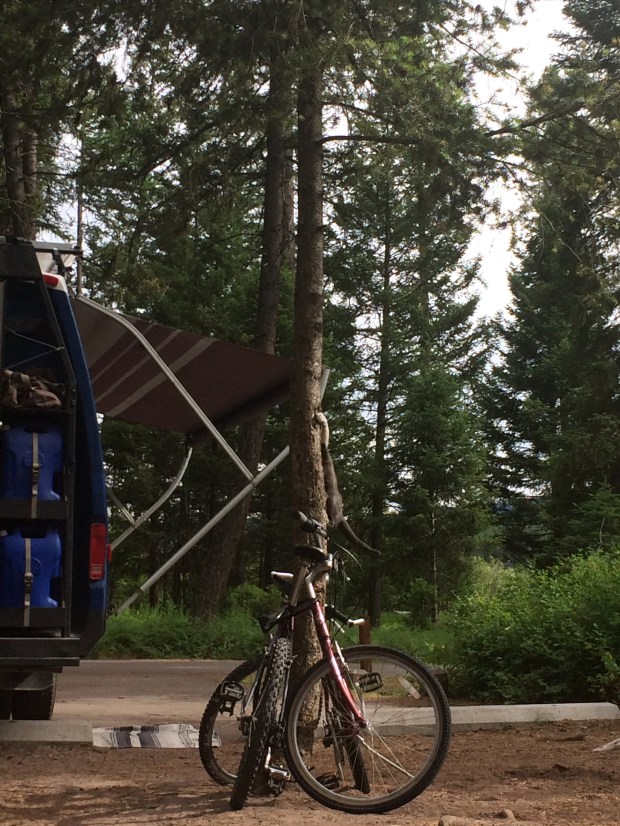
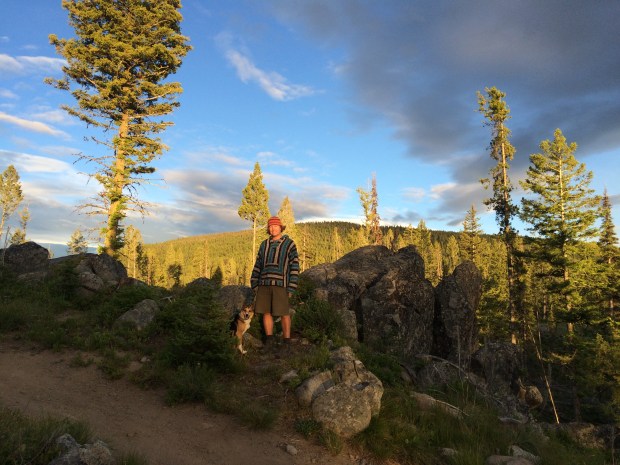
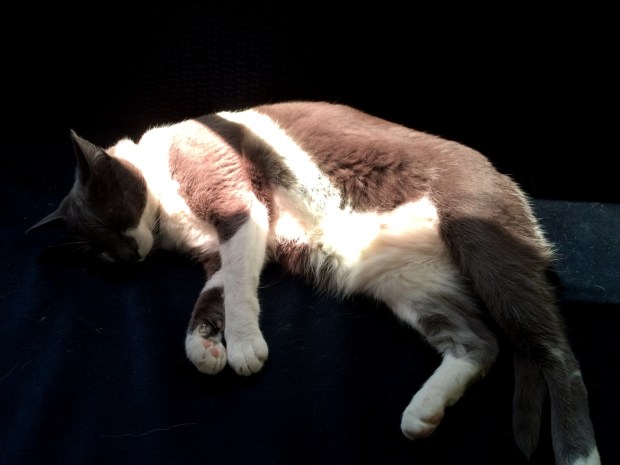
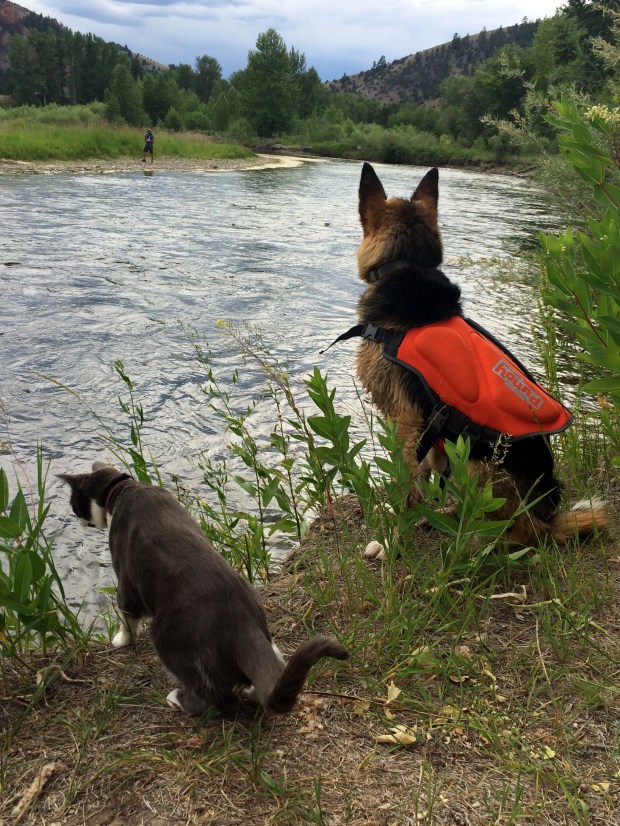
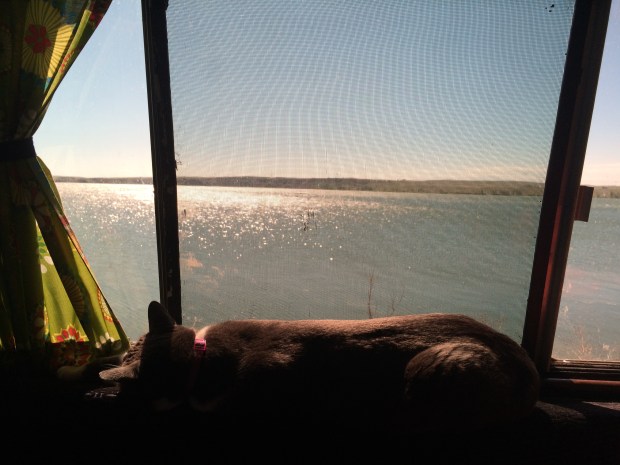
Scout and Gracie also enjoyed their time in the Montana outdoors. Gracie was stuck in the Turtle for a number of days while Andy worked, so the moment she got a taste of freedom, that girl was up a tree!

IMG_4527

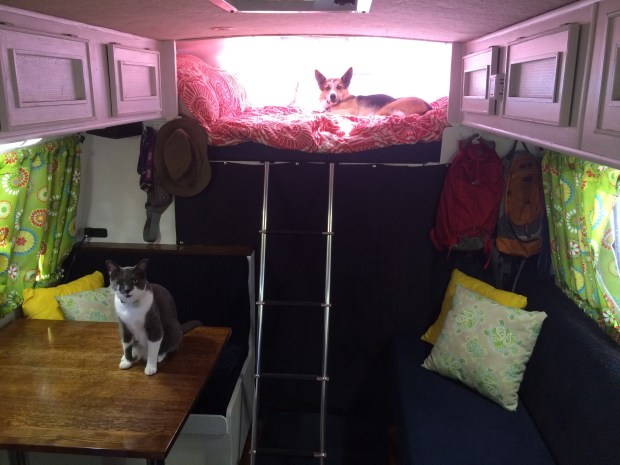
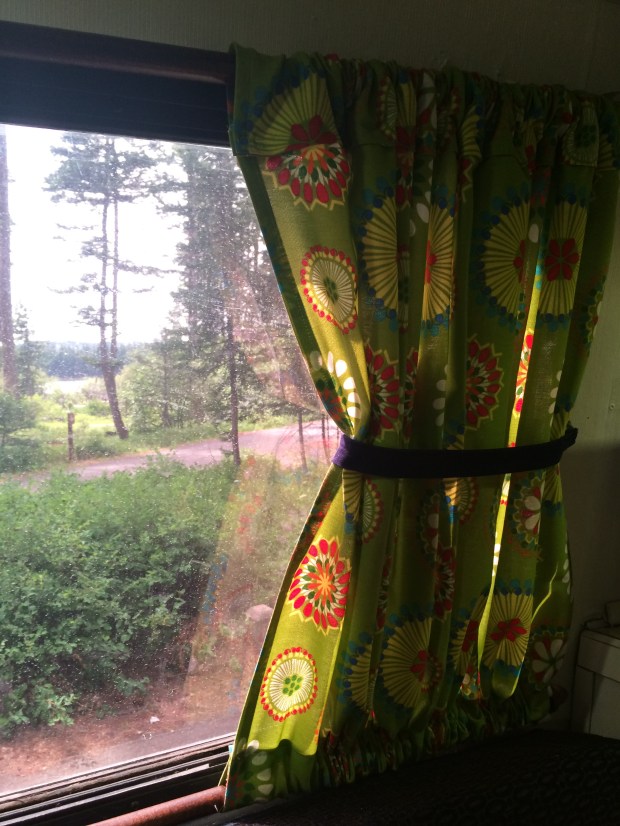
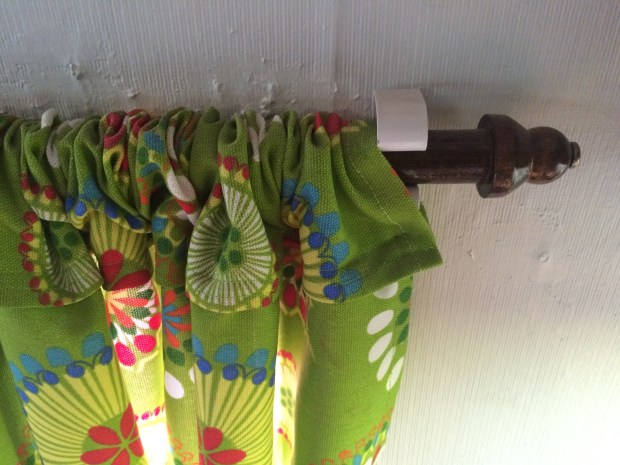
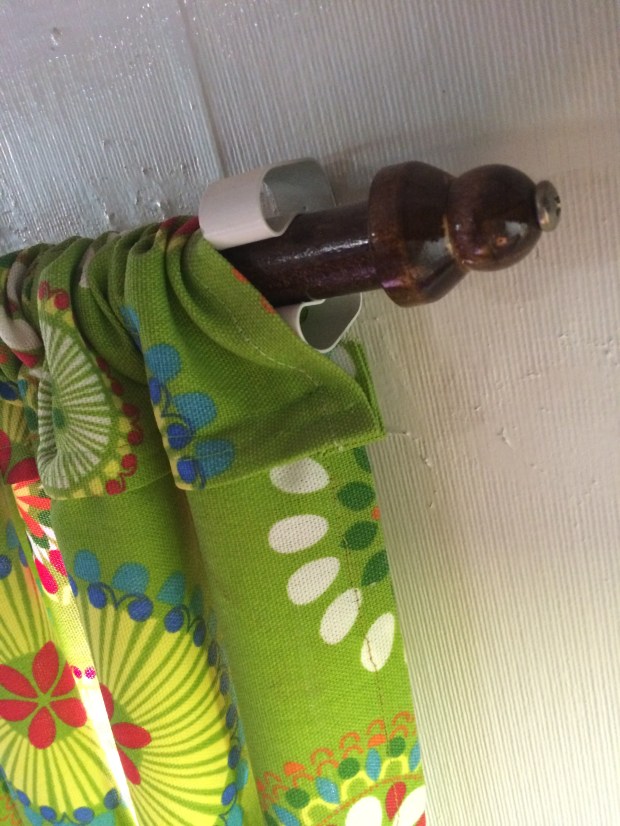
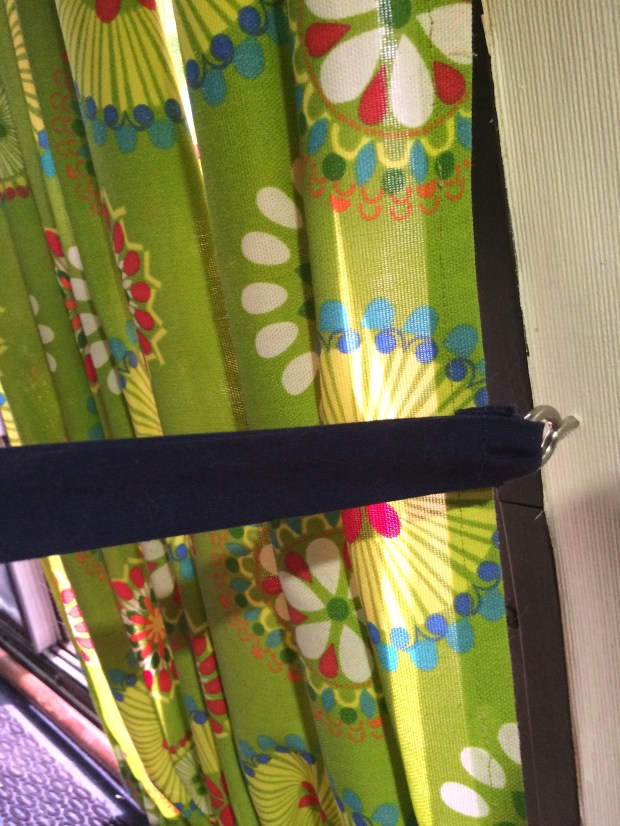
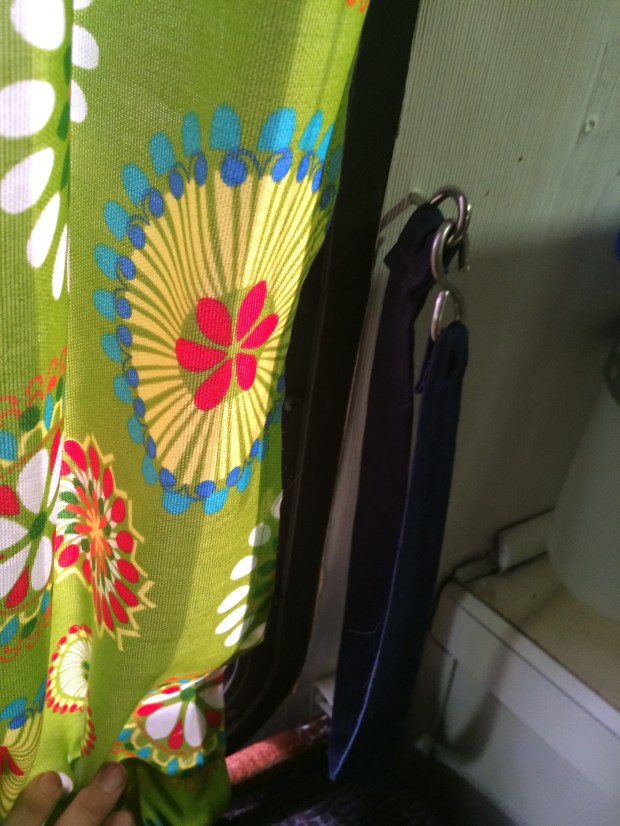
Here they are modeling the new curtain I made while we were in Bozeman, which blocks off the front of the Turtle and keeps the back nice and cool! Andy’s brilliant idea + my love of sewing. You’re welcome, Gracie and Scout.

IMG_4237

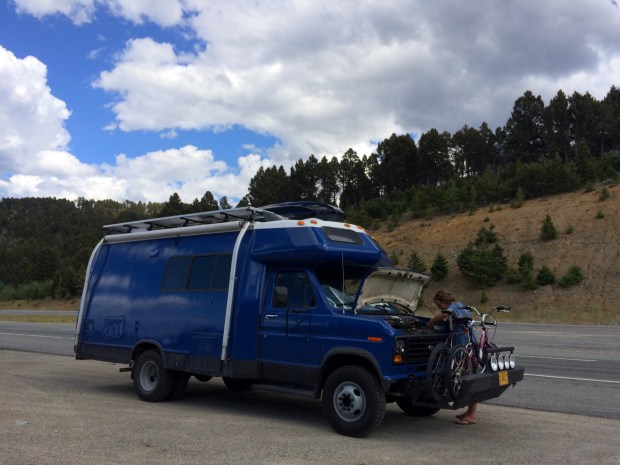
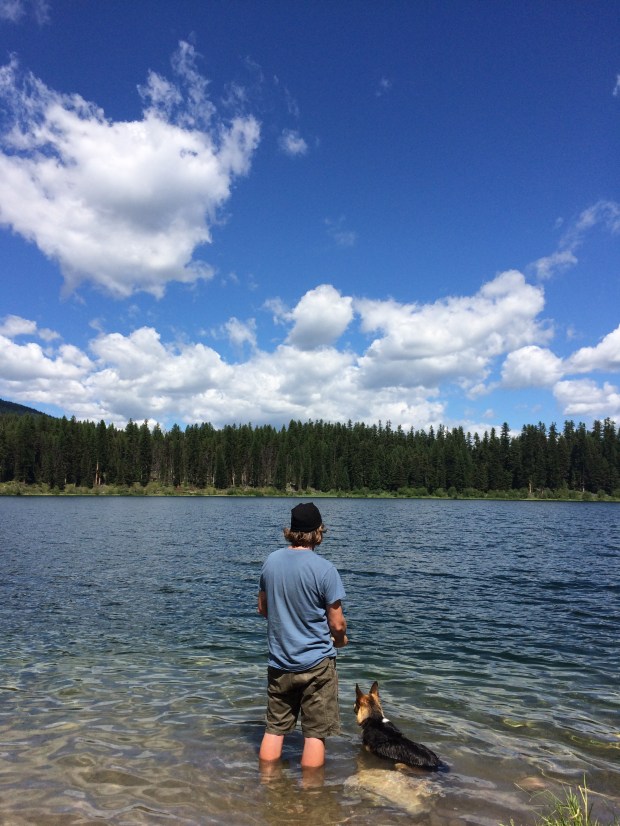
After lots of swimming with Andy’s mom, lots of pizza dinners in town (a Goodman family tradition), and lots of inspiring sunsets, we left Great Falls on our way to Boise. We only broke down once!

IMG_4577

On the way, we stopped at Kimberly, Idaho to visit the Higdems. This time Andy didn’t have to work the whole stay, so we got lots of time with them to visit. They’re a hard-working pair, and it was the height of harvest time, so we got to watch them in action as they took care of the animals and crops. We also were lucky enough to be gifted bunches of fresh veggies to take with us on the road! What a treat.

A quick stop at the Snake River Canyon on our way out of town for a great view and some sweaty palms (guess whose). It’s unbelievably high up!

We didn’t fall off the bridge, and shortly afterward we made it to Boise!

IMG_4642

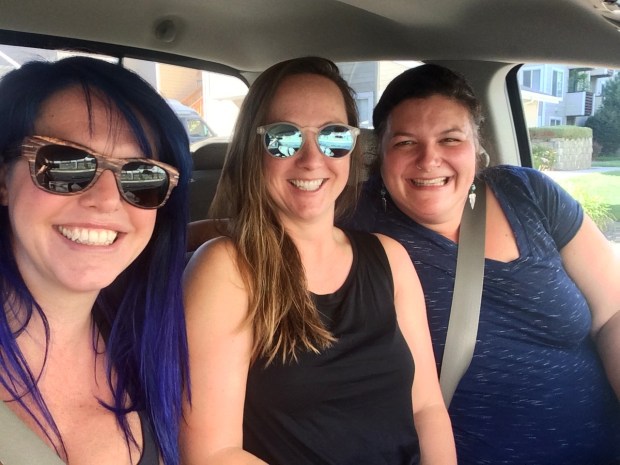
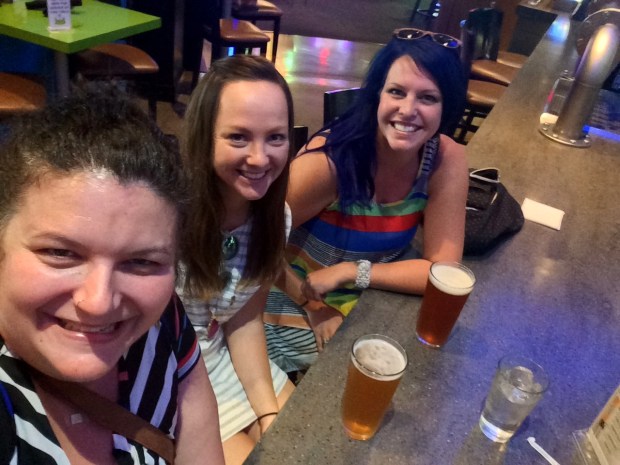
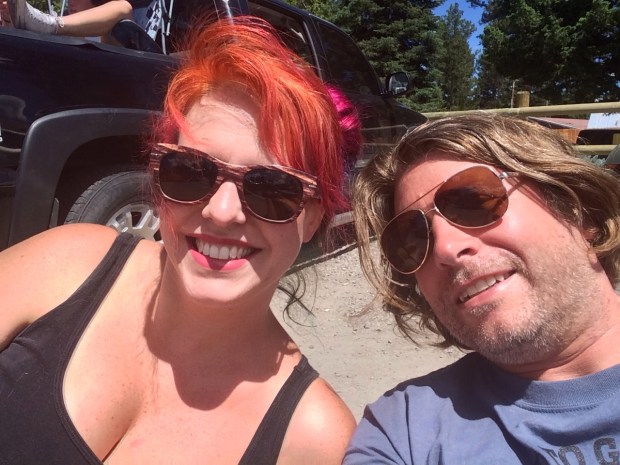
Every year my college girlfriends, Beth and Lexie, and I meet up for our Girls Trip! This year we met in Boise because Lex was moving to town for Grad School. Exciting! So we rallied the troops to help her get moved in, complete some Craig’s List furniture transactions, and tell the same old jokes a hundred times and still find them clever and hilarious.

IMG_4632

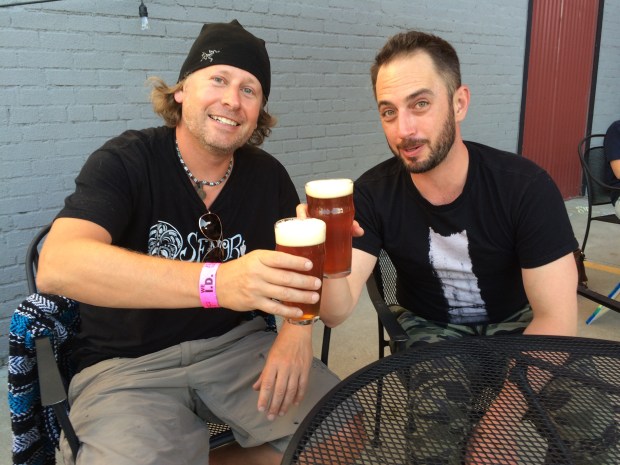
And of course, we had to help her find the good spots for an after-class brew. It takes research!

IMG_4640

Beth left way too soon. But as always it was fun and fulfilling to see each other again and give each other a hard time and just laugh like maniacs together. Andy and I stayed in town for the rest of the week while he worked and spent his evenings at his college buddy Dave’s place. So they got some great friend time too, and caught up in the evenings on his back patio. They had a pretty ok view.

IMG_4677

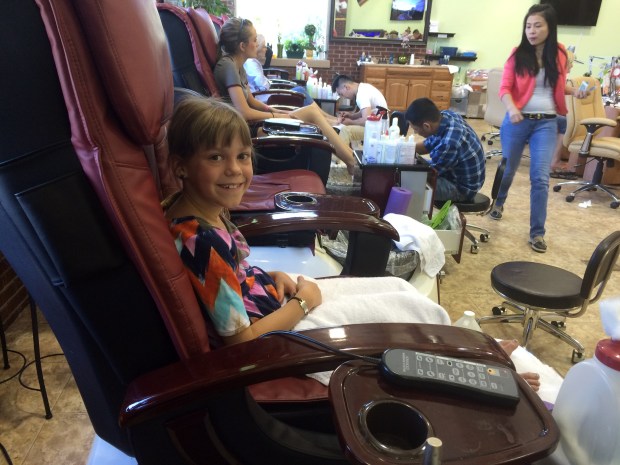
Meanwhile, Lex and I ran more errands. And ate more yummy food at the cute local restaurants. Again, research.

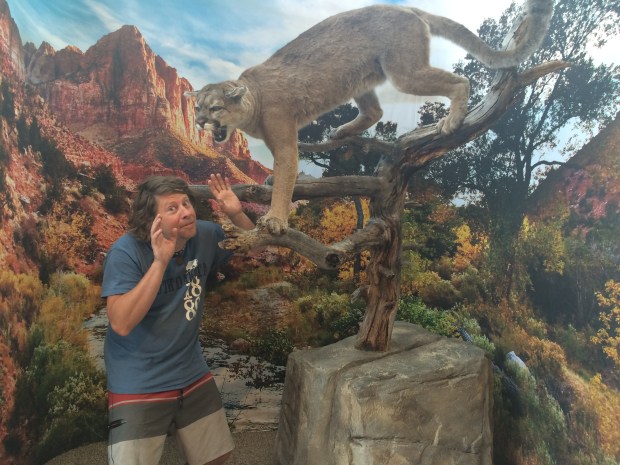
Dave let the three of us tag along to an evening work event at the zoo. We got to feed a giraffe! And we saw a snow leopard chase its tail! And if you’ve never heard of a Maned Wolf, you should really look it up when you get a chance. What a crazy, cool imaginary animal.

The time to move along snuck right up on us. It’s always hard leaving anywhere we go, but especially when the place is home to our best buddies. But when the next destination is where you will meet up with your other buddies, it makes the sting a little easier to bear. 🙂

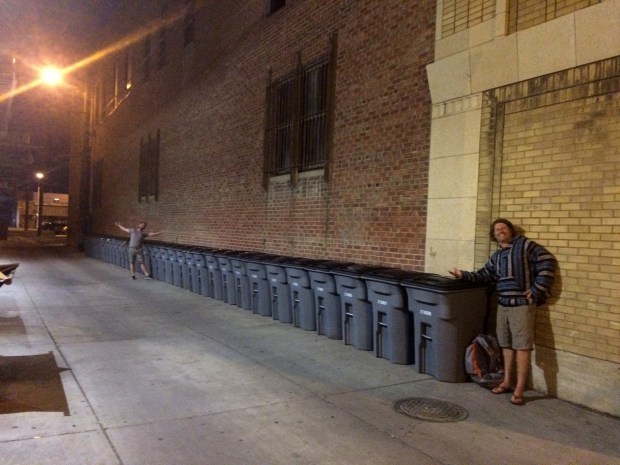
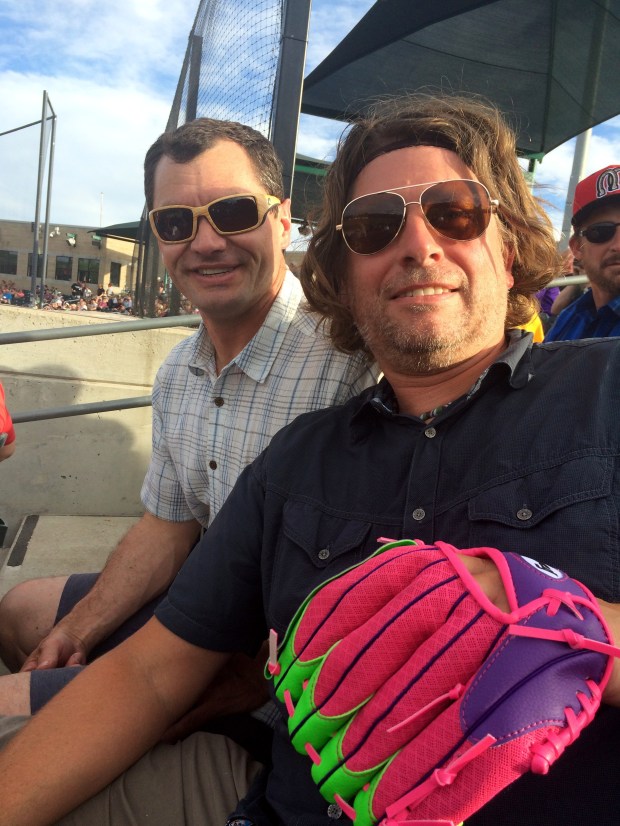
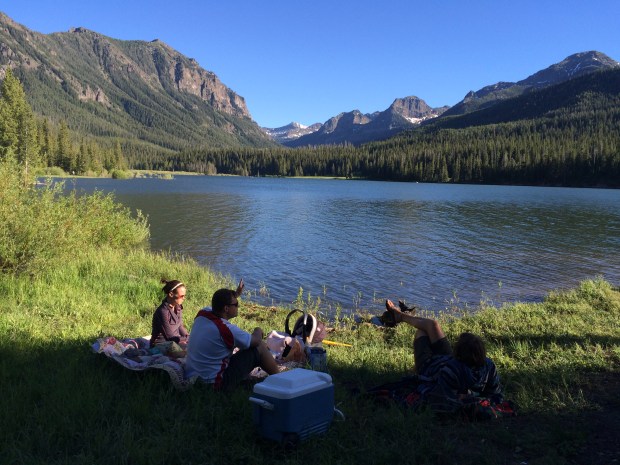
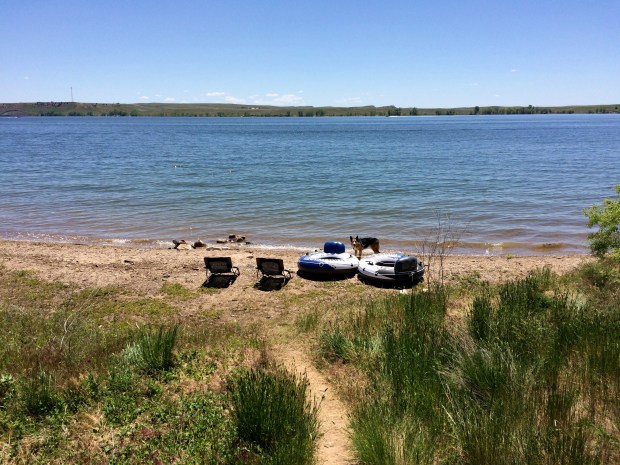
So on we drove to Missoula, to meet our Portland friends Kelly and Jason for a week of Montana shenanigans! And of course, more Montana sunsets.

IMG_4034

Huckleberry Heaven: Seeley Lake, MT

Of all the places we’ve been so far, never have we been so perfectly in the right place at the right time! That’s right, huckleberries are ripe early this year and we’re camped out right in the middle of a huckleberry field!

IMG_3344

If you’ve ever eaten fresh huckleberries, you will agree that this is likely the most magical part of our journey yet. If, tragically, you haven’t had the pleasure, do yourself a favor and come to Seeley Lake right away and I will treat you to the yummiest berry you have ever tasted. Of course I can’t tell you where the berries are—when you have a good huckleberry spot, you keep that information locked in a vault! I probably wouldn’t have even told Andy if he hadn’t been with me when we found them.

Ok, I probably would have. We’ll assume I would have. 😉

It all started at our camp site at Big Larch. We were walking Scout down to the water for some swimming, when Andy saw a ripe huckleberry on a bush along the path. We were so excited! Huckleberries usually aren’t ripe until mid-August! After a (quick) swim, we rushed back to the Turtle and got a couple Nalgenes and outfitted them with paracord and duct tape to make hands-free berry pails.

IMG_3112

We picked like crazy, but the spot was pretty thin. We worked for about an hour to end up with a few handfuls of berries, but it was worth it!

IMG_3120

Now that we knew there were ripe berries to be found, we were on the lookout. In between Berry Bush Searches, we enjoyed our camping spot: riding bikes, fishing, collecting firewood, and late nights stargazing and chatting by the fire. And of course, cooking up our berries into fresh huckleberry pancakes!

Gracie climbed trees pretty much the entire time. Our neighbors all thought she was hilarious. (I often forget how rare it is to see a house cat roaming around a campsite. We think it’s pretty normal these days!) I tried to get a photo of her up a tree, but the only one I was quick enough to capture was this one, and she’s mostly behind it!

IMG_3247

I did get a great video of her racing up a tree and bounding off, but I don’t know how to upload videos to the blog yet. And it’s gorgeous outside so I’ll teach myself on a rainy day! You can see it via our Instagram though: #blueturtlecrossing

After a week at Big Larch, we left to meet up with Andy’s family at a cabin in Seeley for the week. We had an awesome time! We fished and swam in the Clearwater River running behind the cabin.

We took a day trip up to Rainy Lake (not rainy this year, woo hoo!). We picnicked, fished, kayaked, and caught crawdads*.

*Andy and his dad caught crawdads. I did my best, but mostly terrified everyone at random intervals by shrieking whenever one raced through my fingers as I tried to scoop him up.

IMG_3403

We took a day trip to Lake Elsina where we fished, built fairy houses, floated, caught frogs, and sketched.

And to top it all off, while on a hike to find a fishing spot we stumbled across a huge huckleberry field covered with ripe berries! There are camp sites there, so Andy and I plunked our tent down to save the spot and we got to work collecting berries. The whole family helped, and during our stay at the cabin we had huckleberry pancakes, huckleberry bars, and huckleberry cocktails. It was pretty freakin’ fancy.

I love huckleberries more than any fruit on the planet. They’re small, but pack an incredibly intense sweet flavor. Yes, they’re related to blueberries, but there’s no comparison! They like blueberries’ much more stylish and exotic cousin, who has loads of exciting stories to tell and a great sense of humor. And looks great in hats.

IMG_3742

Based on our huckleberry discovery alone, we decided to stay another week! Our site is beautiful, overlooking the lake, and we’d love it even if it weren’t surrounded by ripe berries. . . but they really do put this place over the top.

IMG_3584

We’re definitely making the best of it—every day we’re out collecting berries!

Huckleberries look like small blueberries, with the same “bull’s eye” at the base, but their color can range from black to blue to purple to red. And unlike the copycat bushes we’ve been seeing next door to the real bushes, the leaves are staggered—not paired. Don’t forget to push the leaves back to check underneath – that’s where most of the berries are hiding! We’ve found a wide array of colors and sizes here, and they all taste spectacular.

We’ll walk down the road, with Scout leading the way and Gracie following close behind, and settle into a nice spot.

Gracie rolls in the dirt and perches on logs while Scout leaps through the bushes and grazes. Andy taught him to pick berries right off the bush, and now he happily helps himself! (Another funny video of Scout picking berries at #blueturtlecrossing, or if you’d like, you can follow us on Instagram at @amycsummers)

Every day we make a huckleberry dish; the most decadent so far was the huckleberry sangria I made two nights ago. It was divine. A friend of Andy’s caught and delivered four delicious cutthroat trout right to our site the other night, so we cooked that up on the fire with our sangria and felt very spoiled indeed. Thanks Joe!

IMG_3764

We’re heading to Great Falls in a few days, so I’ve got to go back to berry picking now! My goal is to fill the freezer before we leave—we’ve got a 1 1/4 gallons so far, so I’ve got work to do!

Wahoo!

IMG_3766

Let’s Refurbish a Van – Part 4: Curtains

Of all the updates one can make to an RV, in my opinion the most drastic change for the least amount of effort is the curtains. It’s a way to infuse color, pattern and texture into the small space, especially in a vehicle like the Turtle, which has zero wall space for art. We almost have zero wall space for walls! Even if you aren’t a world class seamstress, it’s a simple shape to tackle, and honestly nobody even notices if your hemlines wobble a bit. I really encourage you to give it a try!

IMG_3047

When we got the Turtle, I knew I wanted to plan all my color choices around the curtains. It’s the best place for statement patterns, and I love-love-love a bright and colorful interior space, so I wanted to see what was available before making further paint or fabric decisions. Actually, it was the first decision I made at all, and I think I had the fabric in hand within the first week of owning the Turtle! I love a whimsical graphic print, and the green shade is so friendly and cheerful.

IMG_0108

When picking your curtain fabric, I highly recommend choosing outdoor fabric. This may sound obvious, but the selection of outdoor fabric is often pretty slim, and the allure of an entire store full of pattern and color choices seems like a fine trade-off for less sturdy material. But the outdoor fabric won’t fade as quickly as other fabric. It’s also mold and mildew resistant, which doesn’t seem like a big deal until you’re boondocking on the Oregon coast and the hygrometer reads 93% humidity and the windows are weeping and mold is knocking at the door. The last thing you want is to find your curtains flocked with green fuzz! Ours stood up to the damp like a champ.

Something to keep in mind about outdoor fabrics, though, is that due to their durability, they are slightly more stiff, and don’t bunch or ripple like regular fabrics. But if you take that into consideration, you can work around it by reducing the ripple a bit or giving your curtain rod span a few extra inches to account for the thickness when the curtains are pulled open.

IMG_3219

IMG_3228.JPG

As you can see, I opted for a gentle ripple, and at the top and bottom it’s still pretty thickly bunched. Additionally, since we don’t have a ton of room on either side of the windows in the Turtle to add rod span, that extra fabric to make the ripples does take up a little window space when they’re pulled open. So it’s good to pick the fabric you like, then decide how you’re going to mount the rods and how much the ripple will affect the length of each panel.

With that in mind, it’s time to determine yardage so you can buy that awesome fabric you found! What I needed to consider with our curtains was the fact that the Turtle’s walls are curved, so I’d need rods on the top and bottom to avoid them hanging far from the wall at the bottom. (I’d actually recommend this even for straight walls, as it keeps more light out and doesn’t blow around.) So I hemmed pockets on top and bottom, and made a double-fold hem on all sides. The double-fold isn’t necessary, but it’s a nice detail. Just fold the hem over, press it with an iron, then fold it over again, press it, pin it, sew it down! Do this to all four sides before sewing the pockets so the rods can slide through.

IMG_3233

Then fold the top and bottom pockets over, press them, pin them, sew them! This part can be tricky if you’re using two rods, as it needs to be nearly perfect so that the curtains stay taut but don’t pull on the rods or just not fit altogether. Even after explicit measuring, I ended up spending some quality time with my seam-ripper as I tried to get the fit just right.

IMG_3220

Oh, did I mention I had a hard time getting the fit right? Yes I did. It was difficult getting them to not balloon out, and when I took them in they strained the rods since they were a little too short. In the end, I had to make another pocket and sew it to the top of the curtains. This made it easier because I could adjust the pocket right on the rods and pin it in place before sewing it. If I did it again, I’d just plan on approaching it that way to save a headache! Luckily I love the way it looks, and if anyone asks, you can tell them I totally did it on purpose.

IMG_3232

IMG_3229

For the rods, I bought some dowels from Home Depot and some wood end pieces from JoAnne for the finials. Cheap! Andy sanded, stained and varnished them for me, and screwed the finials into the dowels. The benefit of doing it this way was that we could cut them to the exact size we needed inexpensively, and the wood end pieces already had holes through them, so screwing them in was really simple.

IMG_3217

Andy’s genius came in handy as we tried to figure out a way to mount the rods. He found some utility tool hangers at Home Depot that fit our rods perfectly and hold onto them tightly enough that they don’t slide back and forth. We painted them white, and done!

IMG_3218

For the tie-backs, I just sewed a strap with some navy fabric I found in the remnant bin at Mill End, and attached one end of each to some stainless steel eye screws I’d screwed into the wall.

IMG_3222

The other end I attached to stainless steel S-hooks.

IMG_3223

They wrap around the panels to hold them back, and then when the curtains are open, we just re-hook it so it stays out of the way (and so Gracie isn’t as tempted to bat it around).

IMG_3234

And there you have it! Inexpensive custom curtains that make a statement, liven up your small space, and are a nice splashy backdrop for pictures of your pets.

IMG_2948

If you have any questions about the process, let me know! As with any How-To post, I’d be happy to explain any parts in greater detail to help get you started on your own project. 🙂

A Very Montana Summer

Greetings from Montana!

It’s been a while since we checked in here, and today is a great day to update the blog as it’s stormy and raining outside here in Seeley Lake. Andy is busy working, and I’m doing my best to keep Gracie from trying to curl up on top of my keyboard as I type this. If any portion of this blog isn’t up to standards, you can take it up with her.

IMG_2971

We’ve traveled a fair distance (by Turtle standards anyway) since our last post in South Dakota! We made it to Billings after a quick overnight in Gillette, and headed to Riverfront Park right when we got into town so Scout could catch some sticks in the Yellowstone River.

IMG_2326

Then we went to Scheels to ride the ferris wheel! If you’re ever passing through Billings, be sure to check out this perplexing sporting goods store. It’s a mix of an outdoor store and a carnival, and just hilariously bizarre. We rode the 3-story ferris wheel, saw animatronic presidents, got our pictures taken with some wild animals, and also got our fishing licenses.

IMG_2328

Then we spent a few days with our friend Grant, who I went to high school with, and who is staying in Billings for the summer. We went to Alive After 5, rode our bikes all around town, and sat on the patio at Thirsty Street for a beer. Check out this place for sure; not a lot of places in downtown Billings have patios, and their patio gets great sun, plays good music, and the beers are super tasty!

IMG_2371

IMG_2375

We did a lot of bike riding, even though the temp was in the 90’s the whole time we were there! We had to pull over one day so I could run around in some sprinklers for a while. We took the dogs to Pioneer Park, had nachos on the patio at The Granary, and stayed up late playing games and gabbing outside in the grass. Fun times with Granty!

IMG_2430

One night we also came across this extraordinary line of garbage cans, which Andy was so taken with we had to take a photo with them. It really was an impressively long line of pristine garbage cans. (It doesn’t take much to keep the three of us entertained.)

IMG_2344

We also spent a few days with Blake and Martha, who always show us a great time! We went to a Mustangs game, and Andy offered to hold little Harper’s mitt for her. . . then wore it the whole game. She was too busy with her ice cream sandwich to mind.

IMG_2451

We had lots of great meals, the boys stained the deck, and Martha and I snuck out again for a beer while the boys watched Harper. I secretly think they just wanted to watch Mickey Mouse Clubhouse and Harper is a good patsy.

Then we moved on to Bozeman to visit my mom and sister Kari’s family for a few weeks. We even timed it just right (accidentally) so we were able to see my Grandma and Uncle Brian while they were in town visiting!  They were only able to stay for a day and a half, but we got to spend lots of time sitting around sipping coffee and sharing stories. What a treat! Plus Grandma finally got to meet Gracie and Scout, who had never made the trip to Newberg with us when we would visit her there. I only realized after they left that I never got a photo of all of us together! Bummer. So instead, here’s a photo of a Bozeman sunset.

IMG_2486

We also got to see a new baby Lipizzan pony! My sister and her friend and all their kids were going to see her, and Andy and I jumped right on that bandwagon. She was so sweet and funny, leaping around at top speed on those spindly little legs. Lipizzans are a special breed of horse with a fascinating history that we learned about from their owner while we were there. They are dressage horses who are super nimble and can perform some incredible dance moves cued only by tiny twitches in their rider’s bum and legs. Crazy!

IMG_2515

Then we went to the Museum of the Rockies, where there was a Pompeii exhibit that we really enjoyed. And their dinosaur bone collection is simply incredible.

That weekend, David and Kari invited us to an evening fishing trip up Hyalite Canyon. We picnicked, Scout swam, and David kept very busy helping the kids bait the hooks and reel in all the fish they were catching! The beginning of our trip was quiet on the fish front, but after we moved to another spot by the dam we all had better luck.

IMG_2567

Scout and Gracie love being at my mom’s the most, as they get lots of attention and total run of the place.

My niece Bella and I went for pedicures one day, and both of us are now sporting some killer sparkles. Bella even has fireworks on hers!

IMG_2677

When we got back to their house, the kids had an impromptu clothes-on pool swim.

IMG_2693

We ate like kings while we were at Mom’s, as she’d just cleaned her BBQ, and Andy installed a few parts to get it looking and working like new! So there were lots of fancy dinners off the grill, including a feast of salmon, steak, and chicken with ginger asparagus and grilled polenta for just the three of us. We could get used to spoiling ourselves like this.

On our way out of Billings toward Seeley Lake, we stopped for the night in a gorgeous spot in the middle of nowhere, and also made some fishing stops along the way.

IMG_2891

We decided to reach Seeley via Garnet, so we could visit the Garnet Ghost Town. The roads there are treacherous, and when we saw the caution sign, we decided to see what the Turtle was made of and just go for it! (Ok, Andy decided. I just said yes and wiped off my sweaty palms.) There were some seriously steep hills that were knuckle-biters. Andy was thrilled.

Neither of us had been to Garnet Ghost Town in over a decade, so we were excited to visit. We got there Saturday evening, and after the first 15 minutes, we were the only ones there! It made it really easy to use your imagination and picture what the town was like during the mining boom, when all the buildings were still standing. But the remaining buildings are well preserved, and they provide lots of information about the town and residents’ lives there.

IMG_2914

You can boondock at the ghost town for free, so of course we did that! We returned to the town the next morning to see the inside of the buildings that had been closed by the time we arrived the day before, and then drove on into Seeley Lake in time to celebrate the 4th of July with the other 3,000 people who come yearly for the parade and fireworks! We just happened to be boondocking right on the parade line, so we were able to easily pop our camp chairs up and watch the festivities with zero preparation or stress.

IMG_2992

After the holiday visitors took off we had our pick of the camp sites, so here we are now right on Seeley Lake. We hiked around the campground and harvested the abandoned piles of wood the holiday crowd left at their sites, so we’re all set to stay here for the next four days! In the next post, you can look forward to some sweet woodcarving projects, much like this impressive hot dog stick Andy made yesterday! We’ve got the time and plenty of sticks, so we’ll see what we come up with. . .

IMG_3066


Livin’ By A Lake: Why We Heartily Endorse Vandwelling

When we were moving out of our house in Portland and into the Turtle, our friends Rhema and Lisa gifted us a wonderful going-away gift: Lisa’s Sensational Pickled Carrots. She’d popped open a jar during a BBQ at their place a few months prior, and I forgot to eat most of my dinner because I was too busy going back for sevenths and eighths of those carrots! I agree with you that pickled carrots sound different, but I promise, they’re super-duper awesome. Lisa’s crazy in the kitchen.

IMG_3300
Lisa and Andy whipped up some serious turkey and stuffing last Thanksgiving.
Rhema and I helped by making sure the video games were played. 

The only bummer was that since she’d just canned them, we had to wait six whole months before we could eat them! So we put them in a box and labeled it “Do not open until April 21st, 2016.” Before sealing up the box, I thought it would be fun for us to write a letter to our future selves, predicting where we’d be when we opened the box. So we wrote our individual thoughts down, dropped them in, and taped that baby up.

As the date approached, we thought it would be fun to open the carrots when we were somewhere really neat. So as we approached Badlands, we decided that was it. That worked great for me, since I was too excited to wait any longer!

They were SO GOOD. What a fun going-away gift! It was a tasty treat that reminded us of Lisa and Rhema and the fun times in John’s Landing. We miss you guys!

After our snack, we opened up the paper with our predictions. Interestingly, without consulting one another, we both wrote that we’d probably be somewhere in Utah! I suppose because there are so many great parks around there, and we’re both so excited to spend time in that part of the U.S. But in order to have made it that far, we’d have to be covering ground at a much quicker rate than we are currently traveling.

IMG_0509.JPG
This is more the speed we’re interested in.

It was a moment of revelation and reflection for us; one that made us really appreciate an aspect of this lifestyle that we worked so hard to achieve. We wanted to be able to slow down and really enjoy each day of our lives, spending less time paying bills for a house we’re never around because we’re busy at work to pay the bills! Now we get to live virtually anywhere we like, for as long as we like. Unlike vacation time, we don’t feel stressed out trying to fit in all the fun right now. We can take our time and explore a spot at our leisure, take an extra day to do nothing if we choose, and see more of any area that interests us.

This is why we currently live by a lake. (We got here meaning to stay a few days, and we now plan to stay another week, or until this crazy 80-90 degree weather leaves!)

IMG_1872

And this is also why we emphatically hope that people who have the capability to try this lifestyle out will do it! One of the reasons we decided to blog about our adventures was to encourage and support fellow adventure-seekers to see that it’s possible, and more than that, it’s the best decision we’ve ever made. We’re living much more inexpensively, efficiently, thoughtfully, and healthfully. There’s a daily dose of adverbs for ya! Every day is a new experience and just a ton of fun (with a fair amount of work and effort involved, of course). We keep asking ourselves why it took us this long to figure this out! Andy always says he feels like we’re cheating somehow. 🙂

IMG_1686

Let me also acknowledge that I totally get that it’s not a possibility for everyone, and my intention is not to alienate those who aren’t able to make such a drastic life change. And according to lots of people we’ve met along the way, not everyone even wants this life! We get that too. It was hard work getting here, and can still be hard from time to time.

Our hope is that the blog can be both an endorsement for people thinking about this lifestyle, and also just a way to stay in touch with our friends, family, and other tiny house and travel enthusiasts, sharing what we’re up to for all interested parties. I know that for people with kids, it’s a much more complicated undertaking (though not impossible; we’ve met families living on the road!). I also know that we’re fortunate that both of us are able to work remotely, and that’s not true for all professions.

IMG_1812.JPG
A lunch break. Since I’m the only one in this photo, I’ll just go ahead and take credit for the lot.

But we have met a whole bunch of people who have always dreamed of becoming vandwellers or full-time RV’ers, and who could potentially take the plunge, but are still on the fence. When we started out, we had a hard time finding online resources of people who were doing something similar to what we had in mind. So if that’s the case for you, please follow along with us for tips on what’s working for us, or feel free to send us a message and we’ll do what we can to help you along the way! It’s a huge undertaking, but the end result is worth all the hard work. I mean, we get to live by a lake, for free!

For those just following along to see where we ended up and what we’re doing there, here’s a quick photo summary of what we’ve been up to for the last week.

IMG_1782

And if you’re wishing for greater detail on how Scout and Gracie are doing, just take these photos of Scout swimming for sticks and Gracie pouncing on buggies, repeat them to infinity, and you’ll have an idea of how they’re spending their days by the lake. Happy days for our best little friends. Happy days for us.

Family Fun in Bozeman, MT

The continuing adventures of the Blue Turtle now bring us from Craters of the Moon into Montana! My sister Kari was having a baby, so all the sisters descended upon Bozeman, and the Summers brand of fun and hilarious chaos commenced.

As anyone from a large family knows, it’s impossible to quantify the specific goings on of family time together. It’s just a continuously-morphing cloud of gabbing, laughing, playing outside, putting out the occasional fires, more gabbing, eating meals, more fires, board games, staying up too late, and—if there’s any remaining time—cleaning up.

With that in mind, this post will simply be a massive photo gallery. Because all I can say for sure is that we parked in Mom’s driveway, we were there for somewhere around three weeks, and in the meantime, this happened:

KIMG1704

IMG_1141

IMG_1055

IMG_1204

IMG_2229

KIMG1827


Thank you, tiny Elora, for being born and giving us all an excuse to get together and play! I missed capturing a lot of the action when the phone wasn’t available—if you can believe it—but there you have the general bullet points.

So with that we say goodbye to Bozeman! We were sad to leave, but adventure calls. . .

Let’s Refurbish a Van – Part 3: Tires (by Andy)

A Post by Andy

Maybe you noticed the tires. Maybe, like me, you love tires. We have fancy tires, and I would like to tell you all about them. Let’s start with what we had.

Pretty standard look for an 80’s era Class-C RV. The Turtle’s stock tire size was 215/85R16 on 8-bolt Ford rims. Single wheels in front, and dully rear.

We wanted to be able to go most everywhere, up dirt roads, over snowy passes, through water and mud, so we wanted a taller tire for more clearance, with an aggressive mud and snow tread. Also, as a general rule I am a fan of tall, skinny tires. Pizza cutters, some people refer to them as. Lots of trucks these days have big, fat tires, and they look pretty cool, but for most conditions they are less than ideal. I really like the Cooper A/T3 tread and have run it on other vehicles, so that was the choice for sure. As to the size: to get added clearance, a greater load rating, and to keep it nice and narrow, we went with 235/85R16.

Image source

The new tires are almost 32″ tall- a significant improvement over the stock height of about 30″- so we gain almost an inch of clearance with the new tires. Additionally the 235’s have a load rating of 3042 lbs per tire vs. 2680 lbs for a typical 215. The additional load rating does not increase the load we can carry, but it is just a stronger tire so they will live a long and happy life rolling along far below their load limit.

After selecting a tire and size, special consideration was given to the rims. It seemed reasonable to replace the 30 year-old rims, and due to the tire size change, this was actually necessary. You see, dual tires need an air gap between them to stay cool. The gap is a function of how wide the tires are, and the distance between the center of the rim and the plane where the rim bolts to the hub (a measurement called wheel off-set). Because the new tires chosen will be slightly wider, we needed rims with a greater offset, so we ordered 7 new rims with a 5.35″ offset (the old rims had a 5.15″ offset).

The rims actually lived in our house for many months before we were ready to get the tires. Though they did finally get their tires attached.

And they finally made it onto the Turtle.

Some additional touches included new lug nuts all around, and lug nut covers. We could only find the covers in stainless steel, so we ordered them, had the 32 brand new covers powder coated black for $40, and installed them. They add a nice, finished look, and will keep the threads clean too!

You can see we have a nice narrow tread but a taller traction tire. I did add a 1/4″ wheel spacer for the front tires to cancel out the additional offset of the rims and preserve (within 0.05″) the stock wheel center line for the steering. Luckily, the front hub was just proud enough to accommodate that and still have the hub-centric wheels centered properly.

1440607039365

The spacing between the rear tires actually increased slightly. All in all, it really worked out pretty great. The new tires will keep us safely stuck to the road in all kinds of weather and terrain, and I sure think they look pretty nice too! Maybe someday we’ll get even bigger tires…

1443392534009.jpg

We Made It!

We’re here!

On Sunday we arrived at Pacific City, Oregon for the first leg of our exciting new life.

IMG_4073

It was a bittersweet farewell from Portland, which was to be expected after living there for a combined 17 years! Portland holds a very special place in both our hearts, and it would take nothing more than a thrilling new adventure to convince us to leave such a unique and beautiful city.

January 30th was both the last Saturday of the month and my birthday, so shortly after noon we left our cozy slice of Sauvie Island and headed to my sister’s house in Washington. There we got to hang out with two of my three sisters, along with their husbands and all 8 combined kids! I was in sister/auntie heaven. The following morning, after a delicious pancake breakfast for me and a (requested) leftover pot roast breakfast for Andy, we said our tearful goodbyes and hit the road.

About a week earlier , we had purchased a Groupon for the Evergreen Aviation and Space Museum, and stopped there on our way to the coast. If you’re ever in the McMinnville area, I assert that it’s worth the seemingly-high ticket price to check the place out! You can easily spend at least 3 hours there, and more if you see a show in the theater or go to the water park. They have a waterslide that starts at the top of a Boeing 747! (Check it out at http://evergreenmuseum.org)

In the interest of time we didn’t do the water park, but we got to walk inside the Spruce Goose, take a tour inside a B-17, and see an SR-71 right up close.

IMG_4020

IMG_4013

IMG_4029

We arrived in Pacific City just in time for the wild hail storm hitting the coast, and checked into the park. The following morning we were lucky enough to get a bright and sunny start to our stay here! Andy had work to do, but over his lunch break we took Scout down to the water for some border collie beach fun! He was grinning from ear to ear, bounding down the beach and back, jumping up to spring off our legs, and then would bolt away for another lap. It was hilarious!

IMG_4064

IMG_4063

IMG_4076

IMG_4097

IMG_4106

IMG_4105

The rocky coastline makes for a dramatic backdrop! It’s also a lot of fun to climb around on. Scout made it to the top and back five times before we made it halfway up. This really is the happiest I can ever remember seeing this dog. He was having such a nice time he even let me catch a few photos of him.

IMG_4093

IMG_4117

IMG_4107

IMG_4122

IMG_4125

IMG_4127

We have a nice little spot for our tiny house right in the middle of the park. It’s a clean and friendly place, and as a extra bonus, the grounds are home to dozens of wild bunnies!

IMG_4131

We also have a great pool and spacious hot tub, which we have been taking full advantage of. Our new schedule allows us pool time before breakfast, during lunch, and after Andy finishes working. Andy gets so excited about pool time that his new work uniform consists of a warm hat, sweater, hiking boots. . . and swim trunks.

IMG_4138

KIMG1075

On our second day here, we opted to stay in the hot tub for the entire duration of Andy’s lunch break, so afterwards Scout and I took a trip down to the beach by ourselves. The sky was mostly overcast and the wind was incredible! It was stunning and invigorating.

IMG_4156

IMG_4206

IMG_4200

The waves were crashing and pounding on the horizon, and they whipped up the frothiest sea foam I’ve ever seen! A wave would push mounds of foam on to the sand, and then the wind would push it in peaks sideways down the beach. When I tried to pick it up in handfuls, it would vanish instantly in a wisp of airy bubbles. It was magical.

IMG_4239

IMG_4265

We endlessly marvel at how unbelievable it is that after working so hard over the last year, our vision has finally become a reality. It was incredibly hard work, but our dream to make our lives more about quality time together outside is now our real life! We’ll keep you posted on the goings on of the upcoming week, but so far it has been made up of relaxation, lots of laughing, and especially much more time for days like this:

IMG_4141


Let’s Refurbish a Van – Part 2: Exterior Paint

Hello everyone! I hope your New Year has been off to a great start!

We’ve been spending much of our time lately getting ready to hit the road—we have just a little more than two weeks before we leave! While we’re as excited as can be to start the adventure, it’s also a bittersweet process as we fill up our social calendar to say our goodbyes. So for now I’m going to pretend I have plenty of time to discuss that aspect of the journey, and instead we’ll go into how we made a brown Turtle blue!

Shortly after we bought the Turtle, we began dreaming up plans for change. Right away, Andy was envisioning the rack and its sky boxes, beefy new bumper, and fancy new tires. For my part, I could hardly wait to cover it from top to toe in an exciting new color! So while Andy created scale model paper pieces of the roof and the racks he wanted to attach, we yelled out colors and mentally tried them on for size. The moment we imagined the Turtle in a bright Crayola blue, we were sold.

Just to get a reference point, we looked into having it done professionally. Needless to say, it was a lot. There is a lot of surface area on this vehicle! So Andy did some research (those words will be seen frequently on this blog) and decided our best bet was to buy some boat paint and do it ourselves. As we looked further into the process, we were really happy with the plan to use marine grade paint. Unlike car paint, we could paint it with a brush instead of a spray can or gun. And unlike other paints that could potentially be applied with a brush, it is made to be super durable in the elements. When Andy found a brand he liked, we looked at their color options and found, to my delight, the absolutely exact shade of blue I had been dreaming of! It was meant to be.

We sanded down the entire Turtle with wet/dry sandpaper, and primed it with white //ws-na.amazon-adsystem.com/widgets/q?ServiceVersion=20070822&OneJS=1&Operation=GetAdHtml&MarketPlace=US&source=ac&ref=qf_sp_asin_til&ad_type=product_link&tracking_id=blueturtlecro-20&marketplace=amazon&region=US&placement=B0017KKKDO&asins=B0017KKKDO&linkId=fc0af2f1af67f4d14ae20361bec4c6d2&show_border=false&link_opens_in_new_window=false&price_color=333333&title_color=0066c0&bg_color=ffffff“>Interlux Pre-Kote primer. The Interlux paints we used ran between $40 and $50 a quart, but compared to the cost of having the job done, it’s a great deal.

Pre-Kote


IMG_1637

Then it was time for the serious business of painting an RV. Neither of us had any experience here, but thankfully Andy’s love of research saved the day again. The method most commonly used to paint boats is called “Rolling and Tipping.” One person uses a small roller to apply a thin layer of the top coat in small sections, then the other person follows behind and quickly but carefully uses a high quality brush to smooth out the bubbles. It’s important to make each section small in order to be able to blend it all together smoothly before the previous section dries.

For our project, we used a badger hair brush and //ws-na.amazon-adsystem.com/widgets/q?ServiceVersion=20070822&OneJS=1&Operation=GetAdHtml&MarketPlace=US&source=ac&ref=qf_sp_asin_til&ad_type=product_link&tracking_id=blueturtlecro-20&marketplace=amazon&region=US&placement=B001BWF718&asins=B001BWF718&linkId=d2af3fdcae720aa23812e2cc28f381b9&show_border=false&link_opens_in_new_window=false&price_color=333333&title_color=0066C0&bg_color=FFFFFF“>Interlux Brightside paint in Sapphire Blue.

Brightside


Before we began painting, I was incredibly nervous that I would make mistakes and the Turtle would look like a bad kindergarten arts and crafts project. But as we neared completion of the three coats it required to cover the Turtle, I think we both gave up on the need for perfection, as it was astonishing enough that we were just two people and we were painting an RV! The paint goes on super smoothly, and it’s pretty incredible to watch as the brush glides over the bubbles and melts the texture into a glassy sheen. If you look closely at the surface, you can see light striations in the paint, but overall we are extraordinarily proud of ourselves! It took weeks to sand, prime, and paint three coats, but in the end we spent far less than we would have if we would have had it professionally done.

In addition to the blue, we painted the top of the Turtle with Interlux Brightside White, and the bottom with Rustoleum flat black. Though it adds visual interest, the primary reasons were practical. The white top will keep us cooler when the sun is beating down, and the black hides mud and dirt and camouflages hatch doors. We have small cans of all three colors on board, so if the Turtle gets scratched or dinged, we can easily mend it ourselves. We found that taping off the layers still resulted in leaks and a super uneven line, so I just used a small brush to freehand the transitions. So don’t look too closely there. 🙂

I’ll share some lessons we learned for those of you who are thinking of tackling a similar project. But first, some process photos!

IMG_1646

IMG_1777

IMG_1780

IMG_1902


It was a bunch of work, but our sense of ownership and accomplishment is a great payoff. Here are a few things we learned throughout the painting process:

  • It’s best to paint on a cool, overcast day. Otherwise, the paint dries quickly after rolling, and by the time you begin tipping it’s impossible to blend sections well.
  • We had better results when tipping if we lightly dipped the very end of the brush in mineral spirits.
  • It’s easier to blend the sections if you tip into the previous section.
  • Edge around windows first so you can move more quickly over the main surface. We started by edging as we went, and it made for a more frantic painting session.
  • Relax and be realistic. We wanted so badly for our very first vehicle paint job to be as perfect as those we saw in YouTube videos, but as we painted we realized that we’re beginners, and that’s OK. Sometimes bugs land on the paint. Sometimes the paint streaks a little. Sometimes you have to sneeze and the paint dries some while you look into the sun waiting for the sneeze, and then by the time you start tipping again the paint has dried a bit and it smudges, and then you dip the brush into mineral spirits to help it blend better, but you use too much and the now-wetter paint drips down the side and on to your shoes and driveway. After the job is done, those little details aren’t as glaring as they seem when your face is right up against the vehicle.

I’ll check with Andy to get his input about our learning process, and update the list. But that’s what I can think of so far. If we can do it, anyone can! And the results are amazingly satisfying.

cropped-img_20981.jpg

Let’s Refurbish a Van – Part 1: Flooring

Well, it’s been raining virtually nonstop for the last few weeks in Portland, and Sauvie Island seems as if it’s ready to admit defeat and just merge with the Columbia River and call it a day. So I’m working from the island today, appreciating how warm and dry I am inside, and thinking about how just a year ago I was dreaming of this very scenario, feeling like the day would never come!

*Newly-formed lakes and sunken pumpkins on Sauvie Island not pictured. It has been raining so hard, one photo would send my phone right into a bag of rice.

These days, as we sit in the Turtle, eating dinner at the table or climbing up the ladder into our cozy lofted bed, we sometimes take for granted how much work actually went into this project. Because we gave ourselves such a tight deadline, we didn’t have time to stop and appreciate each accomplishment as it was crossed off the list, because there was another line item right below it requiring immediate attention. The moment we crossed one finish line, we’d look up and see there was another lap ahead of us!

IMG_3452
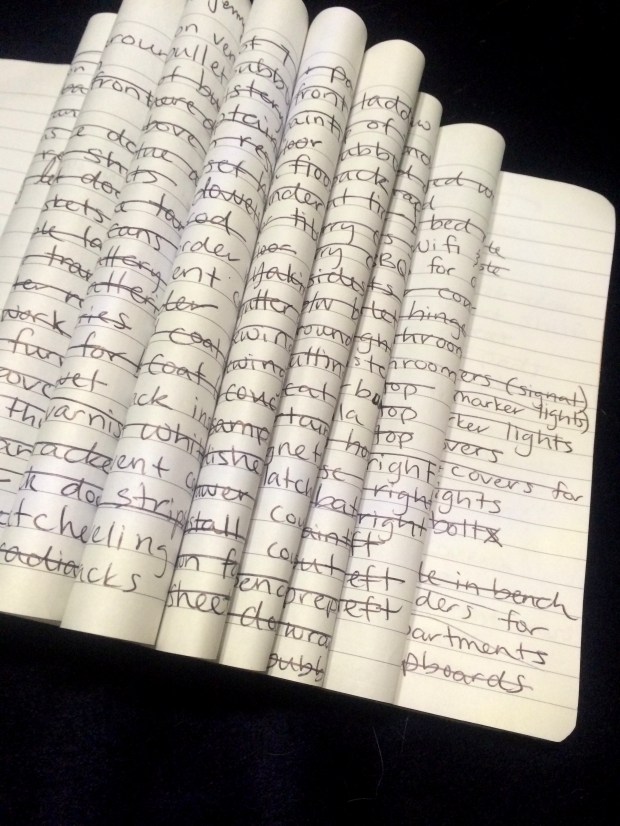
A portion of the list. 

If you’re thinking of taking on a similar project, or if you’re just curious how we got from Point A to Point B, here I’ll be discussing our process, and what we learned along the way. I will admit, our experience was made much easier due to Andy’s crazy number of useful skills! But if you’re like me and aren’t handy with welding, car mechanics, woodworking, and wiring lighting (among Andy’s many other contributions), don’t despair! The most inspiring thing about Andy is that when he comes across a job that requires skills he doesn’t have in his personal toolbox, he does research online, buys books, and reads the blogs of others who are skilled in that field. He then gets the needed tools for the job, and just gives it a go. Personally, I tend to get intimidated by new large-scale tasks that feel like they should require a professional. But throughout this project, following Andy’s lead, I found myself feeling empowered and excited to see what I could learn and accomplish. If I can fiberglass and epoxy a floor, anyone can!

KIMG0095The quality of this photo is terrible, but the cuteness is top shelf.

Our first goal in the refurbishment was to strip down the interior of everything we wanted to update. This included nearly all soft surfaces, as the Turtle is 30 years old and these tend to hold on to dirt and odor. . . and the design sensibilities of 1985.

So as it was the first change we made to the Turtle, for this portion of the blog, let’s discuss flooring.

KIMG0023
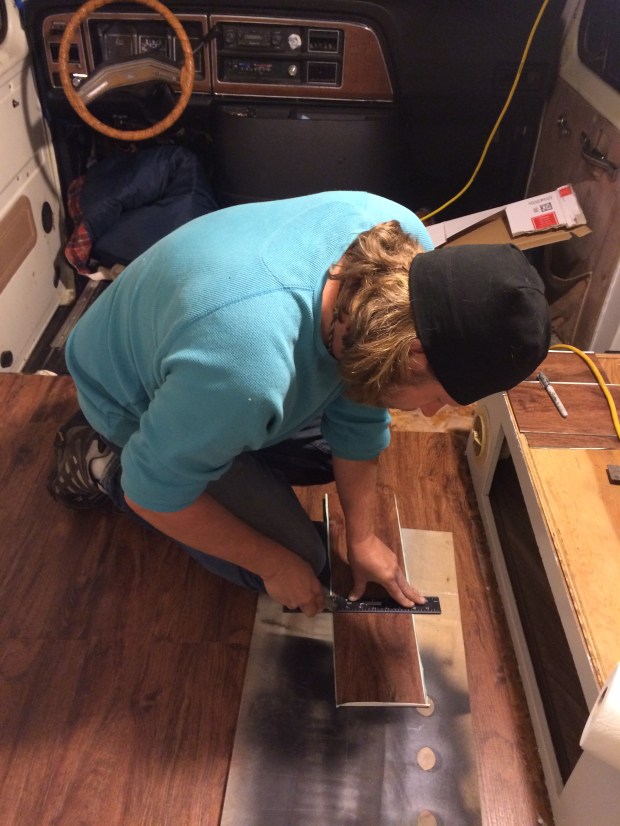
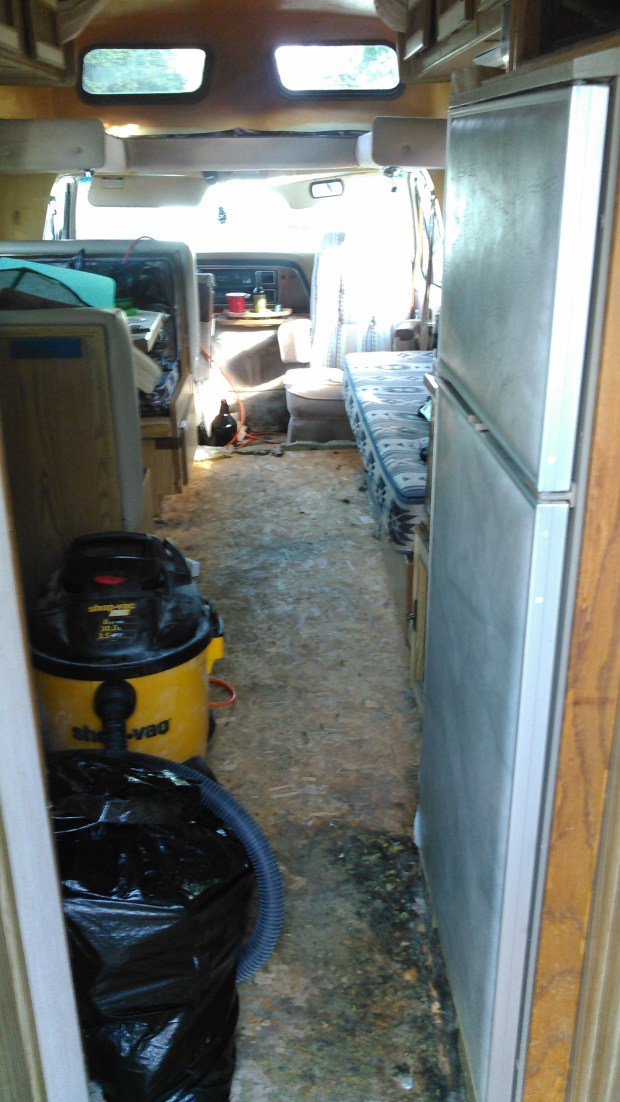
This is one of the only photos we have of the carpet before Andy pulled it out – just a teeny slice visible in the bottom left corner. But you get the idea. 

KIMG0020A bit more carpet shown here. We just got so excited to get started, we didn’t get a whole lot of “before” photos before things started changing!

First, Andy ripped out the carpets and the subsequent one million carpet staples. I’d like to say I’m exaggerating the number, but I kind of am not. I worked on just a 30″x30″ portion and the resulting blisters were highly impressive.

KIMG0050

KIMG0041

Underneath the carpet was the OSB flooring we were expecting to find. Due to its age and thickness, it tended to sag quite a bit when walked on, so Andy proposed reinforcing it with sheets of fiberglass cloth and epoxy. At this point, I’m going to use the pronoun “we” when I discuss our work on this project, because I now am a fully qualified epoxy applier, and proud of it! Though of course Andy did much of the up-front work before training me—but I felt very pleased with myself when I realized that I can now strengthen any old floor I like!

In a few areas, the flooring had rotted out pretty significantly. Ever the optimist, Andy was pleased that it was an easy early indicator of where we had leaks that we needed to fix, before finding out the hard way when the rain hit! So he cut out the soft blackened area and replaced it with another piece of OSB that he cut to fit.

So, in small increments, we 😉 laid sheets of fiberglass cloth over the floor of the turtle and rolled thin layers of epoxy over it with a small roller, eventually covering the full surface area and applying additional layers in the weaker spots. Between each layer, we sanded it down to keep it nice and smooth, as portions of the fiberglass tend to raise up a bit here and there.

IMG_0383Halfway epoxied. (Guess which half!)

It was so smooth and shiny that Andy originally wanted to leave it as it was. Truthfully, it really had a neat industrial quality to it, but as it was going to be our home, I was hoping for something a little warmer. He cared less than I did about this issue, so we agreed to find flooring to install over the OSB.

After researching a number of ideas for the flooring surface, we decided on vinyl stick-on tiles. They’re fairly durable, inexpensive, and if any damage is done to a portion of the floor, we can just pull it up and lay a new one in its place. Considering the fact that we plan to play hard while on our adventures, neither of us wants to tiptoe around the Turtle trying to keep it pristine. But we also don’t want to take all this time just to trash it either! So it seemed like the best route.

The majority of the options we found were square parquet-style tiles, which we liked, but I had my heart set on long planks. After some research, we found exactly what we were looking for at Lowes: cherry “wood” planks with some textured striations to give it a more realistic wood feel. They sell them both by the box as well as individually, and are relatively easy to cut to size.

IMG_1794-001

IMG_1714

IMG_2059

Aside from the fact that the Turtle has some ca-raaazy angles, installation was fairly painless. I’d imagine if you have a more uniform and rectangular vehicle, you’d have an easier time than we did. The Turtle, though, is made up of friendly-looking but unpredictable curves and turns, so both we and the box cutter were put to the test.

But we got it done, and there you have it! Brand new floors. They’ve been holding up great, and with all the rain and mud we’re experiencing out here lately, I’m so appreciating the ease of hard surfaces as opposed to a muddy carpet to clean! And with the recent addition of a few navy runners, it really feels like home.