hardware

3 Months in Baja: Guerrero Negro to Mulegé

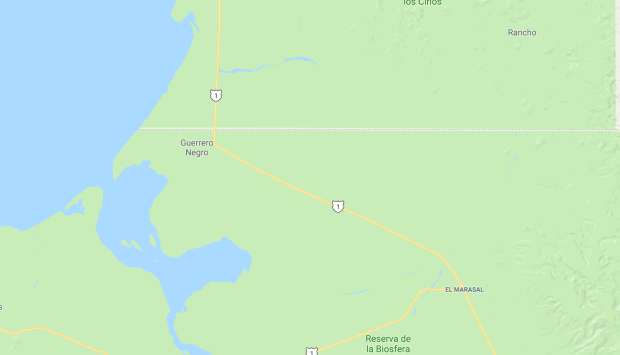
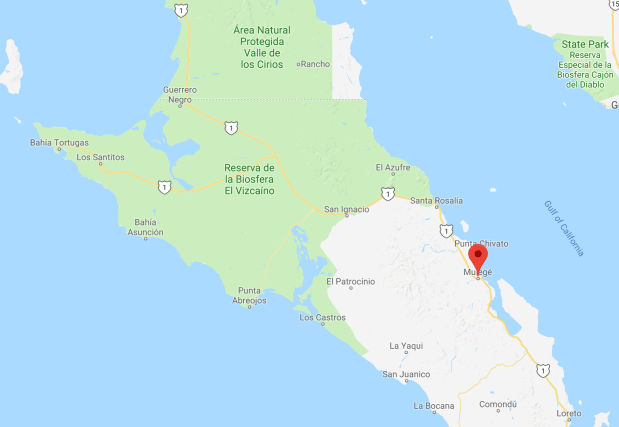
By the time we left Guerrero Negro, we’d officially made it into Baja Sur and and had been in Baja for 21 memorable days.

That dotted line just above Guerrero Negro is the border of Baja California and Baja Sur. Since we snuck in the back entrance on the remote dirt road, we missed that border inspection and the cost of being sprayed for bugs there. Hopefully we didn’t have any hitchhikers!

Screen Shot 2018-07-12 at 2.23.57 PM.png

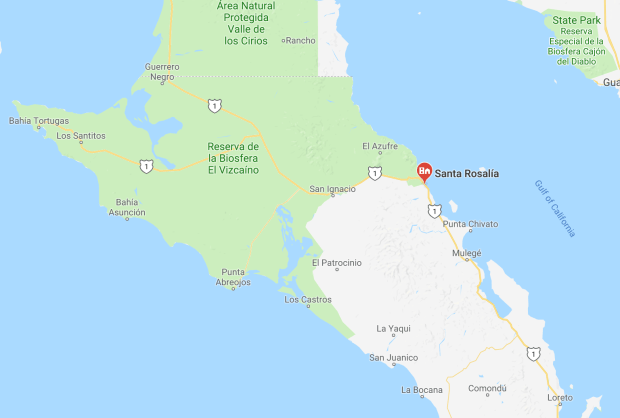
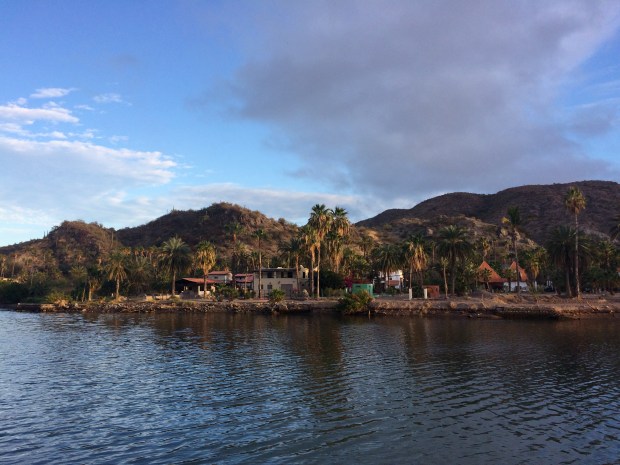
Our next stop was Mulegé, which we’d been told by most other travelers was the best town in all of Baja. In fact, many people drive down as far as Mulegé and then just stay the entire winter there, usually just south of town somewhere along the Bahía de Concepción. We were excited to see it!

IMG_9857

But first we passed through Santa Rosalía, a darling sleepy little town on the Sea of Cortez, a town unlike any other in Baja.

Screen Shot 2018-07-12 at 2.32.46 PM.png

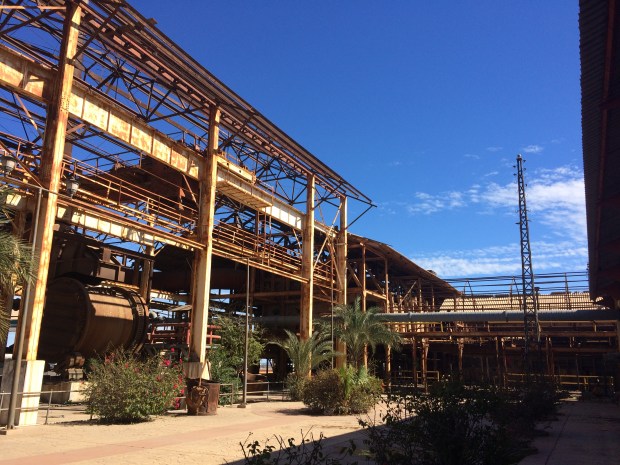
In the late 1800’s it was occupied by a French mining company who bought the rights to mine El Boleo copper mine there. The French influence can be seen throughout the town, from the remains of the mine, the wood architecture and the French bakery, Panadería El Boleo, that has been in constant operation since 1901 and is famous throughout the peninsula for its baguettes. I forgot to take a picture of it, but here some photos of the mining structures that were super neat.

IMG_9887

IMG_9889

IMG_9884

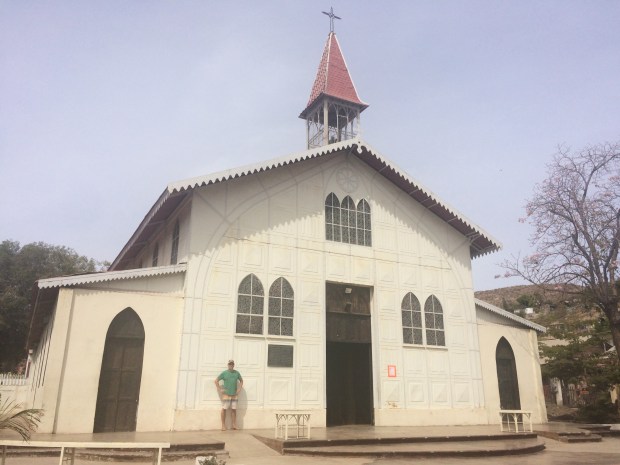
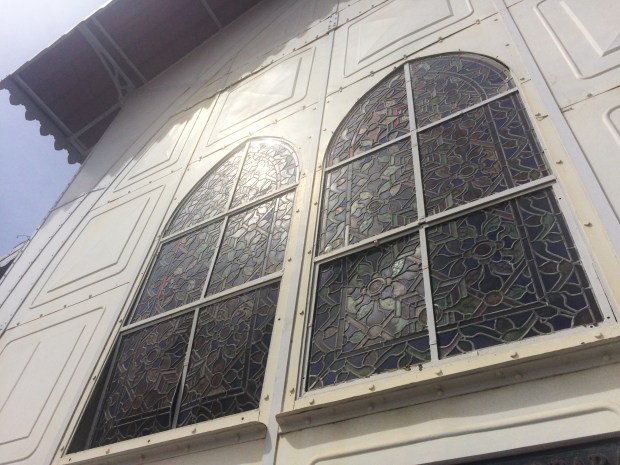
Santa Rosalía’s other claim to fame is the Iglesia Santa Barbara de Santa Rosalía church,  designed by Alexandre Gustave Eiffel (who you may know best from another little project he built in Paris). The church is made almost entirely of iron, which was constructed in Europe and then shipped in sections to Santa Rosalía where it was reassembled.

IMG_3521

IMG_3522

IMG_3523

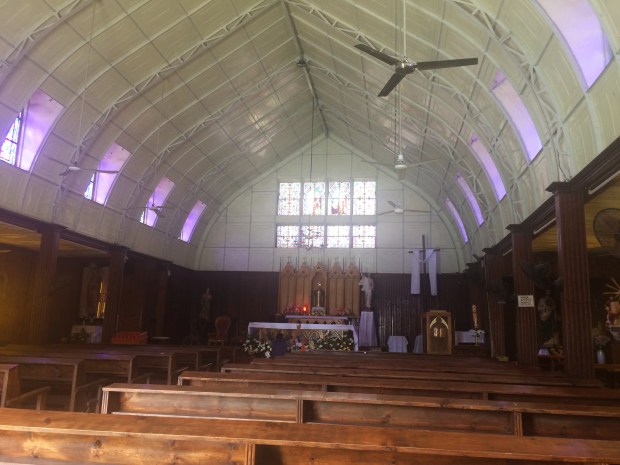
I discreetly took a quick photo of the interior before I saw the sign that asked me not to take any. But the damage had already been done, so the illicit photo remains here for your benefit.

IMG_3525

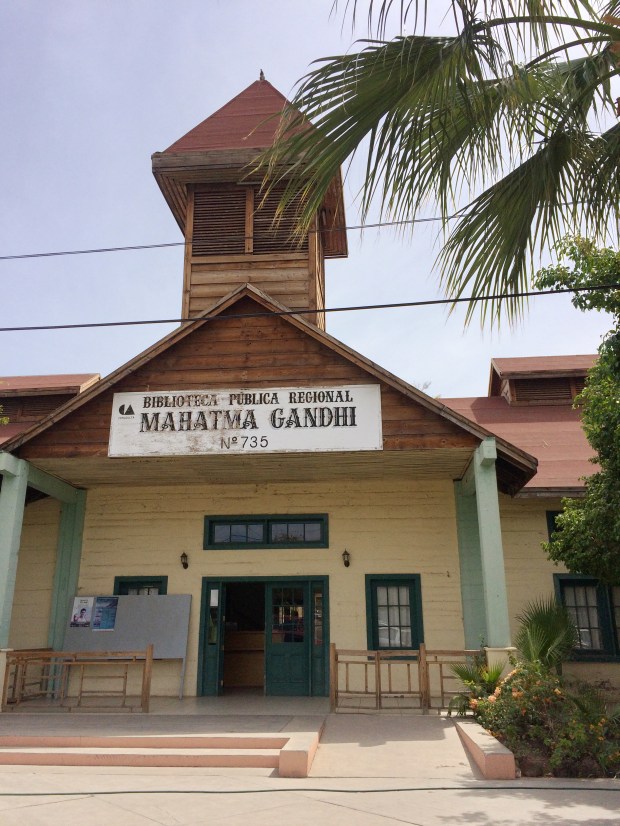
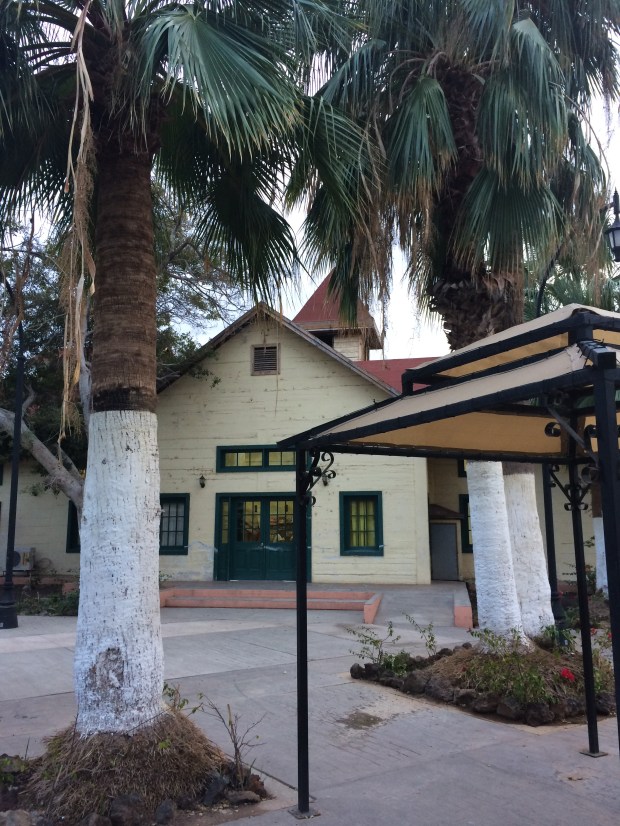
On our way into town we investigated the spot that we’d chosen from iOverlander before arriving, dubbed it “Playa Basura” (Garbage Beach) and decided not to stay there. The historic town is wonderful, but the beaches there are black and trashed, and I didn’t like the idea of the animals running around there. So Santa Rosalía became our first in-town boondocking spot in Baja! We parked next to the town square by the Mahatma Ghandi Library, and chose a single spot instead of the double-length spot that another traveler had reported getting double parked behind the morning after boondocking there.

IMG_9861

IMG_3531

IMG_9863

We walked around town for a while, visited a ferreteria where we learned the Spanish word for hardware store, and looked for a new backup bomba de combustible to replace the old backup that the Turtle was now using as its primary bomba de combustible. No luck there, but we had fun drawing pictures with the helpful guy behind the counter.

For dinner, we had two options: the place that looked like it had incredible tacos but was blaring club music so loud we couldn’t even hear our conversation about why we didn’t want to go there, or the place with the crazy menu. We chose crazy menu and decided to try out a Mexican pizza for the first time. Aside from the confounding addition of candied maraschino cherries on my Hawaiian side, it was pretty good!

IMG_9864

We slept great in the middle of town, and in the morning noted that every single long parking spot was double parked, so we were grateful for the tip from the other travelers on iOverlander. Then we went to Coffee Star for some Wifi and the best mango smoothie Andy has ever had.

IMG_9865

After trying my very best to catch up on the blog, I had to give up when I realized that uploading a single photo took 12 minutes every time. I tried, guys! The trickle of Wifi throughout Baja is the reason I’m still playing catch-up here. (We’re currently in California, but I promise we’ll get to that soon!)

We abandoned plans to get work done and went next door to a taco stand that advertised “Tacos de Guisado” which was a new term for us. I Googled it and learned that Tacos de Guisado are a stewed meat breakfast and lunch taco, and that the stands open early and close usually by 2 or 3 p.m. It was just before their 2 p.m. closing time, so after the patient woman showed us each pot of mouthwatering meat since my dictionary didn’t know any of the words on the board, we ordered a sampling of them and sat out in the shade to eat.

And holy cow. Remember when I said we were on a search for the best tacos in Baja? We did it! It’s like a pot roast taco, which might sound weird but I assure you it’s scrumptious.

IMG_9867

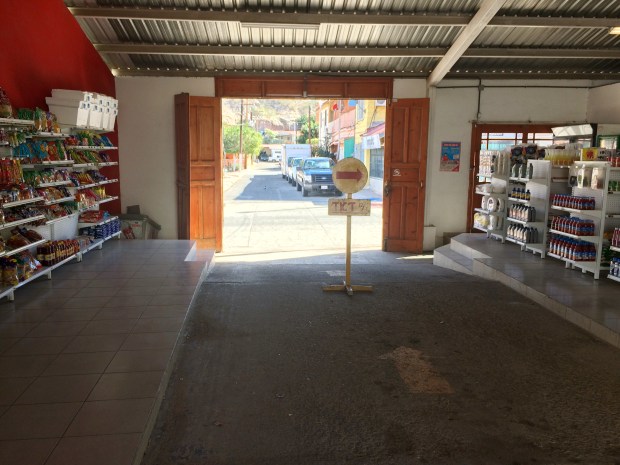
Our other favorite feature of Santa Rosalía was the pink drive-through Six! And when I say drive-through, I don’t mean they have a window. Cars can drive right through the middle! We loved it.

IMG_3516

IMG_9876

We left Santa Rosalía full and happy, and drove the short distance to Mulegé.

Screen Shot 2018-07-12 at 3.38.17 PM.png

The town is quiet, clean and very friendly. We ran into Ransom and Casey, some friends we’d met on the whale tour in Ojo de Liebre, walked around town some, and then stopped by a well-hidden second-story bar for a beer.

IMG_9899

IMG_9907

IMG_9908

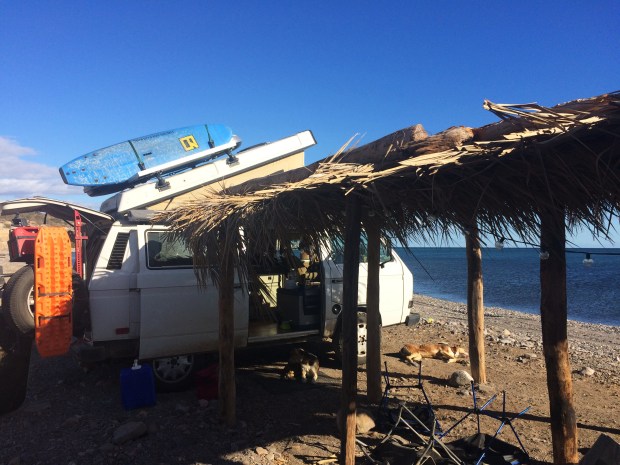
Before the sun set we drove up to El Faro, a public beach at the lighthouse just north of town.

IMG_9914

IMG_9937

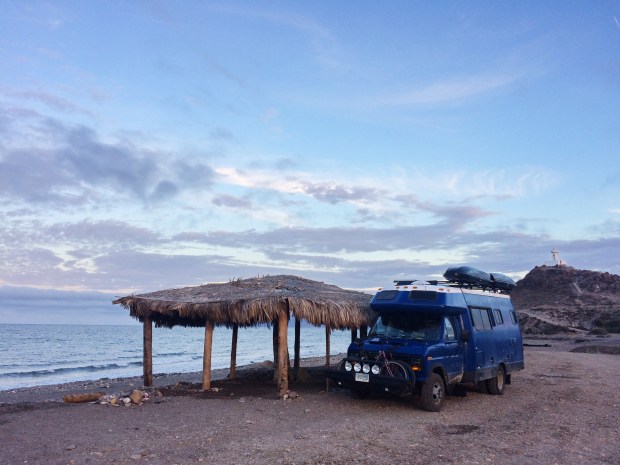
The first night was fairly quiet, and we enjoyed the spot very much. We walked down the beach to a little outdoor restaurant and had dinner and margaritas, then spent a pleasant night by the water.

The next day we walked around Mulegé, met Ransom and Casey for breakfast at a really cute cafe, explored the shops, did some laundry, and generally enjoyed everyone’s favorite town in Baja.

IMG_9944

IMG_9947

IMG_9951

IMG_9953

IMG_9964

We camped on the beach at El Faro with Ransom and Casey and were adopted by the local beach dogs. When we parted ways we made plans to meet up again somewhere down the road.

IMG_9967

We loved Mulegé, but we had a bit of a deadline. . . our friend Jason was flying into Loreto in a few days, so we made it a quick stop and promised to spend more time there on our way up north. We’d been saying that a lot, actually. We were never ready to leave when the time came, but Baja is a big peninsula and there is a lot to see! So far we’d made it about two thirds of the way down, and the best was yet to come.

Screen Shot 2018-07-10 at 4.21.05 PM


All Kinds of Parties: Billings & Bozeman, MT

As October neared its end, we found ourselves back in Bozeman, MT to visit my family as we continued our journey south. It’s still beautiful there!

IMG_4395

IMG_4398

IMG_4419

The weekend before Halloween, we drove over to Billings to spend the weekend with our good friends Blake and Martha. (Martha is taking this photo, so she is not pictured. Sorry Martha.)

IMG_4553

We were excited to have time this year to make Halloween costumes, and while we stayed with Blake and Martha we’d planned to dress up and go out with some friends. Andy was a steampunk mad scientist, and after he put the outfit on I realized that this isn’t too far a cry from his real persona.

IMG_4476

I was a steampunk mechanic, and the moment I put on the bustle I’d made (from curtains at Goodwill) I decided it was the one thing that’s always been missing from my daily wardrobe.

IMG_4479

IMG_4550

Once the group arrived at Blake and Martha’s, Martha unveiled the snacks that she had prepared (with some help from Andy and Blake, they’ll want you to know). Aren’t they adorable?

IMG_4482

And isn’t the group adorable?

Halloween.jpg

Off we went to a local pub downtown, where the Halloween party was just beginning. (Wonder Woman did not join us on this portion of the outing.)

IMG_4505

IMG_4500

IMG_4489

IMG_4540

IMG_4516

We had a blast! It was a fun night, and a super-fun weekend hanging out with good friends. We watched a couple World Series games, ate some Chalet Market sandwiches (my favorite), Blake, Andy and Harper carved pumpkins. . .

IMG_6144 1.JPG

And then suddenly Blake had to go back to work. BOOOOO!

IMG_E4493.JPG

He was probably relieved.

It was still sunny in Billings when we pulled away.

IMG_4474

And no sooner were we in Bozeman than the snow began to fall.

IMG_4613

Though Gracie enjoys snow as much as any adventure cat, she preferred my mom’s warm bed. And when it wasn’t available, she’d wait outside the door for her turn.

IMG_4605

The rest of us enjoyed playing outside.

IMG_4598

IMG_4617

IMG_4622

IMG_4624

IMG_4632

IMG_4649

IMG_4651

Then we’d come back inside to visit Gracie.

IMG_4390

The last time we visited Bozeman, we made good use of my mom’s kitchen and cooked up a number of tasty feasts for the three of us. Andy and I both love to cook, and do quite well with our three small burners, two pots, one small pan, and limited counter space in the Turtle. (We had authentic Pho while cozied up inside our tiny house in Deadhorse! It was pretty fancy.) But a complete kitchen with lots of space and a full sized oven is a treat we can’t resist. Andy had his heart set on cooking a turkey, and if you’re going to cook a turkey, you may as well make stuffing, and if you’re going to make stuffing, you ought to make mashed potatoes and gravy and also bake a pie, right?

It was weeks until Thanksgiving, but it seemed like the plan was shaping up into a real party. We christened it Fall Feastival, and invited my sister’s family and a few friends over, and Andy spent all day carefully preparing the turkey.

IMG_4678

IMG_4685

Meanwhile, Clive and Scout and I played in the snow. That boy can really throw a frisbee, even with winter gloves on. Scout was very impressed.

IMG_4689

My sister and I contributed to the meal a bit, but mainly it was Andy’s show and he was happy to have full reign over the kitchen. He made stuffing and gravy so good we all considered drinking it straight out of mugs.

IMG_4692

IMG_4702

It was a genuine feast! The turkey was without a doubt the best I’d ever had. Andy really knocked it out of the park! I made a pumpkin pie cheesecake and hot chocolate for dessert, just in case we didn’t feel we’d spoiled ourselves enough already.

IMG_4711

Afterwards we played a little Pin the Tail on the Turkey, which Liam, Clive, and Bella all helped put together.

IMG_4716

IMG_4719

IMG_4723

IMG_6145 1.JPG


IMG_4738

It was a wonderful celebration! Maybe the First Annual? Any excuse for a feast.

The Fall Feastival marked the end of our visit to Bozeman, so on we traveled toward our next stop: Spearfish, South Dakota. It’s always so hard to leave my people, but we’re grateful to see them as often as we do these days.

I mean, if we didn’t live in the Turtle, I may have never seen this work of art:

IMG_4387

Liam made The Eye of Sauron’s girlfriend.

Like I said—my people.

Let’s Refurbish a Van – Part 6: Roof Rack (by Andy)

A post by Andy

{Note: The work detailed in this post was completed over the summer of 2015, before we moved into the Turtle. I am just getting the time to write the post now.}

So, we have stuff to carry. And we want a place to store our solar panels. And we want to stay cool. And, if possible, look cool. So, we need to put together a roof rack…

Here are a few pictures of the old RV when we got it. It had an aluminum ladder that was old and worn, along with the typical RV aluminum tube luggage rack at the back- all bits with some of the mounts loose. We also had a big plastic storage box bolted to the top, but it was cracked and would certainly leak. As you can see, there was also one solar panel and a mount for what I’m pretty sure was a TV antenna. Good stuff, but it was all pretty worn, as it had all traveled for close to 30 years and more than 250 thousand miles.


We wanted our rack and top equipment to do a few things for us:

  1. Have a dry and accessible place to store camping and fishing and other fun gear, out-of-season clothing, and some spare parts and equipment.
  2. Have the rack removable, so we can maintain and fix the roof when the need arises.
  3. Have a location to mount the planned solar panels.
  4. Design the rack to provide us shade.
  5. Have a system that we can change, add more solar to, move things around, etc.
  6. Be able to fill and seal up all the holes prior people made when mounting things to the roof, and have a system where moving forward we will not be drilling into the roof any more.

Anyway, roof racks look great! I hear they can be useful too. In truth, we have pretty limited room and storage inside, so having a bit of room up top for our extra supplies and garage-like stuff was essential for a successful voyage.

So, to the step of getting the old stuff off and sealing up the holes. Pretty much unbolt the bolts and pry everything else off. I then used fiberglass impregnated epoxy body filler for all the big holes (I love epoxy!), maybe adding wire to support it as it cured. I then added Geocel Proflex on the seams. I read about and tried a few things, but to date, it is my go-to for exterior sealing. Here is a link.

For the (many) smaller holes, I would first clean and fill with the Geocel, then screw in a stainless steel screw the size of the hole, then cover the head of the screw with another layer of Geocel. It is a technique I read about on the internet, and it seems to have worked well so far. Again, it is not worth buying any hardware but stainless or grade 8. It does cost a little bit more, but use the savings you get for doing this yourself to get the good hardware. Plus, you don’t have to worry about some interior rust and redoing the work down the road. After sealing the holes, I put down Rustoleum on all the modified spots. The following pictures show the antenna hole through the roof, and some of the removed parts scattered in the yard.

We were lucky enough to have a friend who worked for Yakima who gave us a VIP discount card for one purchase. With the card, we got 12 A1 rain gutter towers, 6 78″ crossbars, 12 wide body rain gutters, end caps, two 12-peice lock core sets, a Loadwarrior basket, and some cargo nets. A truly impressive amount of wonderful Yakima pieces at a great savings. Boxes and boxes of sweet components!

From REI, Amy and I used our one-item 20% member discount and each of us bought a Skybox Pro 12, shipped to the Portland REI for free. We got the long and narrow boxes to configure end-to-end, and not take up too much roof area width-wise. We effectively have the roof racks for 4 vehicles, all to put up top the Turtle. It added up to a lot of initial investment, but it has been working well, and added an important comfort to be able to store a reasonable amount of things to make our small world flexible, and I think it actually has a sleeker look being made from components—as opposed to a custom-fitted rack. Since we were doing all the work ourselves, we decided to invest a bit more on some nice new hardware. After popping down to REI and loading our new Skyboxes (in their own boxes) onto the top of the old Scout, we stopped for a bite in downtown Portland. Seems fairly reasonable to me, but I imagine to some people we made a sight…

The sky boxes, along with the other hardware, sat in the house for quite awhile. After stripping and sealing the roof, it was only logical to finish painting the Tutle blue, then do the white roof paint, and then finally get to the point where we could install the new roof rack. Consequently, this is what our place looked like for quite an amount of time. (As you can see, our front room was used to store a number of Turtle parts until they were ready to install.)

The pictures are few here, but after most of the painting was finished, I mounted the wide body mounts. I measured, marked, measured again, checked, and had the geometry figured out. On the corner of the Turtle roof, I would drill my two holes, fill with Geocel, cover the mounting surface with Geocel, align the bracket, screw in two (you guessed it) stainless steel lag bolts, then cover the seam and outside with Geocel. After it all cured, we repainted with the Interlux. It looked nicer with the black brackets and shinny bolts before the sealant and paint, but I didn’t want to risk it. And, just so you know, the asymmetric spacing along the length of the roof is due to needing to align the crossbars so they will not interfere with a roof vent when open, but also allow for the mounting points of the skyboxes. Here are the brackets installed:

kimg0798

It is a nice feeling to know that at any point we could unlock (all keyed alike, now) the 12 towers, unscrew, and remove the whole rack if we had to do some maintainence on the topside. Anyway, the pictures are limited at this point, but following are some involving the tower, crossbar, and rack install.

kimg0804

You might notice that the Yakima basket lost out to the solar panels. The basket is in the storage unit presently, and it would be great to get it up there at some point. When we were building and installing the rack, though, the geometric logistics were far too difficult for the time allocated. Anyway, to install the solar panels, I bolted two pieces of 12′ 6061 T6 aluminum square tubing to the crossbars with stainless steel carriage bolts and nuts fitted through the Yakima Universal Snaparounds.

I picked up used ones super cheap here. By the way, ReRack in Portland are nice people and can save you some money on roof racks, so check them out if you are in the area. Back to topic, after getting the aluminum properly spaced and installed, I then drilled and screwed the solar panel brackets to the the aluminum. That step was a breeze. Solar panels installed, photo taken probably a month in.

kimg0938

As to keeping it all cool. We planned on (and did), paint the roof surface with a couple of coats of Interlux topsides white boat paint. We actually painted the roof vent covers white as well. The assumption is that paint will reflect much of the sun’s heat, and be able to withstand the UV rays. So far, everything looks pretty good up there. We have some cracks in the paint where the caulking we used was not completely cured before we painted (I don’t blame the paint, we had time constraints), so we have some washing and fixing of some seams to do. Otherwise, all looks pretty good. A common approach for keeping a bit cooler is to have a couple of roofs, effectively carrying your own shade along with you.

The above old-school Rovers have a second roof with an airgap for passive cooling in the hot sun. (Side note, did anyone notice the tall skinny tyres the rovers are running on?) With the spacing added from the rack towers, and mounting the solar panels and boxes above the crossbars, we have a impressive air gap and continous shade on over 50% of the roof.

Currently, there is a middle strip free for walking, in which I will fit an additional panel at some point, then simply make some cheap synthetic or plywood panels and paint them white to increase our shade to close to 100%. So far, though, we have been to the Badlands of South Dakota in the summer, and have stayed with the ambient temperature with thoughtful venting and minimal electric fans.

To me, the goal is not to be cooler than the outside, all we need to do is not be hotter than the ambient temperature in all kinds of weather.

kimg0184

Oh, almost forgot, we want to access the roof! We need to clean the solar panels, get stuff into and take stuff out of the boxes, check on all the paint and seals, and most importantly, be able to climb up and yell with arms outstretched like you are in a movie! Anyway, the ladder…

We actually bought a car roof rack ladder as a start. The almost $200 ladder (seems crazy) was well worth the money, in the time saved. It always feels pretty weird to buy something new, remove it from the box, then start cutting it right away. So, the ladder, welding, adding more rungs for the proper length, and fixing the folding function.

Some close-to-final pictures here. We started with a 9-rung foldable ladder, and ended with a 12-rung rigid ladder that bolts to the bumper and the top rack. Again, it was designed to bolt to the bumper and rack, so it is removable…

I’m pleased with the removability of the ladder, because we crushed it a bit when we backed into a tree one day, about a week after it was finished and installed. The ladder was subsequently unbolted, straightened, and remounted. From the side, it now does have a bit of ripple (below the designed joint and by the spare tire)—this is what we call life.

kimg0186

To sum up a bit, up in the boxes right now we have a few fishing poles, extra wire and parts and unfinished projects, cloth for sewing projects, extra window insulation, snow shoes and masks and fins, river tubes, my old tent. A pair of driving lights I have yet to wire up. Some cheap speakers I plan on installing in the doors. You get the picture. We call it our attic.

img_1863

We have a completed rack now. It holds our solar panels, is our attic, and still has room to exapand.