how to

3 Months in Baja: Border Crossing to San Felipe

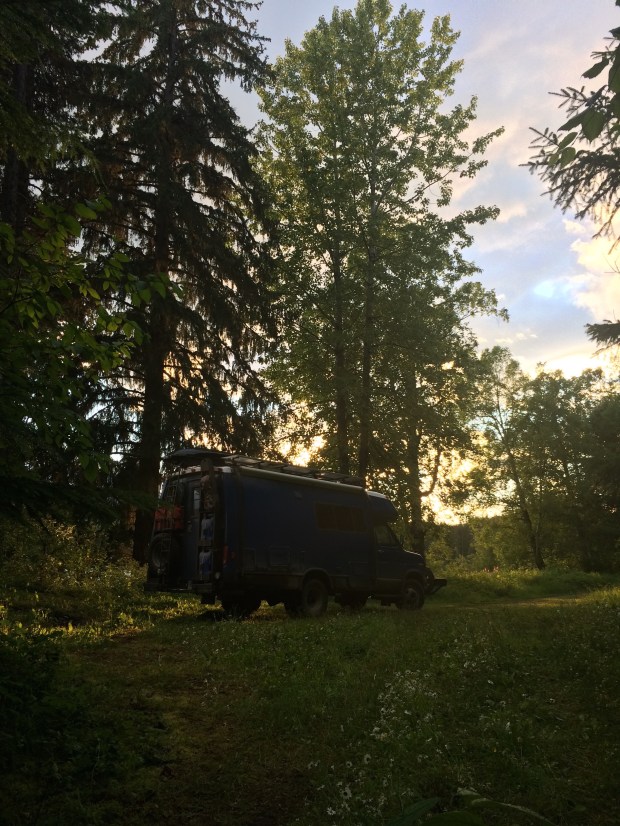
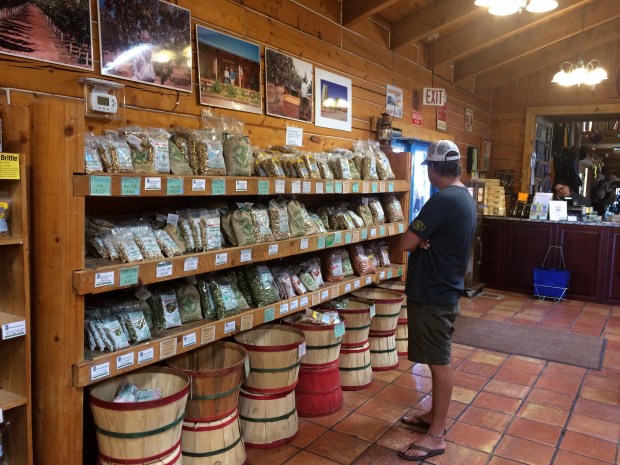
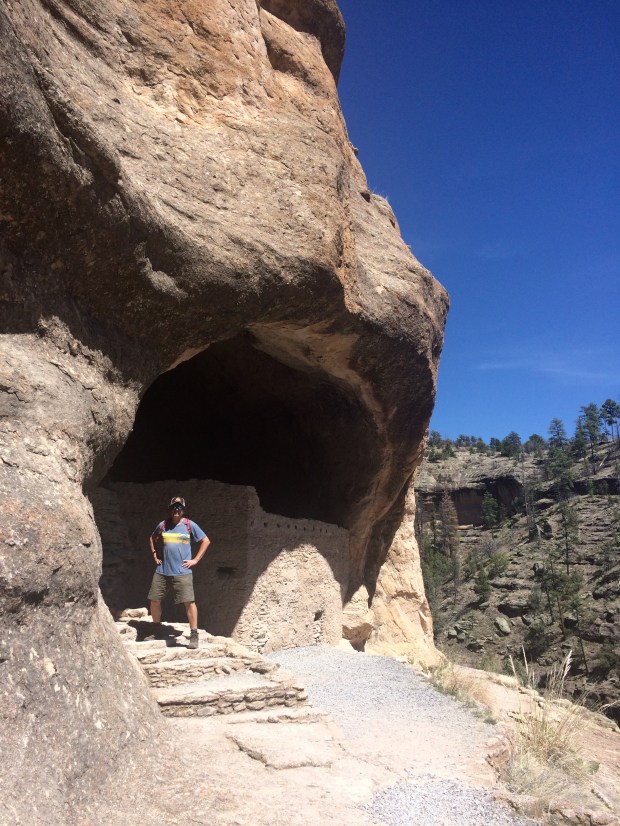
Since we first moved into the Turtle, an extended tour of Baja had been at the top of our travel list, though it continuously got delayed due to too much fun in the border states! We’d prepared for the trip as much as we could manage amidst other adventures—which is to say we bought the book everyone recommends for travelers driving through Mexico. It’s called the Traveler’s Guide to Mexican Camping by Mike and Terri Church, and we found it a useful resource for planning the trip. We’d recommend it for anyone planning a van or RV trip to Baja and/or mainland Mexico.

9780982310106_p0_v1_s260x420

It gave us enough information to choose a border crossing that worked best for us, informed us of the crossing process and procedure, what cards we’d need to obtain after arriving, and helped us make our lists of things to do before crossing, such as buy Mexican insurance, ensure we were up to date on the required pet vaccinations, and get some pesos to have on hand, as credit cards are scarcely accepted. It has a fairly up to date list of all the campgrounds in Mexico, which is quite useful since cell service is unreliable on the peninsula, making it difficult to look up places to stay while you’re on the move.

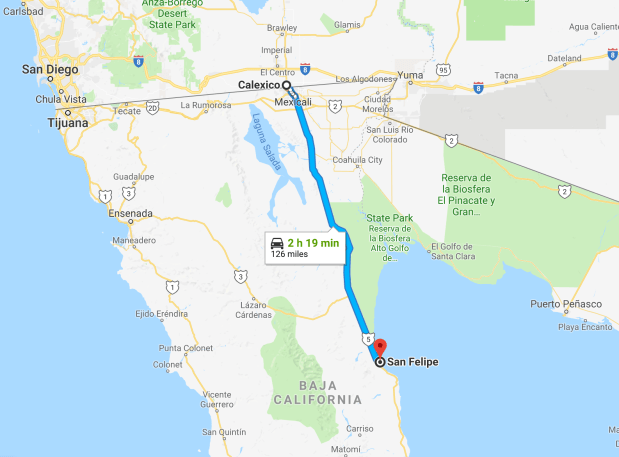
It also recommended we stay overnight somewhere near the border so we could cross earlier in the day when there is less traffic, which was something we’d planned on doing anyway as we still had some research to do now that our Baja trip was actually on the horizon. We found a great spot in El Centro—not far from our chosen border at Calexico—that was so fabulous that we decided to stay an extra day!

IMG_8199

The Rio Bend RV Resort was the perfect place to relax, swim, and get all the necessary pre-Baja jobs done, such as laundry, flushing tanks, using WiFi to buy insurance and get it printed at the office, dying hair, etc. (Dying hair is on the to-do list for all travelers, right?)

IMG_8204

They have a great dog park, a golf course, a pool and hot tub, an outdoor bar by the pool with great happy hour food and drink specials, special events like the Murder Mystery dinner we attended, and a staff that was so nice we felt like regulars the first hour we were there!

IMG_8205

IMG_8226

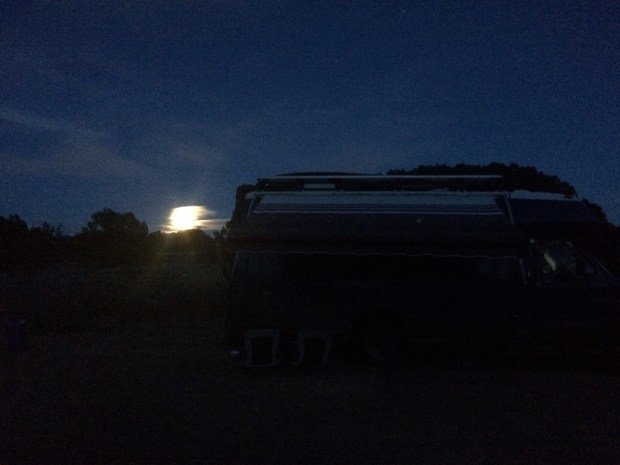
We were fully refreshed and super excited the morning we drove to the border. It was about 10 a.m. when we got there, and we only had a handful of cars in line in front of us! Of course since we’re in a van—and a bizarre one at that— we expected that every time a search was possible, for us it was inevitable. Over the next few months that assumption proved true, though every search was an easy and pleasant experience, including our first one going into Mexicali. They just asked us to get out of the van so they could look around in the back, and as I held onto Scout outside, Andy gave the tour and did his best with a language barrier to tell the young guy what our plans were in Baja. It took all of five minutes and we were on the way!

IMG_8234

It was overwhelming driving our big van into Mexicali, where we didn’t yet know what all the signs meant and traffic laws seem optional. I recommend getting the signage basics under your belt before going to Mexico, since knowing that a sign with a big “E” means “Parking” is helpful when trying to navigate through a wildly busy city trying to find an invisible Banjercito. We somehow found a place to park, found the Banjercito, got our tourist cards, and got out of town!

IMG_8238

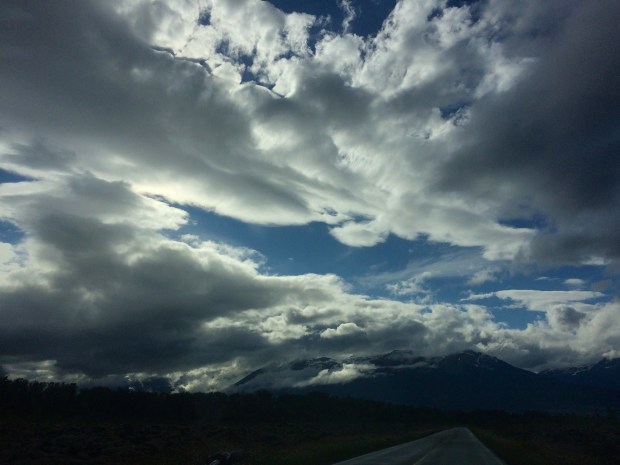
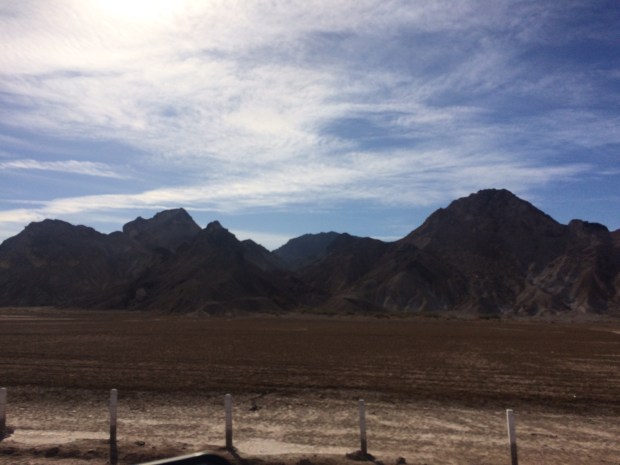
We drove across miles and miles of desert on our way south, laughing about the funny thing that had happened the day before.

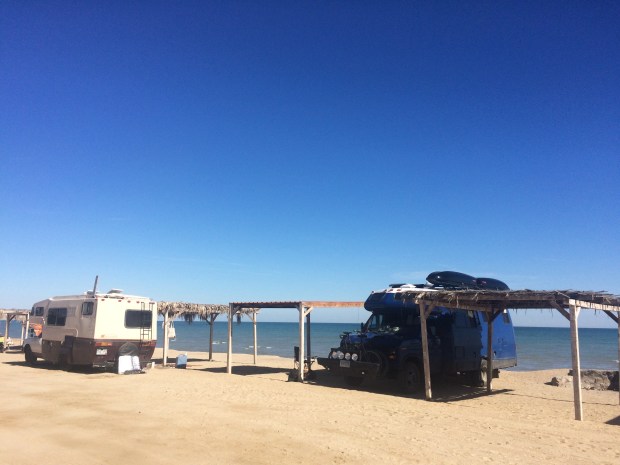
While we were staying at the RV park, we had casually been reviewing our plan to drive straight to San Felipe as we got ready to go for a swim. Andy sat on the couch and looked at his email, and after a few minutes smiling at his phone he let me know that he’d gotten an email from our friends Gary and Kiki, who we’d met at Mesa Verde National park last year and who have also been traveling full time in their charming van named Birdie. He related that they just wanted to say hello and let us know that they had decided to spend the winter in Baja, and presently they were enjoying a lovely spot on the beach just outside of San Felipe! Holy moly! Andy wrote back to let them know that we would see them tomorrow.

And now we were on our way, knowing we’d have a place to stay next door to friends!

IMG_8241

IMG_8243

We got to Gary and Kiki’s spot later in the evening, and sat outside for a few hours talking about where we’d all been and where we planned to go in Baja. It was totally surreal accidentally seeing friends in Mexico, and just so much fun.

Screen Shot 2018-05-20 at 1.05.36 PM

We thought we’d spend at least a few days at that spot as we acclimated to the new environment and enjoyed some time with our friends. Birdie and the Turtle looked so cute on the beach together. Animal vans unite!

IMG_8325

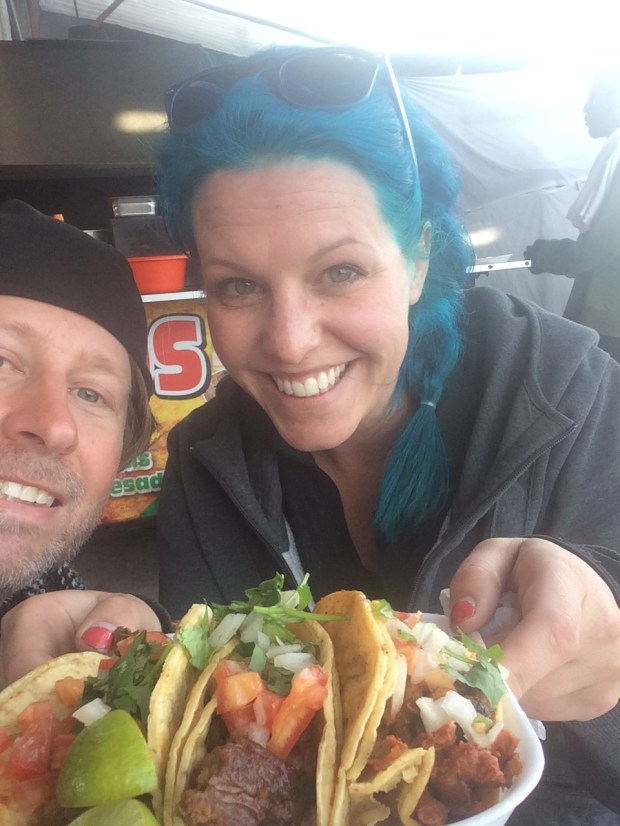
On our first day there we could hardly wait to go grab a few tacos, so we drove into San Felipe and picked a spot on the malecon for some carne asada and tacos adobadas. We sat outside with a view of the ocean and devoured those tasty cheap tacos. As we’re both big-time taco lovers, we made it our personal mission to find the best tacos in Baja, a job we exuberantly embraced.

IMG_8245

We checked out a few nearby shops and then stopped at a cute spot for a beer while we tried to memorize the pesos to dollars conversion. I got all the coins out of my wallet to look at the pesos, and we laughed at the combination of change I had on me. It was a fun reminder of all the places we’ve been.

IMG_8250

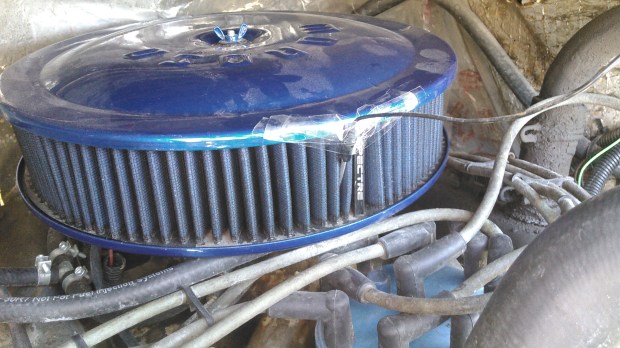
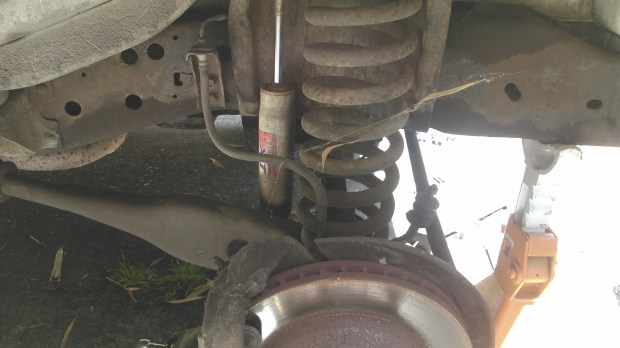
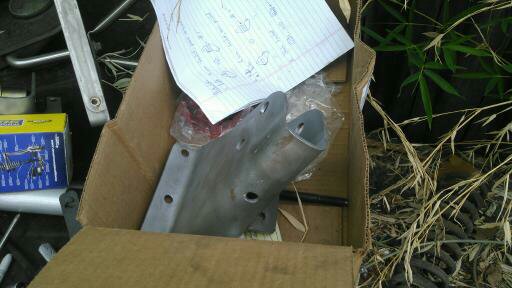
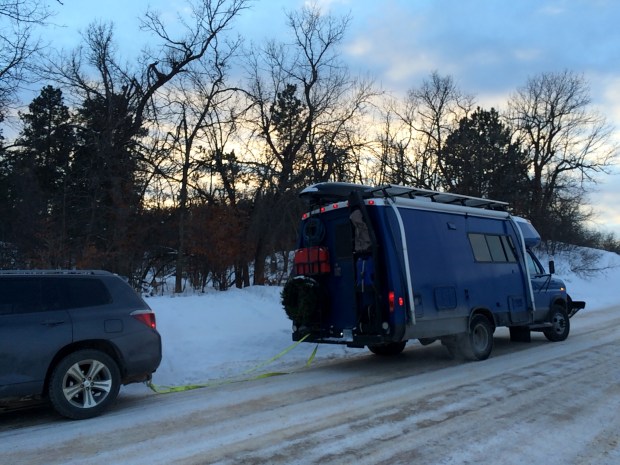
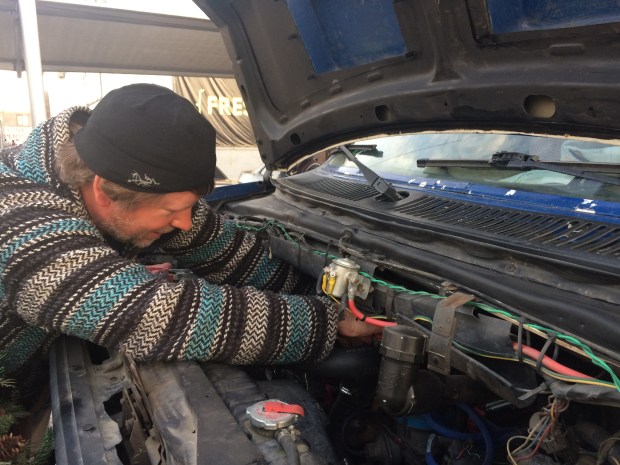
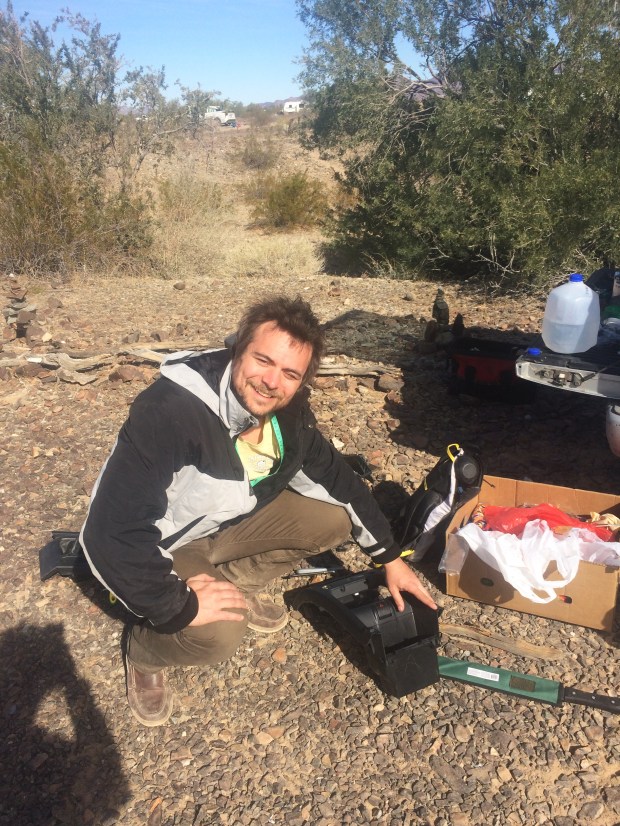
On our way back to the campsite, we stopped at the Calimax grocery store, and as we started the Turtle to leave we had our first Mexico breakdown! I took a photo for our records as Andy successfully fixed it. (It’s funny that these events are just a quick line item any more, as opposed to a tragic tale of how our day was ruined. Andy knows his stuff!)

IMG_8253

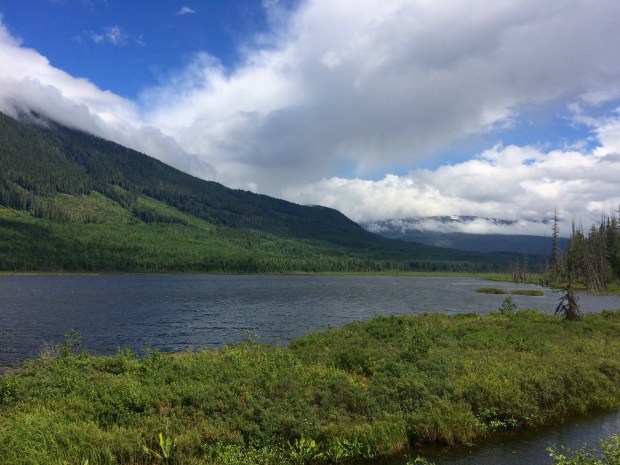
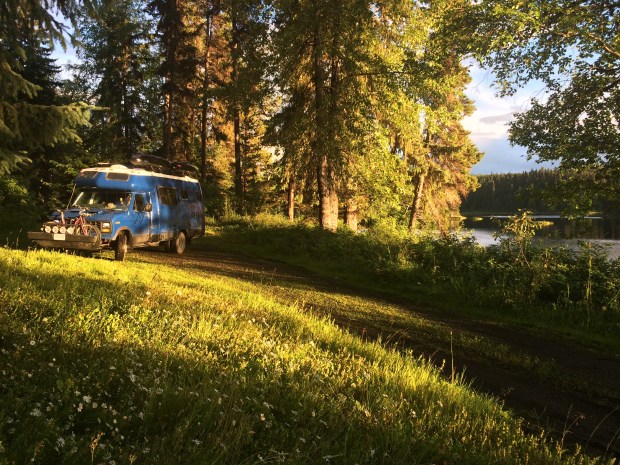
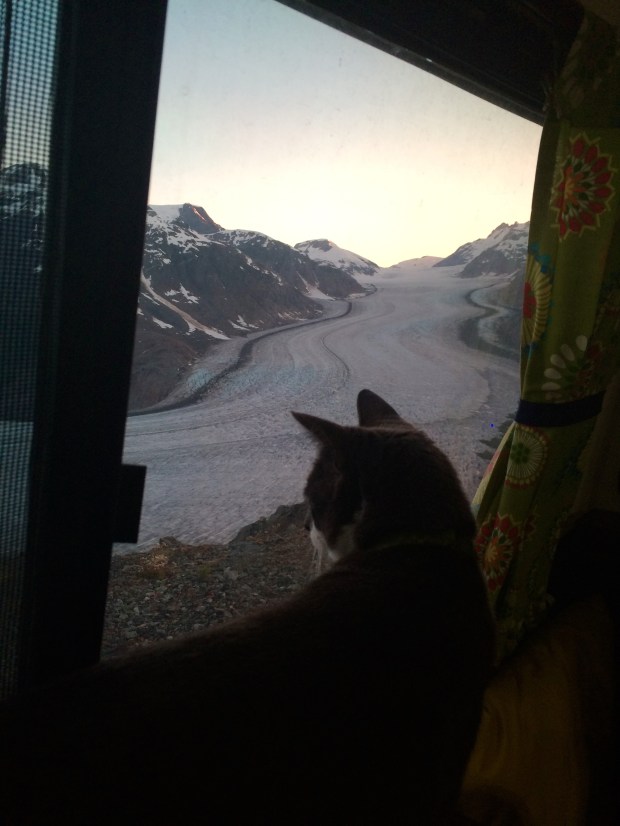
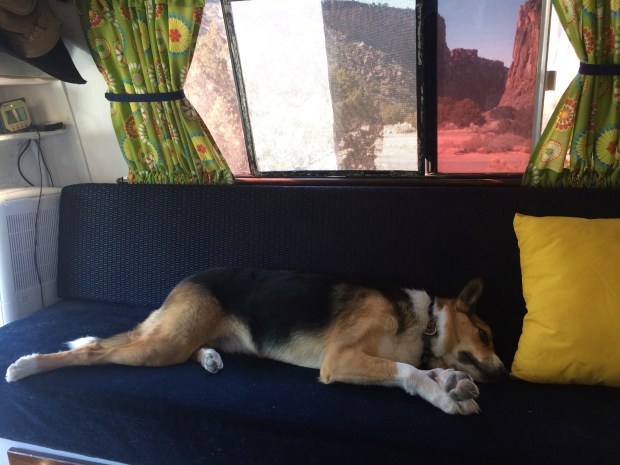
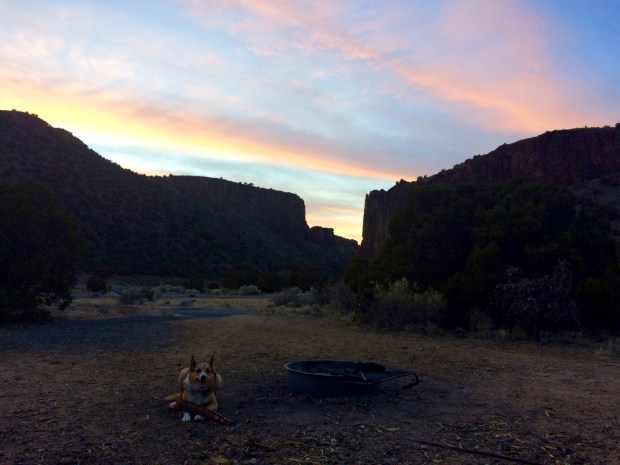
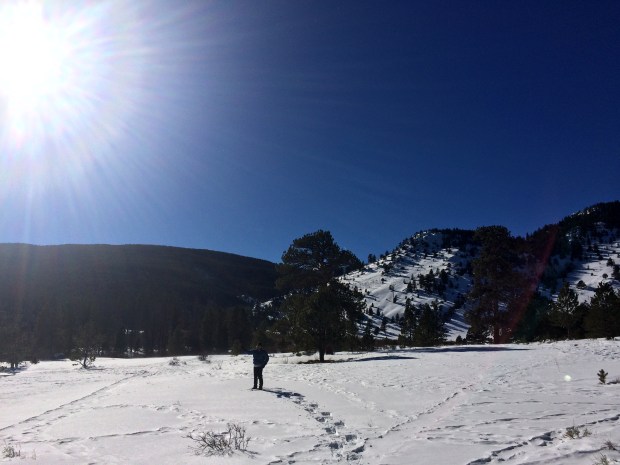
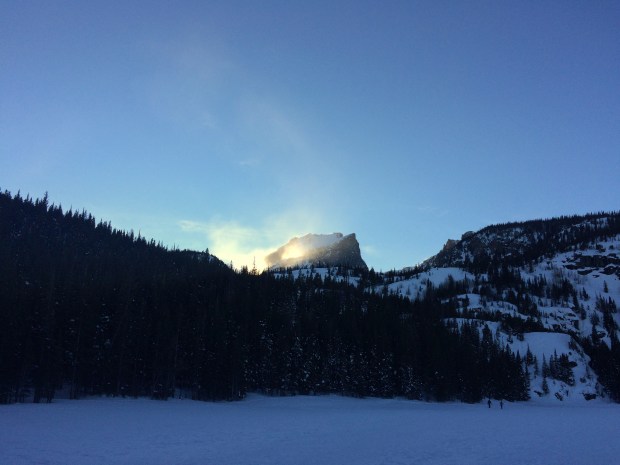
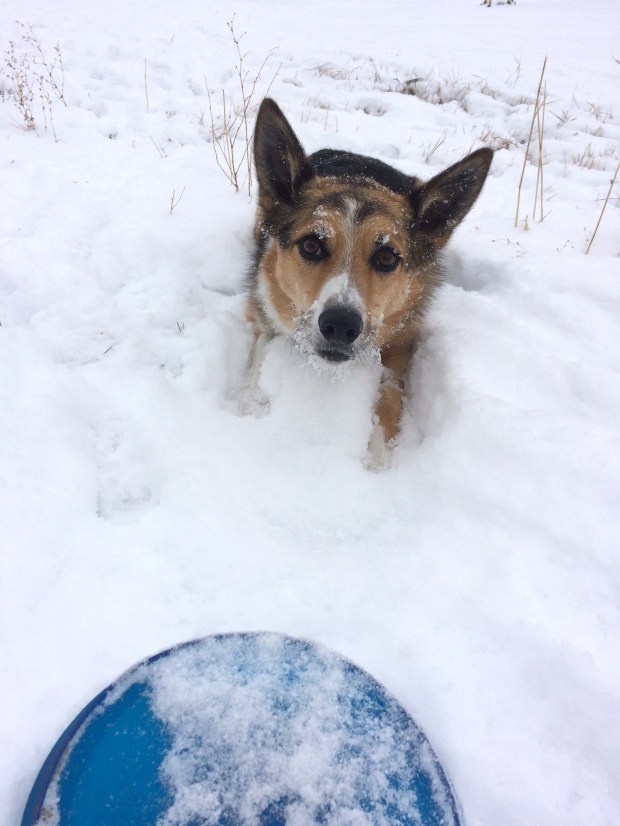
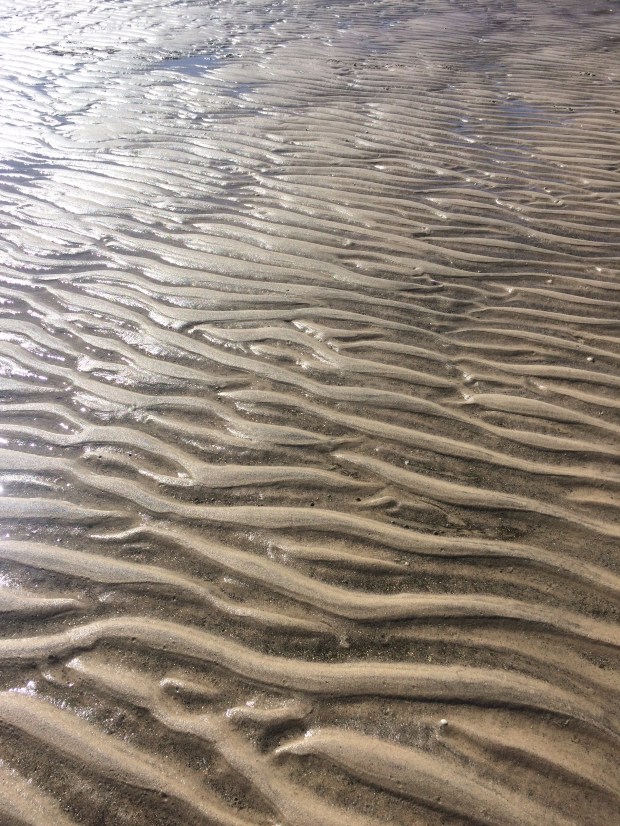
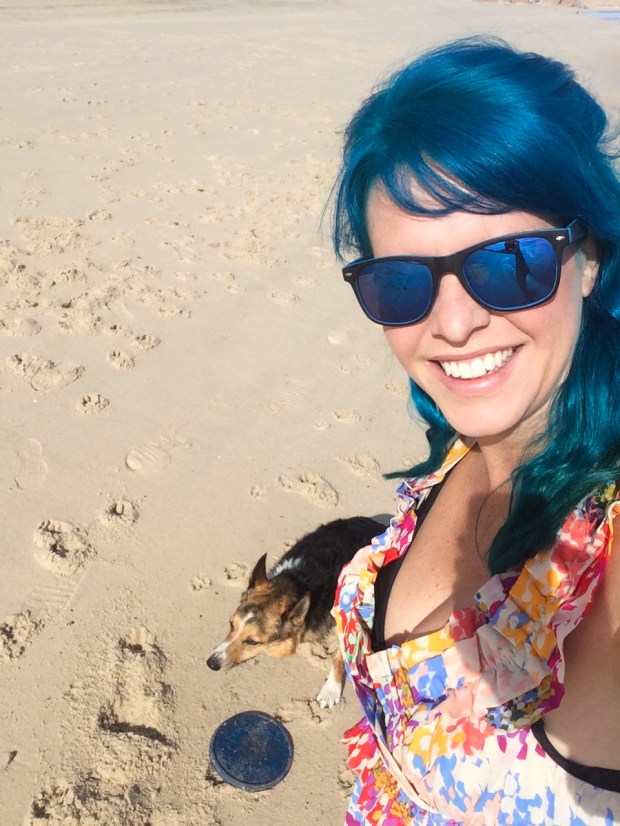
On our second morning in Baja I woke up wondering where I was, as is part of my normal morning routine these days. I climbed down from bed and looked out the back window to this happy view:

IMG_8256

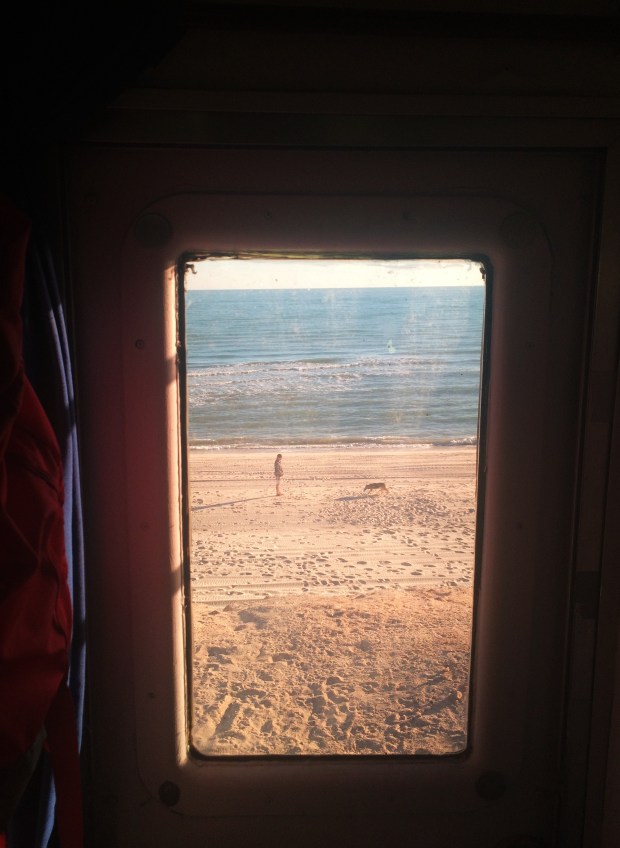
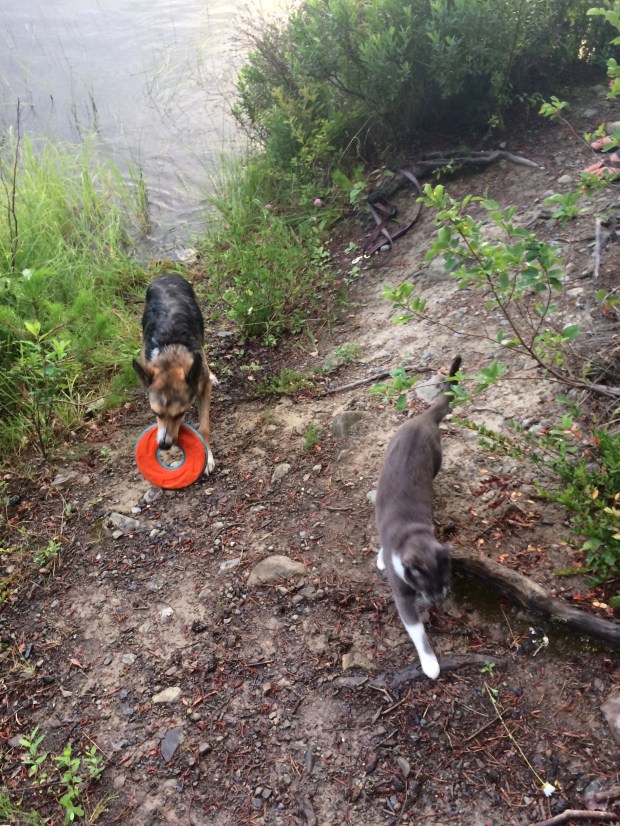
What a spot for a morning frisbee session!

IMG_8257

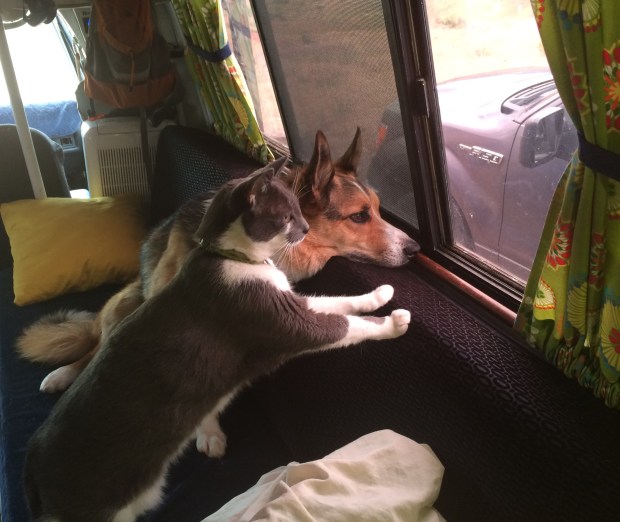
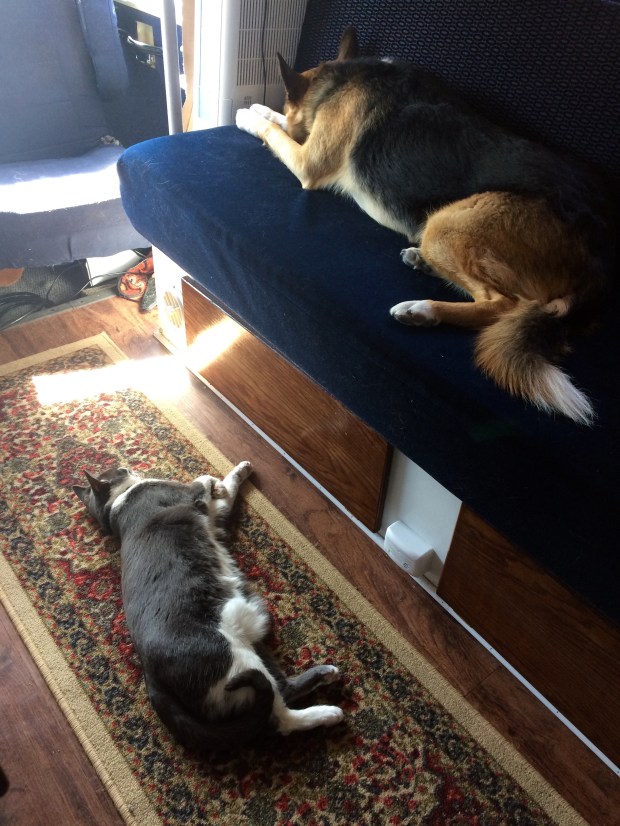
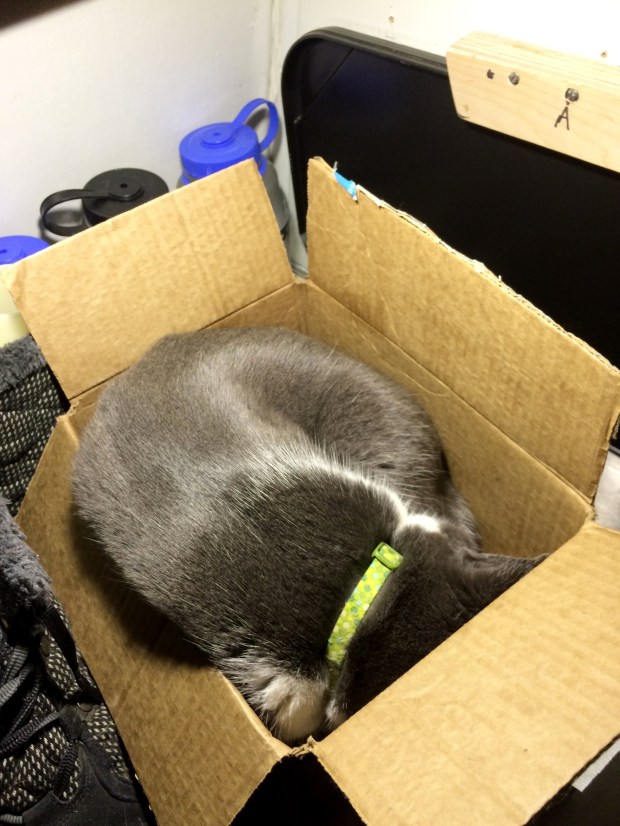
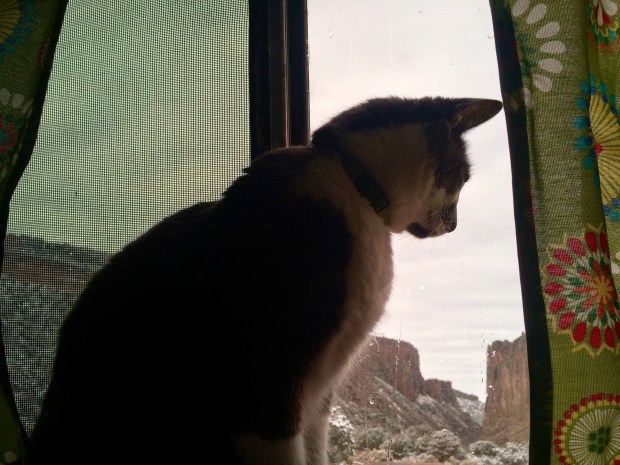
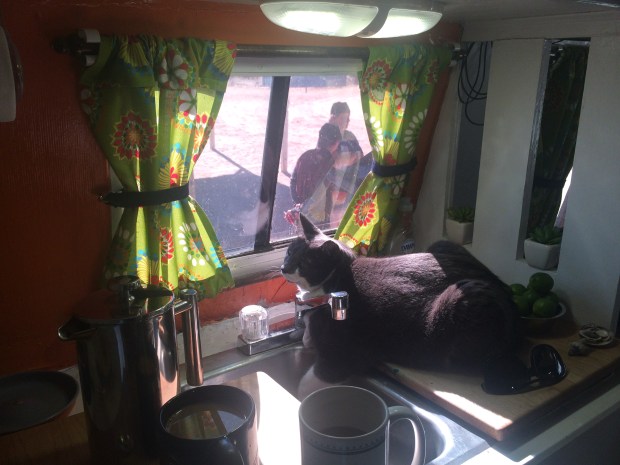
Until we learned more about the area and the potential wildlife that could be nearby, Gracie stayed inside or came out only on a leash. Luckily there were lots of birds around for her to chatter at through the window.

IMG_8288

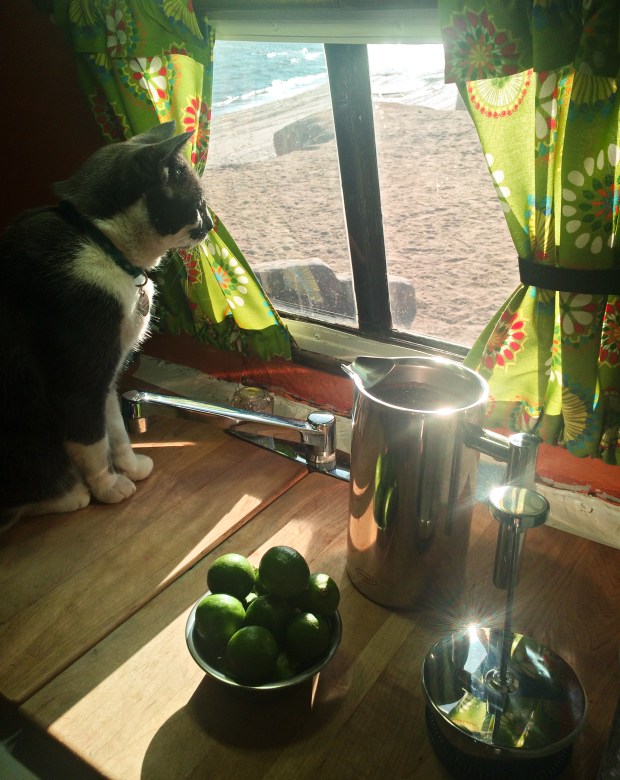
She also really enjoyed the warm weather and powerful sunbeams.

IMG_8329

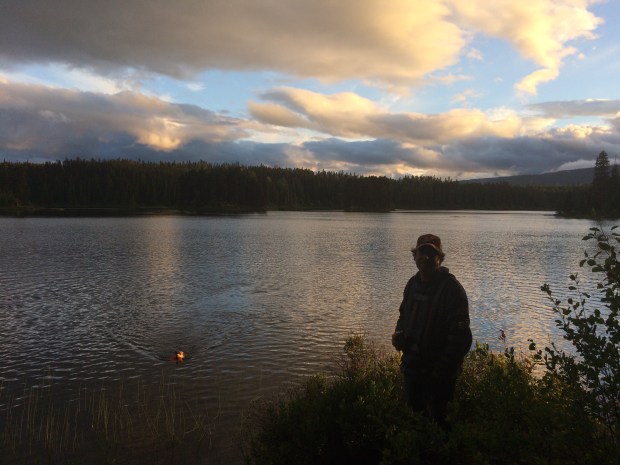
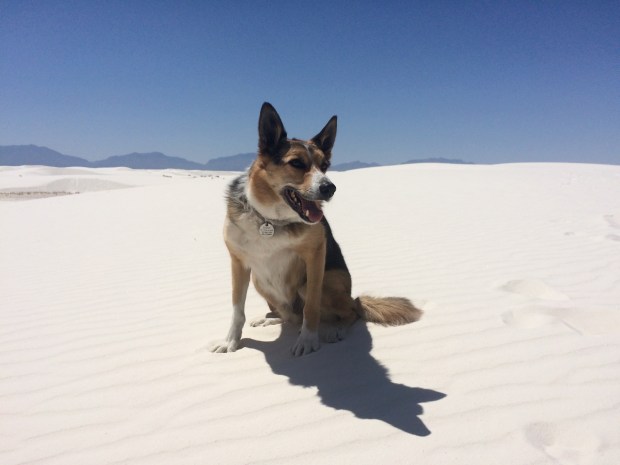
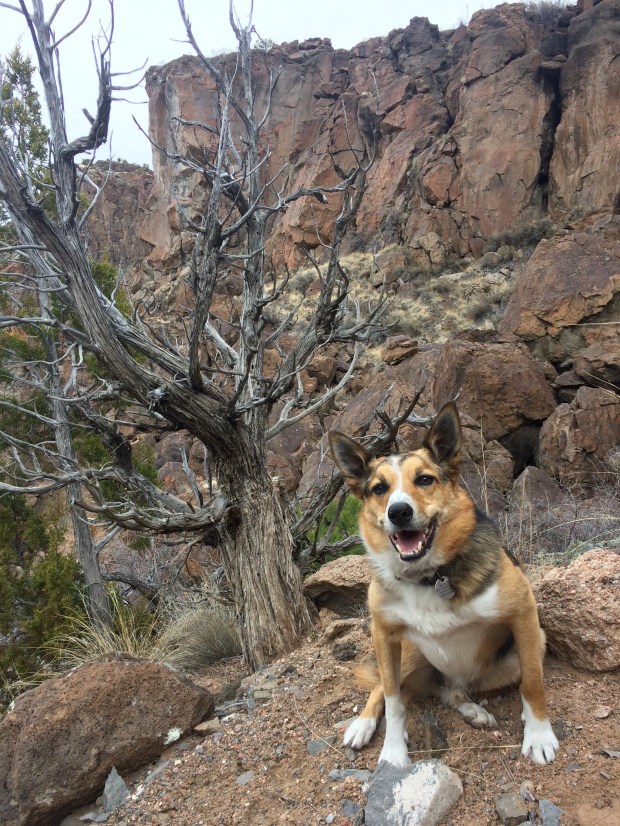
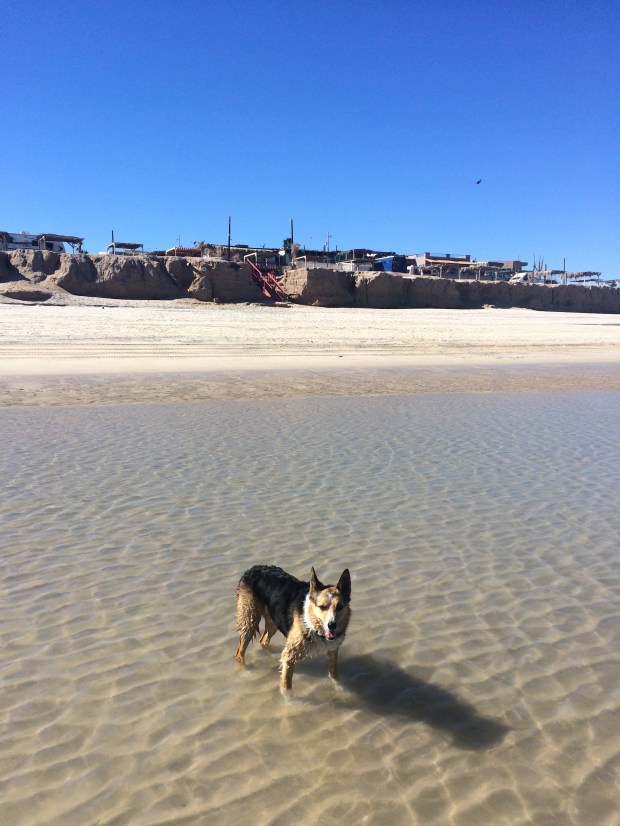
We also were very pleased with the warm weather, despite the first few days of wind. I spent a lot of time on the beach with Scout, who may have been the most pleased of all of us to have the endless beach at his disposal.

IMG_8347

IMG_8356

We also really enjoyed catching up with Gary and Kiki, who were the most fun neighbors during our first week in Baja!

IMG_8361

IMG_8441

IMG_8443

We went for beach walks, talked vans and travel (of course), enjoyed morning coffee together, and sat out overlooking the water watching the sun set.

IMG_8382

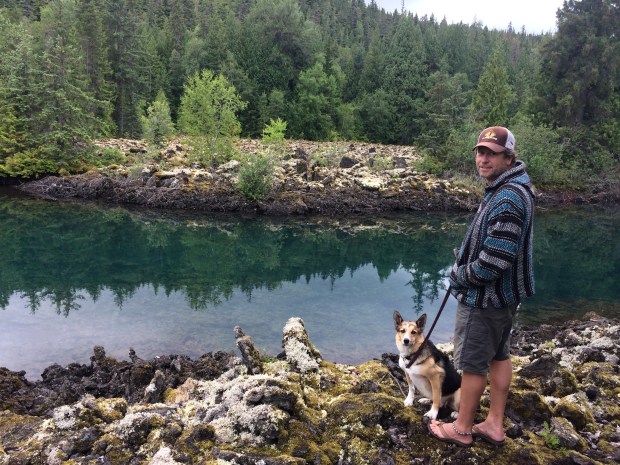
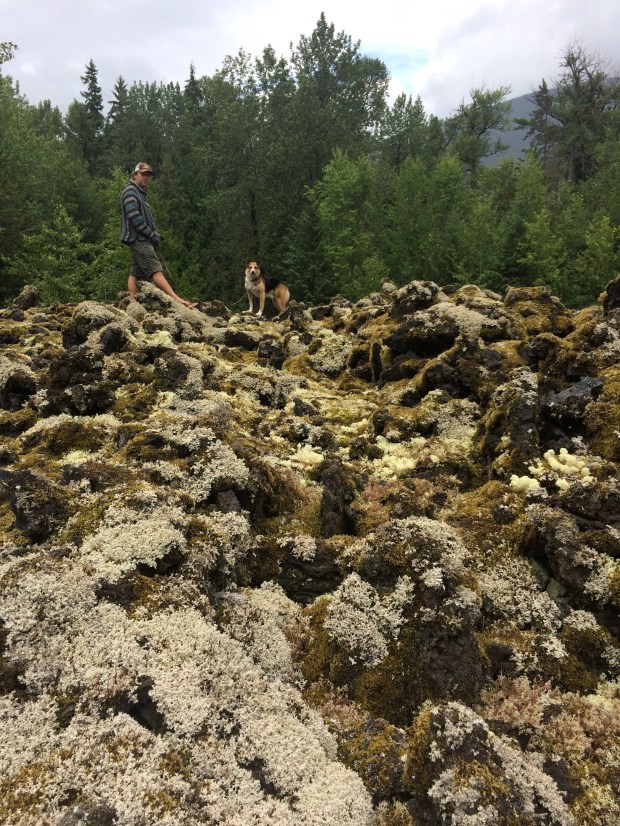
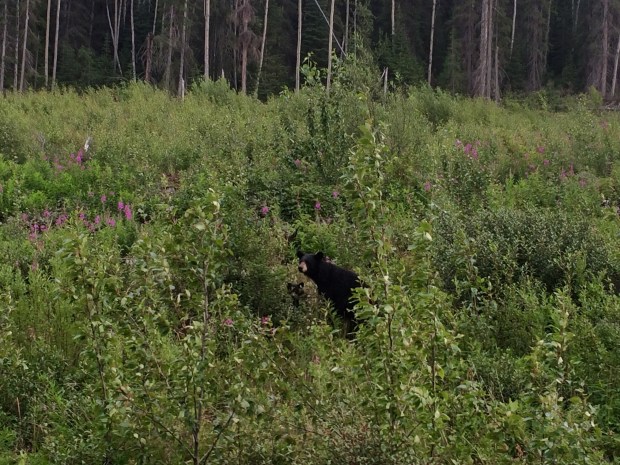
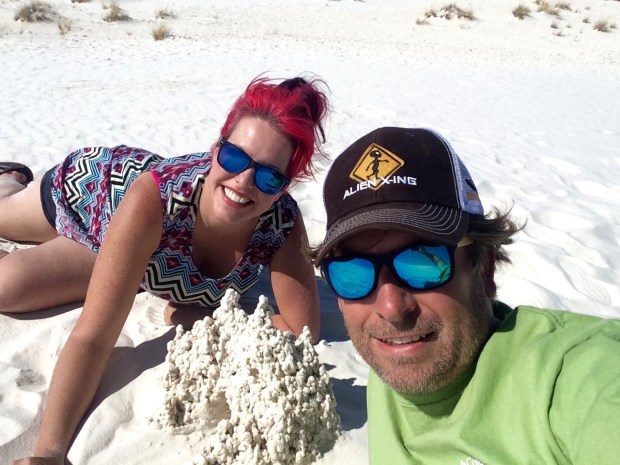
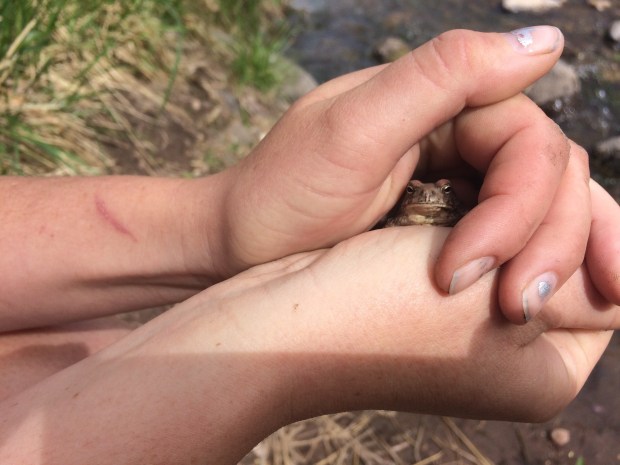
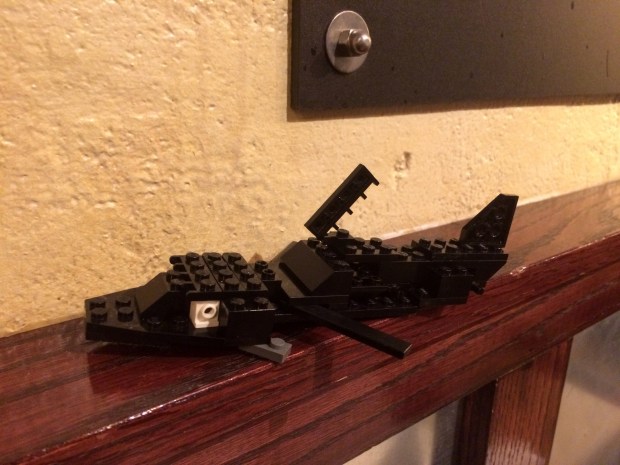
One evening as Andy and I walked along the beach with Scout, we came across this interesting fellow:

IMG_8393

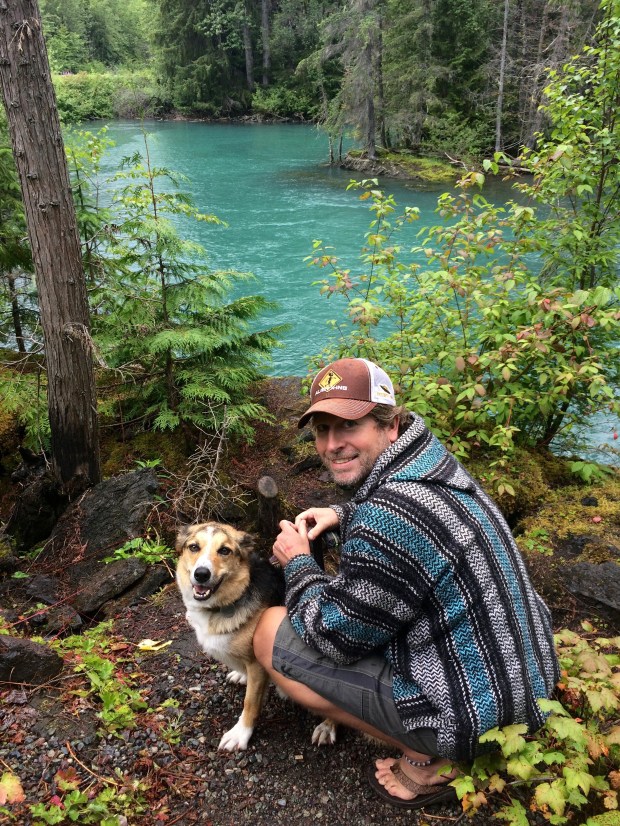
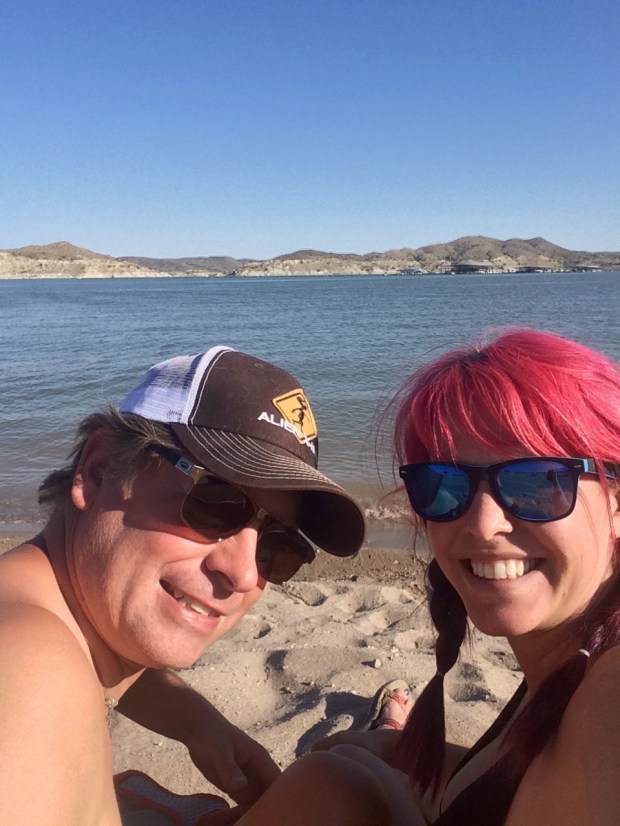
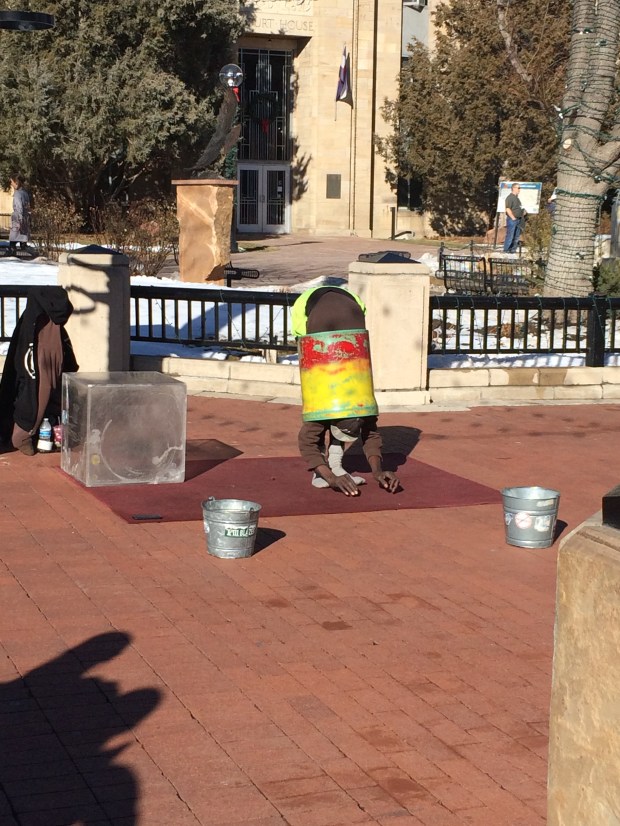
We also ran into another interesting fellow, our friend Jordan who we’d recently met at RTR, the van meetup in Quartzite earlier that month!

IMG_8092

He was traveling south to the mainland, and swung by San Felipe to say hello and get Andy’s assistance with some new solar panels. The more we travel, the smaller the world seems to be, and having a friend just “stop by” our campsite in Baja is now a thing.

IMG_8418

The boys got to work wiring and affixing the panel, which was not always easy, but entertaining to watch.

IMG_8424

We went for dinner and drinks after the job was done. Jordan introduced us to quesatacos, which are a perfect blend of carne asada and melted Mexican cheese, and became a favorite of ours throughout the trip.

IMG_8456

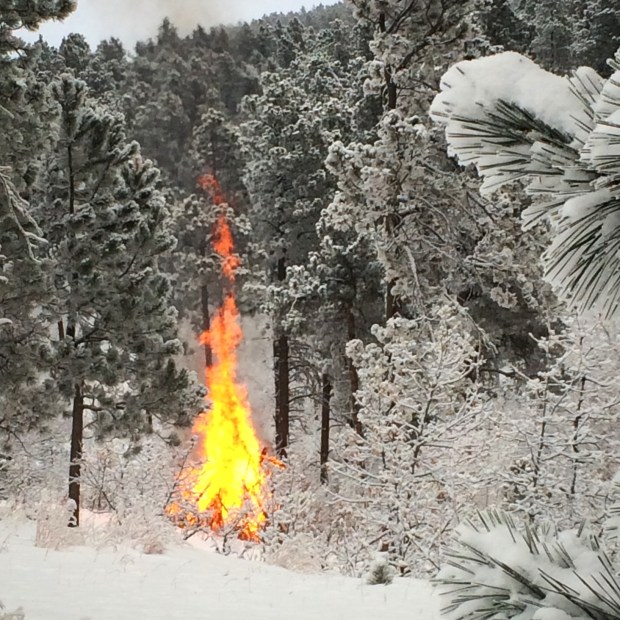
We had a campfire that night while we watched Jordan’s first few YouTube videos documenting his travels. They’re hilarious and really well made, and if you want to follow his journey you can do that here:

We thought it was funny that, while we watched a part about a wood piece he’d had in the back of his truck but just removed, we were at that moment using it as fuel for the fire! So I took a picture of them side by side.

IMG_8461

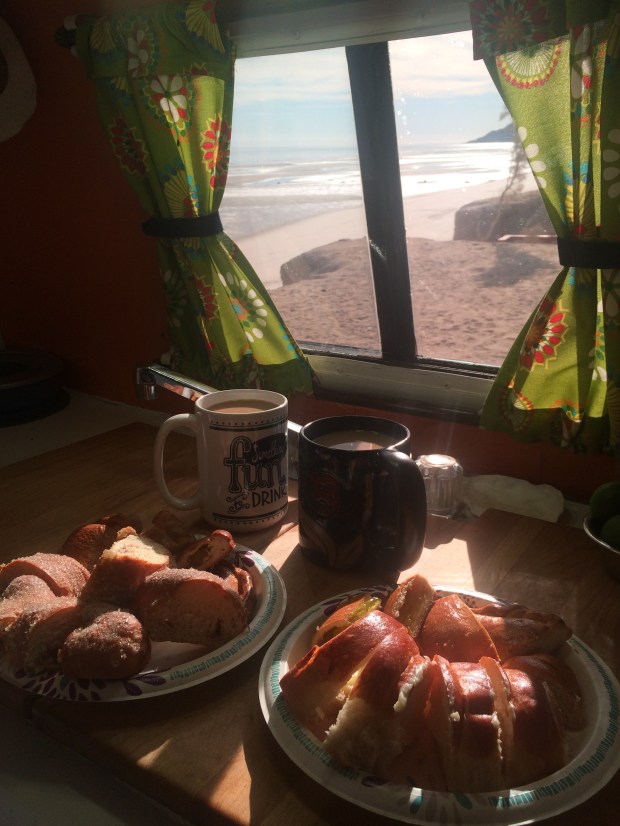
A day or two after Jordan took off for the mainland, we were still at our awesome beach overlook site when my birthday showed up! It was a most incredible day. For breakfast we had coffee and fresh Mexican pastries.

IMG_8480

Then as I got ready for the day, there was a knock at the door and standing outside were Andy, Gary, Kiki and our other sweet neighbors Stashik and Dorota. They sang Happy Birthday to me and Stashik played a second verse on his harmonica. What a wonderful start to a special day!

IMG_8484

I played on the beach with Scout for a while and collected sea shells.

IMG_8491

Then Andy and I went into town for lunch. . .

IMG_8504

Walked along the malecon. . .

IMG_8514

And then on the way home we picked up some fireworks! We had a campfire with all four neighbors, and lit sparklers.

IMG_8542

IMG_8544

IMG_8567

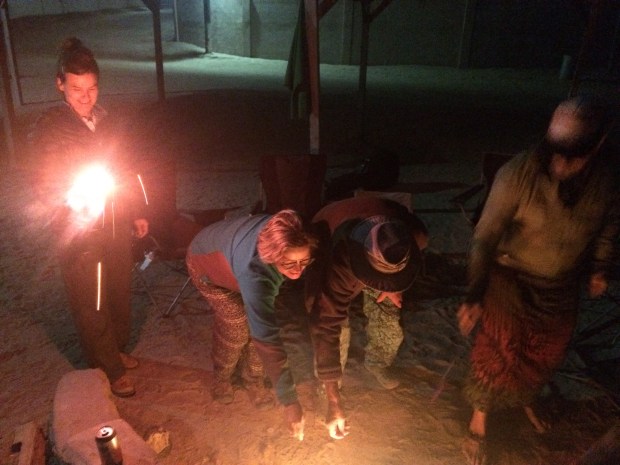
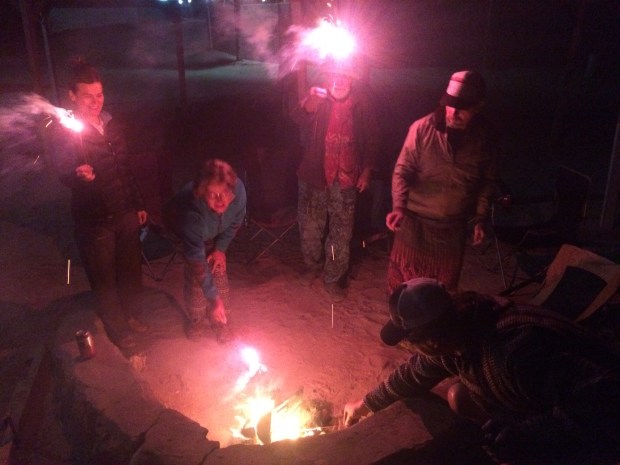
Then we went down to the beach and lit off some mortars, the first time my birthday was celebrated with fireworks! After the show, we went back up to the campfire and had birthday cake. Gary played some songs on his guitar, and we all told stories of our lives up north.

IMG_8580

Then if all the festivities weren’t enough, that night was a full lunar eclipse! We all went to bed after the fire and set our alarms for 4 a.m. so we could wake up and watch the show. We had coffee and thin slices of birthday cake as we watched the moon disappear. What a day! It was all very special.

IMG_8592

After a week at our lovely spot, we thought it was time to hit the road. There was still so much more to see! Stashik and Dorota were headed home to Canada, and Gary and Kiki had planned to stay a bit longer and then drive to their destination outside of Mulege. We all said goodbye-for-now, and Andy and I continued down the road.

IMG_8606

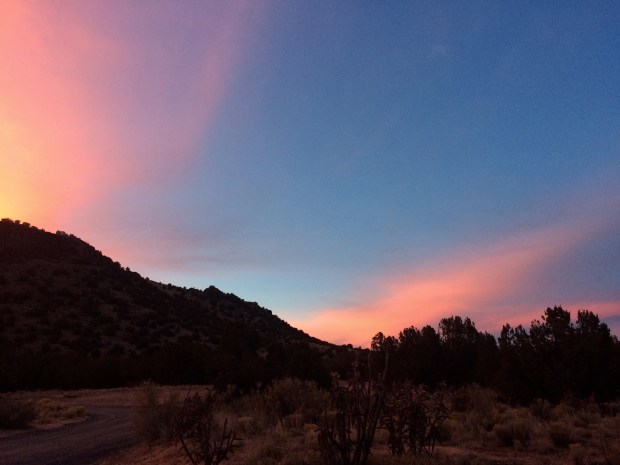
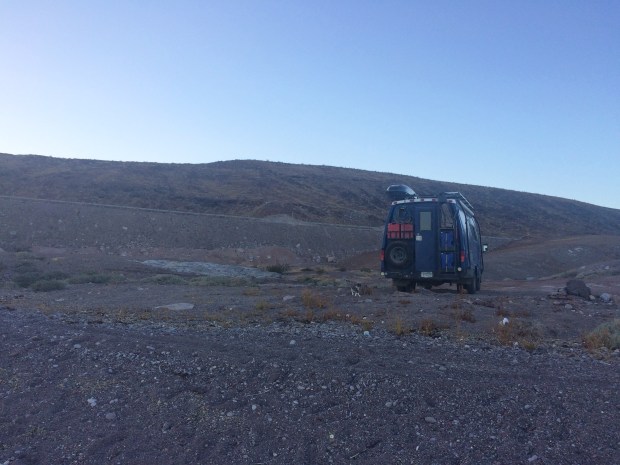
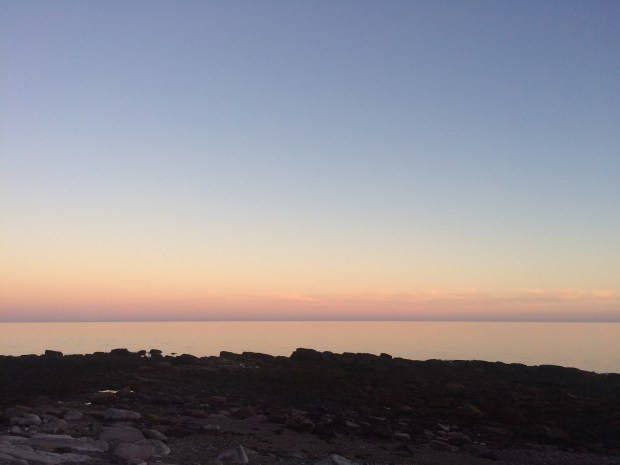
We stopped for the night at a dispersed camping spot on the beach just south of Puertecitos. We got there right in time for a beautiful pastel sunset and a quick frisbee session before dark.

IMG_8632

IMG_8633

IMG_8638

After the sun went down, we put our head lamps on and explored the rocky beach. We saw more sea life than some aquariums have to offer! It was super neat.

IMG_8656

IMG_8660

We’d also been tipped off by some locals that the beach had rock oysters, and after extensive searching in the dark we found about five of them, which Andy ate raw right on the spot. I tried one and did not enjoy it, but I do like the searching part.

IMG_8650

The next day was another sunny morning in Baja. After coffee on the beach and some pelican watching, we hopped in the Turtle and drove further down the crazy Mex 5, bumping and lurching our way along the dirt road they call a highway that rivaled any we’ve braved before!

But that’s a whole other story.

The Road to Alaska – Part 3: New Aiyansh, Stewart, & Hyder

Holy cow, you guys.

We knew before we began the drive through Canada to Alaska that it was going to be beautiful, but somehow we weren’t even prepared for how majestic this part of the world is!

IMG_7152


IMG_6885

Every new place we go, we just look at each other, wide-eyed, and laugh out loud in amazement that we’re getting to see all this.

One of my favorite spots yet was the next stop on our map after leaving Stewart. New Aiyansh, BC and the other neighboring villages of Nisga’a are so beautiful that I can’t possibly do it any justice with words. And believe me when I say that I’ve been trying! Even when we were there, both of us were more quiet than usual.

A volcano eruption in the 18th century left the area covered in lava rock, which now is blanketed in dozens of different varieties of moss, ferns and little succulents. And the pools of water scattered around the lava fields are a perfectly clear aquamarine color that felt like something out of a fairy tale.

IMG_6903

IMG_6920

IMG_6910

The Drowned Forest was a favorite stop for me.

IMG_6927


IMG_6956

A neighboring village has a bouncy suspension bridge spanning the Nass River, so we crossed it and I quickly admired the view as I hurried to the other side. Andy, of course, loved it!

IMG_6965

IMG_6996

Vetter Falls was a rainforest wonderland, and we walked out as far as we could to see if we could spot the “phantom fish”—steelhead that get trapped at the falls and develop snake-like bodies with large heads—but they lived up to their name.

IMG_7029

Andy tried very, very hard though. So you have to give him credit.

IMG_7035

IMG_7042

We stayed the night at a lake near Cranberry Junction, which had a name but will now just be known as “mosquito lake” in our memory. It was a gorgeous spot for a feeding frenzy though!

IMG_7087

IMG_7107

IMG_7116

IMG_7120

Although staying indoors to escape mosquitos has its advantages.

IMG_6873

The next day, we drove to Stewart, BC, which took us five times as long as it would have had we not stopped every half mile to marvel at the mountains, glaciers, and waterfalls.

IMG_7142

IMG_7145

IMG_7196.jpg

IMG_7211

Right next door to Stewart is a little town called Hyder. . . Alaska! They’re minutes away from one another, and have a very similar vibe; they’re just separated by a border agent on the BC side.

IMG_7215

A local tradition is to get “hyderized” at the Glacier Inn, so we did. A bracing shot of Everclear later, we had our official cards!

The next day, one of the locals we’d met found us and invited us out for a day of fishing on their boat! We had a phenomenal time, especially considering the weather was clear and sunny so we could venture out on the speed boat to explore, fish and pick wild blueberries.

IMG_7281

IMG_7243

IMG_7259

IMG_7270

IMG_7279

There were other perks as well:

IMG_7347

It was such a treat and we’re so grateful we got to join! Thanks again, Kim and David!

After we left the dock that evening, we drove up to the Salmon Glacier, the fifth largest glacier in Canada. Because the sun doesn’t set until 11 p.m. around here this time of year, we had plenty of time to drive up and stop for photos along the way.

IMG_7364

IMG_7371

IMG_7382

IMG_7387

IMG_7391

IMG_7396

IMG_7399

We found a great lookout to stop for the night, and watched the sun set behind the mountains.

IMG_7424

The view from our front yard when we woke up the next day was pretty incredible!

IMG_7451

We even had friendly neighbors!

IMG_7435

Scout and I took a little walk while Andy made coffee.

IMG_7446

I love our morning coffee views these days.

We drove back down the mountain to Stewart, where we got our fishing licenses and headed out to the dock to see if we could catch a few crabs. We had great luck catching crabs, but for a little while it seemed like the only crabs in the water were females! We met a local who was also crabbing from the dock and enjoyed hanging out with him while we all released the ladies back into the ocean. By the time he had to go he’d caught a number of prawns, which he gifted to us. We were totally thrilled. I’ve never had fresh prawns before, so it was generous and very much appreciated! Thanks again, Tim! 🙂

Well, I have more tales to tell and I’m not nearly caught up all the way yet, but I just looked at the time and it’s almost grizzly bear feeding time here in Haines, and we want to see more bears!

Yes, I said more! Spoiler alert:

IMG_7580

Everything Rolls: Lessons From the Road

Living on the road full time has proven to be even more drastically different from “real life” than we’d anticipated when we began this adventure almost two years ago. We assert that it’s waaaaaay better (for us), but there definitely have been a whole lot of lessons we’ve gradually been learning along the way. These are all things that we’d never had to consider when our house didn’t move, and it’s funny when we find that our new behaviors are now so deeply ingrained that when visiting friends in their stationary houses, we still anticipate things falling out of cabinets whenever we open them, for example.

I thought I’d list a few of the funnier lessons we’ve learned in the last year and a half.

  1. Never trust the flatness of any surface, no matter how level it may look. Everything rolls. Put that egg on the counter without hovering your hand above it for a second first, and you’ve got a cleanup job in between you and breakfast! It’s not a matter of will it roll, it’s what direction, and you better be ready.
  2. Always open liquid containers slowly, because you’ve more than likely changed altitude since you last closed it. I mopped up a whole lot of wasted sunscreen, shampoo, and ketchup before learning this lesson. You can’t trust a bottle on the road.
  3. You can’t take people’s recommendations for the “best food in town” unless you’re in your home state, or at least a neighboring state. Regional tastes vary so much that Yelp has been rendered useless to us. You just don’t know what the ideal flavor profile is. We’ve gotten tips from locals about where to go for dinner for the “most amazing Mexican food we’ll ever have” only to discover that in that state, sweet marinara-flavored salsa is the standard, among other atrocities.
  4. If you see a sign for a free dump station and potable water that’s right on your way, it’s going to be a good day.
  5. There are loads of great places to park when boondocking downtown. One of them is not the local newspaper office. At 3:30 a.m. the trucks pull up and idle while metal doors are flung open, and the workers chat loudly while tossing heavy piles of paper into their trucks. This all happens six feet away from your face. Newspaper offices may seem harmless, but they’re hazardous to your sleep.
  6. Never assume that the mess you don’t feel like cleaning up right now is your secret. A house tour could happen at any time. We vandwellers just love to check out each other’s setups, and if you meet some fun fulltimers and you slacked on clean-up duty that day, you’d better just come to terms with them being in close quarters with your dirty dishes and sandy dog cushions, because you just can’t forfeit the tour swap!
  7. Let yourself wake up enough in the morning to realize where you are before opening the back door and hopping out. Just because your back yard has been the woods for a week doesn’t mean that you won’t step out—in your pajamas and —into the middle of some town’s morning commute.
  8. We also just recently learned that we are Napa Blue. You really do learn something new every day!

IMG_4791


Let’s Refurbish a Van – Part 8: Hood Scoops (By Andy)

A post by Andy

{Modified the title theme some. We think of ourselves much more as a big van than a small RV. I now want to start prefacing this and future posts to be more representative of our self-image.}

So, to the meat of the subject. I just finished our hood scoops! Why did I make hood scoops? Well, for one, they look pretty cool and I needed a prominent place to put my new go-fast emblems that I ordered from Amazon.

KIMG0530

Mainly, we are trying to get as much power out of the engine so we can get our heavy old self up the high steep hills. In that vein, I have been playing with the spark timing, carb mixture, and intake airflow. By tweaking and adjusting these parameters we are working to get the most power and efficiency out of our old engine. Specifically, advancing the timing can get the engine to produce more power, but too much spark advance causes engine problems—pinging and preignition. If the engine is cooler, one can run with more advance. Another way to look at it is that with a given timing advance, if the engine and intake air get hotter, then the timing is too far advanced.

Maybe a side note about my “go-fast” emblems. Car companies try to sell cars. Sometime fancy cars come with racing stripes, cool graphics, and badges on the side about engine stuff. A joke among car people is the question “How much horsepower do the stripes add?” The answer is, of course, none. But… they do look cool. Look around, they are everywhere: M3, AMG, Hemi, 440, HiPo. The only thing the badge or stripes could actually do is add an immeasurably small increase in drag, or some unneeded paint weight. They are simply for the people in the car next to you. All the same, they look sporty, so I bought some that state the displacement of our engine and say it is “High Performance”. What I’m saying here is they do nothing, but they truly do look great!

So, I wanted more air to get in and out of the engine compartment to cool the engine, and have the air flowing into the air cleaner be as cool (and dense) as possible. To make sure I had an understanding of the pre-hood-scoop environment, I first taped the probe end of my digital temperature gauge to the air cleaner. Over a few weeks in different driving conditions and different altitudes, we took notes about the temperature measurements of the air cleaner and air filter. You can see the wire to the probe, and the tape holding it in one location.

KIMG0451

Overall, we are in the 150º–160ºF range under the hood after the engine gets warmed up and when the ambient temperature is in the 70º–80ºF range. So, to get more outside air in and more inside air out we need some kind of venting. I looked online, and $50+ plastic vents and scoops can be found, but they were not really van-sized, and seem flimsy. Metal ones can also be found, but are more expensive, and again, really don’t fit. Apparently there is an untapped market of people who want to mod 1985 Ford vans! (Investors be wary—the market may be small.) I finally hit on the idea that rectangle cake pans are about the size I wanted, and they are inexpensive, and they are made of metal designed to withstand 500ºF+. Going with this thought, while we were camping in El Malpais National Monument, I made some cake pan-sized cardboard mockups and spray painted them with a blue that I had.

Test fitting…

I thought that looked good, so a few days later when we were in a town, we got some cake pans.

KIMG0454

KIMG0455

One morning, a few weeks later, when we where camping at the Great Salt Lake, I got out the pans, tin snips, sandpaper, and primer, and got to work remaking our sweet cake pans into even sweeter performance hood scoops (please note the word play).

Here they are.

Test fitting.

We stashed them away for a bit and traveled onward. Another week later we had a free day while visiting our friends the Higdems in Kimberly, ID. I measured, moved, marked, measured, and measured and marked again. Then I started drilling holes in the hood.

Lots of little holes now!

After fitting and drilling the mounting holes, I now knew what piece of the hood (bonnet, for any Brits out there) to cut out. Out with the jig saw.

Another side note here: When putting the Turtle together, we set ourselves up with a few DeWalt cordless tools and the battery charger that plugs into a 12V cigarette lighter. The tool charger is now wired to our solar-charged batteries, so we are using the sun’s energy to drill, cut, and modify our hood. It feels fun to know that when working on projects such as this!

For the final install, I put down a small bead of RTV sealant, aligned the scoops, and screwed in the 6 screws per scoop that I had already pre-drilled. After the RTV cured a bit, I got out our boat paint and went at it.

Included above is, obviously, a photo of what Scout and Gracie were doing at the time. A few days later, at Dave and Ryann’s place, I added more RTV to smooth the transition and put on more paint to finish it all off.

All finished now, after the last painting and with the great go-fast badges installed.

We should call this the conclusions section of the post, for you science people out there. Well, they have been on now for a week, and we don’t move fast, so we have only driven a few hundred miles. We will need to collect more data, but so far the maximum under-hood temperature we have seen in 135ºF, and most of the time it has been in the 100º-120ºF range (and we are actually in hotter weather than when we took our non-hood scoop measurements). We have also driven through crazy heavy rain and, as expected and hoped for, the small amount of water that enters through the scoops has no adverse effects on the engine. Generally, a pretty solid success, and I have since advanced the ignition timing just a bit with no pinging.

Oh, maybe a cost breakdown. The sum total of the cake pans, primer, quantity of screws, RTV, and paint used is less than $20. The go-fast badges were $11 each. Dave suggests I sell it as “The whole project was less than 45 dollars.” I think I shall adopt that tract!

All that for less than 45 dollars!!!

We Love NPS: Carlsbad Caverns, Guadalupe Mountains, White Sands & Gila Cliff Dwellings

It’s no secret that we love the National Parks System. In fact, part of our five-year plan (or as close as full-time wanderers get to a plan) involves taking occasional breaks from the road to work at National Parks and Monuments as we travel around. Not only will it be soooo fun to live at a park, but we can also make a little extra travel money while giving back to the Parks System that has basically been our landlord for a good portion of the last year and a half. We’ve boondocked on NPS land at National Parks, campgrounds, and dispersed camping areas. And not only to we get access to astonishingly beautiful and unique gems around the United States, we’ve also been provided at many sites with potable water, RV dump stations, showers, bathrooms, and garbage services. Oh, and a surprise favorite—ranger talks around campfires under the stars! At Wind Cave the fireflies were flying around us as we walked to the amphitheater to hear a ranger tell us all about the history of bison in South Dakota, and another ranger sang us a song on her ukulele that she wrote about Native American folklore. Pretty fancy, right?

Immediately after hitting the road, we got our NPS annual Interagency Pass and it’s no surprise that we’ve gotten our $80 worth and feel pretty happy about it! The last few weeks have been especially National Parks-y.

We began the streak at Carlsbad Caverns National Park, hiking down to the Big Room from the Natural Entrance.

IMG_0900

IMG_0910

IMG_0914

There were some beautiful intricate formations on the way down, but the real thrill was the 1.25 mile loop around the Big Room at the bottom. We’ve been in a bunch of caves, but never anything like this! The photos do it no justice, but the scale of these stalactites and stalagmites is staggering.

IMG_0935

IMG_0951

IMG_0955

IMG_0956

IMG_0963

IMG_0964

We were thankful for the railings along the path, which made it possible to just stare upward with our mouths hanging open, pinballing our way down the walkway. It’s Andy’s Favorite Cave To Date, and for me it’s Tied For First with all the other caves I’ve explored. (I just really like being in caves.)

We stayed the night somewhere outside the park, and then the following day—Easter Sunday!—we arrived at Guadalupe Mountains National Park for a holiday hike.

IMG_0985

IMG_0996

Of course we had to investigate the potable water situation, and they had a nice spigot near the RV camping area, so we made a note of it and hiked on into the hills. This park is home to El Capitan, which is a celebrity rock, and Guadalupe Peak, which is the highest mountain in Texas. We didn’t hike either of them; it was 90 degrees with full sunshine, so neither of us felt bad about choosing a less strenuous trail.

IMG_0999

IMG_1006

IMG_1039

IMG_1046

After the hike and a water fill, we proceeded to El Paso for a Costco run and then on to Alamogordo and saw. . . well, look.

IMG_1059

IMG_1066

That’s right; it’s the World’s Largest Pistachio! It’s a sculpture at the McGinn’s Pistachio Tree Ranch, which is a really fun stop if you’re in the area. There’s a lot to see and eat there. We sampled dozens of flavored pistachios and pistachio candy, bought some bags to take home, and got some pistachio ice cream to eat under a pistachio tree by the huge pistachio sculpture.

I’ve never written the word “pistachio” so many times in my life combined.

IMG_1069

IMG_1070

IMG_1073

Then another stop in Alamogordo at the Alameda Park Zoo, recommended to me by my buddy Daren who used to live in the area. And I’m so glad he did; we wouldn’t have thought to stop by this tiny zoo in a park in the middle of town, but it was one of the coolest zoos either of us has ever visited! It’s only $2.50 to get in, the grounds are lovely and nicely manicured, and the animals are happy and well-cared for in their clean and green enclosures.

IMG_1085

IMG_1097

IMG_1101

We left the zoo while we still had plenty of light so that we could make the big climb up to Cloudcroft, an adorable town 19 miles outside of and 4,000 feet higher than Alamogordo. And our little Turtle made it! We may have been going 2 mph, but we made it! We stopped at the scenic train trestle outside of Cloudcroft, and then found a cool dispersed campsite nearby to stay for the night.

IMG_1139

IMG_1186

We stayed two days, and drove back down.

. . .Don’t get me wrong, lots of fun things happened in Cloudcroft, but I promised you a National Parks post so I’m going to try to stay on topic here. 🙂

IMG_1204

A lot of National Parks that we go to feel like being on another planet, which is a shared characteristic of all the parks I’ve liked best. So you can probably guess my approval rating for White Sands National Monument! This place was bizarre in the very best way.

IMG_1212

IMG_1225

IMG_1238

It was magical. Hills and hills as far as the eye can see of gypsum sand.

It played tricks on our minds, as hills of white usually mean snow and winter, but it was 85 degrees and we were roasting! I made a sand angel anyway. Also strange was the sensation that we were walking on sand in that heat, but it wasn’t hot on our feet at all.

IMG_1250

IMG_1269IMG_1282

Before we began walking back to the Turtle, Andy joked that we should fill our bucket with water and make a white sand castle. We both got quiet and looked at each other, and then went to get the bucket.

IMG_1334IMG_1338

The next day we went to Hatch, NM to get ourselves the epic green chile cheeseburger at Sparky’s that some hot springs friends had told us about a few months ago.

IMG_1367

IMG_1370

It was legitimately one of the best burgers I’ve ever had. Thanks for the recommendation, guys! On our way out of Hatch, we got some green chiles from a roadside market, Andy hassled one of the locals, and then we hit the road for Spaceport America.

IMG_1380

Spaceport America is incredible to see, even though it’s not open to the public right now. We’d read that there was a visitor’s center, but it’s in nearby Truth or Consequences (actual town name) so we just got a long-distance view of “the world’s first purpose-built commercial spaceport” and some really neat info from the hospitable guard at the gate. The sci-fi nerd in me was already picturing the next time I drive out there, this time with my flight ticket in hand. To infinity and beyond!

IMG_1470

That night and the next we stayed at Elephant Butte Dam in Truth or Consequences. We swam, read by the water, got some sun, and threw Scout’s frisbee into the water a thousand times before continuing onto the next leg of our journey.

IMG_1493

Which was Gila Cliff Dwellings National Monument! Another new favorite, and another great NPS spot to visit at the top of a very windy road that tops out at about 8,300 ft. The Turtle was wheezing, but we made it up this one too! And the reward was worth it.

IMG_1681

IMG_1649

IMG_1660

IMG_1697

IMG_1702

IMG_1705

IMG_1716

IMG_1722

IMG_1731

IMG_1678

There are free campsites all around the monument, as well as an oasis just right outside—a privately-owned hot springs with three pools and camping available. If they hadn’t been booked up, we would have gladly stayed the night too!

IMG_1774

But we already had a site we’d found the night before that we loved, so we were happy to return to our little house by the river.

IMG_1614

IMG_1794

IMG_1598

It was a great place to relax and catch our breath before moving on to the next National Park! It was also a great place for catching other things too.

IMG_1816

After returning our new friend to his home by the river, we returned to the road—the Turtle’s natural habitat! And on to the next National Park—the Turtle’s second home.

Two Weeks in Diablo Canyon, New Mexico

One of our favorite places to “live” is on BLM land, and if they didn’t have a rule that you can only stay a maximum of 14 days, we would likely still be in Diablo Canyon right now.

img_8205img_8213

We were looking for some sunshine, and we got it! This spot is great. It has four primitive camp sites, which is our favorite since we come equipped with everything we need, and we get far fewer neighbors.

We did see loads of people, though, as it’s a really popular spot for climbers. The edge of the canyon is a really clean vertical, and we saw climbers up there every day.

img_8441

The weather was warm and sunny, and we all got to do our favorite things outside.

Andy got to work on the Turtle.

Scout got to go for 3-hour walks and hikes almost every day.

Gracie got to roll in the dirt, climb things, and explore outside. She just learned how to climb the ladder to get on top of the Turtle, and now we’ve gotten used to hearing the thumping of paws on the roof!

And I was in rock-collecting heaven. Everywhere we walked there was an endless array of beautiful rocks, and my pockets were constantly full. I couldn’t help it!

Over the course of our time there, we hiked to the top of the canyon, around the opposite edge of it and up and over, and all the way through to the Rio Grande.

img_8705

We played all day, and earned our naps.

img_8560img_8382img_8269img_8547-001

After a day of exploring, we were happy to put our feet up and watch the desert sunsets, around the fire or under the awning wrapped in blankets.

img_8222img_8532img_8537img_8529-001img_8609-001

We also met our neighbors, full-time travelers Eric and his darling dog Willow, and spent some time with them swapping travel stories. They’ve been all around, and also blog about their time on the road here. Go say hello! 🙂

They even gifted a squeaky stuffed worm to Scout, which he loves and has been dropped into our lap many, many, many times. Thanks guys!

img_8519

On our last day there, we woke up to a bizarre surprise:

img_8829

Snow!

We thought that was pretty well timed, since we’d reached our 14-day limit! So we traveled back into Santa Fe to plan our next desert destination.


Winter in Rocky Mountain National Park

It was mid-January when we left South Dakota and began our journey south in search of sun. We learned a lot over the last few months about winterizing the Turtle, and have systems in place so we can go anywhere we want and live comfortably, even in single-digit temps. But seriously—we’re mobile and get to choose the climate in which we live. Let’s ditch the gloves and base layers and go play somewhere warm!

That was the idea, anyway. This story is not about finding the sun, but about the journey toward the sun that I am basking in as I write this. And that journey includes a National Park and a three trips down memory lane with awesome old friends.

First we stopped in Fort Collins to see my friend Rachel, who I hadn’t seen in 20 years! (There was much discussion about how that number was an impossibility, but the math doesn’t lie.) But even a couple decades couldn’t interfere with us picking right back up where we left off, and having hours of fun getting to know each other again. We were having so much fun gabbing, though, that I took no pictures! Only a few snaps in town as I walked Scout before bed. What’s that about? Having too much fun, of course. So I had to get one from her that we took after having coffee together the next morning. SO good to see you, Rach-o!

The next day we made the short trip to Boulder to check out the town since I’d never been. The highlights of our stay included Taco Tuesday at T-ACO (my favorite day of the week), Andy’s Lego picostomus,

img_7430

the charming and bendy performer on Pearl St. who wriggled bum-first through a bucket,

img_7423

Andy coming through on my request for a snow angel in the park,

and an unexpected early visit with our friend Rob, who we were going to see when we made it to Arvada, but happened to be in Boulder that night too!

Rob had to work through the rest of the week, so we took a trip over to Rocky Mountain National Park while we waited for the weekend.

img_7462

We were lucky enough to get a clear sunny day upon our arrival, and had a beautiful snowshoe hike into the mountains.

img_7475

img_7482

img_7486

img_7490

img_7497

img_7498

img_7519

As we got higher up, the ice crystals were so sharply defined and sparkling in the sun that I took a hundred pictures trying to capture the magic, and failed. So instead we ate some.

img_7510

After a parking lot picnic, we drove up to Bear Lake to hike around, but the sun was starting to descend and not only was it getting chilly, the drifts there were so high that there wasn’t much to see aside from snow piles of various sizes.

Andy did find a bench, and we realized that what we thought were trail markers were actually a fence along the path that was nearly buried!

img_7545

img_7547

img_7536

We should have known what we were in for, since the signs on the way up all looked like this:

img_7533

There is one loop in the campsite that is open year-round, and a few of the spots had even been dug out already, so we picked one and called it a night. The next day we decided to take another snowshoe excursion, and as poor Scout was dying to run through the snow, we decided to walk around the expansive campground where dogs are allowed. It was overcast and cool, and the views even in the campground are stunning.

img_7611img_7582img_7574img_7593img_7585

We left the park after our outing and drove to Arvada, where Rob lives. He’s a good friend who lived in our neighborhood when we lived in Portland, but his job took him to Colorado while we were still living there. We’ve missed him and his sweet fuzzy dog Kokanee very much, so what a treat to get to hang out again after a few years! He showed us the town, the Geology museum at the college in Golden, a great brunch spot, and the nearby park for Scout to catch Frisbees. And somehow, just like our visit with Rachel, I ended up with only a few pictures. And neither of them included us with Rob! We’ll have to go back soon.

img_7619

img_7629

KIMG0174.jpg

Rachel had recommended that we check out Casa Bonita, a bizarre restaurant outside of Arvada with sub-par food and inexplicable ambiance. That girl still knows me well, because I was on Cloud Nine at that place! Yes, the line was staggeringly long, the cafeteria-style food was as shockingly bad, the place was jam packed, and still I loved it. They have divers jumping 30 feet into a small pool in the middle of the restaurant, fire jugglers, a guy in an ape suit, a spooky pirate cave, a mariachi band . . . it was hilarious! Andy agreed it was “pretty crazy” and suggested we go for a beer afterward. He’s a good sport.

img_7633img_7635img_7638img_7640img_7646

After a too-short visit with Rob, we drove to Brighton to visit my friend Bev, who I hadn’t seen in 15 years. Once again, the years between were irrelevant, and we talked and laughed for hours, and only drove Andy and John a little bit crazy with our old jokes. It’s amazing to me how easy it is to pick up where you left off with real friends. If they hadn’t had to work the next day, we’d probably still be there playing games and being ridiculous in our usual way. Aaaaaand, once again, I’m full of great stories and low on photos. Love you Bearly! xoxo

IMG_8620.JPG

It has been a dream come true to have enough time and flexibility to be able to reconnect with friends. This Turtle life is really making up for lost time, right? It’s also ensuring we’re able to continue checking National Parks off our list, with one more coming right up: Great Sand Dunes National Park.

The warm weather will have to wait! We’ve got some snowy dunes to climb.


Let’s Refurbish a Van – Part 6: Roof Rack (by Andy)

A post by Andy

{Note: The work detailed in this post was completed over the summer of 2015, before we moved into the Turtle. I am just getting the time to write the post now.}

So, we have stuff to carry. And we want a place to store our solar panels. And we want to stay cool. And, if possible, look cool. So, we need to put together a roof rack…

Here are a few pictures of the old RV when we got it. It had an aluminum ladder that was old and worn, along with the typical RV aluminum tube luggage rack at the back- all bits with some of the mounts loose. We also had a big plastic storage box bolted to the top, but it was cracked and would certainly leak. As you can see, there was also one solar panel and a mount for what I’m pretty sure was a TV antenna. Good stuff, but it was all pretty worn, as it had all traveled for close to 30 years and more than 250 thousand miles.


We wanted our rack and top equipment to do a few things for us:

  1. Have a dry and accessible place to store camping and fishing and other fun gear, out-of-season clothing, and some spare parts and equipment.
  2. Have the rack removable, so we can maintain and fix the roof when the need arises.
  3. Have a location to mount the planned solar panels.
  4. Design the rack to provide us shade.
  5. Have a system that we can change, add more solar to, move things around, etc.
  6. Be able to fill and seal up all the holes prior people made when mounting things to the roof, and have a system where moving forward we will not be drilling into the roof any more.

Anyway, roof racks look great! I hear they can be useful too. In truth, we have pretty limited room and storage inside, so having a bit of room up top for our extra supplies and garage-like stuff was essential for a successful voyage.

So, to the step of getting the old stuff off and sealing up the holes. Pretty much unbolt the bolts and pry everything else off. I then used fiberglass impregnated epoxy body filler for all the big holes (I love epoxy!), maybe adding wire to support it as it cured. I then added Geocel Proflex on the seams. I read about and tried a few things, but to date, it is my go-to for exterior sealing. Here is a link.

For the (many) smaller holes, I would first clean and fill with the Geocel, then screw in a stainless steel screw the size of the hole, then cover the head of the screw with another layer of Geocel. It is a technique I read about on the internet, and it seems to have worked well so far. Again, it is not worth buying any hardware but stainless or grade 8. It does cost a little bit more, but use the savings you get for doing this yourself to get the good hardware. Plus, you don’t have to worry about some interior rust and redoing the work down the road. After sealing the holes, I put down Rustoleum on all the modified spots. The following pictures show the antenna hole through the roof, and some of the removed parts scattered in the yard.

We were lucky enough to have a friend who worked for Yakima who gave us a VIP discount card for one purchase. With the card, we got 12 A1 rain gutter towers, 6 78″ crossbars, 12 wide body rain gutters, end caps, two 12-peice lock core sets, a Loadwarrior basket, and some cargo nets. A truly impressive amount of wonderful Yakima pieces at a great savings. Boxes and boxes of sweet components!

From REI, Amy and I used our one-item 20% member discount and each of us bought a Skybox Pro 12, shipped to the Portland REI for free. We got the long and narrow boxes to configure end-to-end, and not take up too much roof area width-wise. We effectively have the roof racks for 4 vehicles, all to put up top the Turtle. It added up to a lot of initial investment, but it has been working well, and added an important comfort to be able to store a reasonable amount of things to make our small world flexible, and I think it actually has a sleeker look being made from components—as opposed to a custom-fitted rack. Since we were doing all the work ourselves, we decided to invest a bit more on some nice new hardware. After popping down to REI and loading our new Skyboxes (in their own boxes) onto the top of the old Scout, we stopped for a bite in downtown Portland. Seems fairly reasonable to me, but I imagine to some people we made a sight…

The sky boxes, along with the other hardware, sat in the house for quite awhile. After stripping and sealing the roof, it was only logical to finish painting the Tutle blue, then do the white roof paint, and then finally get to the point where we could install the new roof rack. Consequently, this is what our place looked like for quite an amount of time. (As you can see, our front room was used to store a number of Turtle parts until they were ready to install.)

The pictures are few here, but after most of the painting was finished, I mounted the wide body mounts. I measured, marked, measured again, checked, and had the geometry figured out. On the corner of the Turtle roof, I would drill my two holes, fill with Geocel, cover the mounting surface with Geocel, align the bracket, screw in two (you guessed it) stainless steel lag bolts, then cover the seam and outside with Geocel. After it all cured, we repainted with the Interlux. It looked nicer with the black brackets and shinny bolts before the sealant and paint, but I didn’t want to risk it. And, just so you know, the asymmetric spacing along the length of the roof is due to needing to align the crossbars so they will not interfere with a roof vent when open, but also allow for the mounting points of the skyboxes. Here are the brackets installed:

kimg0798

It is a nice feeling to know that at any point we could unlock (all keyed alike, now) the 12 towers, unscrew, and remove the whole rack if we had to do some maintainence on the topside. Anyway, the pictures are limited at this point, but following are some involving the tower, crossbar, and rack install.

kimg0804

You might notice that the Yakima basket lost out to the solar panels. The basket is in the storage unit presently, and it would be great to get it up there at some point. When we were building and installing the rack, though, the geometric logistics were far too difficult for the time allocated. Anyway, to install the solar panels, I bolted two pieces of 12′ 6061 T6 aluminum square tubing to the crossbars with stainless steel carriage bolts and nuts fitted through the Yakima Universal Snaparounds.

I picked up used ones super cheap here. By the way, ReRack in Portland are nice people and can save you some money on roof racks, so check them out if you are in the area. Back to topic, after getting the aluminum properly spaced and installed, I then drilled and screwed the solar panel brackets to the the aluminum. That step was a breeze. Solar panels installed, photo taken probably a month in.

kimg0938

As to keeping it all cool. We planned on (and did), paint the roof surface with a couple of coats of Interlux topsides white boat paint. We actually painted the roof vent covers white as well. The assumption is that paint will reflect much of the sun’s heat, and be able to withstand the UV rays. So far, everything looks pretty good up there. We have some cracks in the paint where the caulking we used was not completely cured before we painted (I don’t blame the paint, we had time constraints), so we have some washing and fixing of some seams to do. Otherwise, all looks pretty good. A common approach for keeping a bit cooler is to have a couple of roofs, effectively carrying your own shade along with you.

The above old-school Rovers have a second roof with an airgap for passive cooling in the hot sun. (Side note, did anyone notice the tall skinny tyres the rovers are running on?) With the spacing added from the rack towers, and mounting the solar panels and boxes above the crossbars, we have a impressive air gap and continous shade on over 50% of the roof.

Currently, there is a middle strip free for walking, in which I will fit an additional panel at some point, then simply make some cheap synthetic or plywood panels and paint them white to increase our shade to close to 100%. So far, though, we have been to the Badlands of South Dakota in the summer, and have stayed with the ambient temperature with thoughtful venting and minimal electric fans.

To me, the goal is not to be cooler than the outside, all we need to do is not be hotter than the ambient temperature in all kinds of weather.

kimg0184

Oh, almost forgot, we want to access the roof! We need to clean the solar panels, get stuff into and take stuff out of the boxes, check on all the paint and seals, and most importantly, be able to climb up and yell with arms outstretched like you are in a movie! Anyway, the ladder…

We actually bought a car roof rack ladder as a start. The almost $200 ladder (seems crazy) was well worth the money, in the time saved. It always feels pretty weird to buy something new, remove it from the box, then start cutting it right away. So, the ladder, welding, adding more rungs for the proper length, and fixing the folding function.

Some close-to-final pictures here. We started with a 9-rung foldable ladder, and ended with a 12-rung rigid ladder that bolts to the bumper and the top rack. Again, it was designed to bolt to the bumper and rack, so it is removable…

I’m pleased with the removability of the ladder, because we crushed it a bit when we backed into a tree one day, about a week after it was finished and installed. The ladder was subsequently unbolted, straightened, and remounted. From the side, it now does have a bit of ripple (below the designed joint and by the spare tire)—this is what we call life.

kimg0186

To sum up a bit, up in the boxes right now we have a few fishing poles, extra wire and parts and unfinished projects, cloth for sewing projects, extra window insulation, snow shoes and masks and fins, river tubes, my old tent. A pair of driving lights I have yet to wire up. Some cheap speakers I plan on installing in the doors. You get the picture. We call it our attic.

img_1863

We have a completed rack now. It holds our solar panels, is our attic, and still has room to exapand.


Let’s Refurbish a Van – Part 5: Suspension (By Andy)

A post by Andy.

{Note: The work detailed in this post was completed over the summer of 2015, before we moved into the Turtle. I am just getting the time to write the post now.}

We wanted a little more ground clearance, fender and frame spacing for the taller tires, and a good, safe ride. We initially hoped to find an off-the-shelf lift kit. . . no soap. People make them for Ford trucks and Broncos, nothing for 80’s vans. I suppose that makes sense; the van market must be pretty small. So I guess we’ll just have to design and install a complete suspension overhaul and customization ourselves. This is where we started…

KIMG0366.jpg

In the front we have what Ford calls a twin I-beam suspension with what I infer is an aftermarket sway bar, and the rear is just a simple leaf spring configuration, though there are functional aftermarket Firestone airbags that have been added.

Let’s address the rear first; that is comparatively easy. We found some 2″ lift blocks from Action Van (http://www.actionvansuspension.com), that fit between the axle and leaf spring. Action Van actually makes full lift kits, but only for ’92 and newer Ford vans. Lucky, the rear suspension was the same, so we were able to use their blocks for the back.

With some breaker bars on the end of the socket wrench and a little groaning, the blocks were pretty easy to install. Lots of jacks and heavy-duty jack stands were employed in this step! Here is a poor photo of the suspension when I was starting the modification.

1433618343139.jpg

Here is a photo of the installed blocks. Always remember that it is a good idea to drive a bit and then retorque all the bolts for suspension components after making changes- things can settle under the vibration.

kimg0176

After adding the lift blocks, the rear airbags were adjusted by cutting, drilling, and painting 2″spacers from hollow square tubing and bolting into place between the axle and bottom of the air bags with new grade 8 hardware. Sorry for the bad photos (at the time, the important thing was to get stuff done, so the documentation suffered), but what you can see in the following is the original airbags and the blocks and hardware cut, drilled, and painted.

And a current photo of the final installed version- a little dirty, as we have been trekking about for a little over a year now.

Pretty straight-forward modification, and after a few thousand of miles everything is very solid.

cropped_1

Now the front suspension. The modifications needed were: 1) taller coil springs 2) adding air bags 3) fitting the new shocks 4) dropping the sway bar 5) dropping all 4 I-beam pivot points 6) replacing all the suspension bushings in the process.

I was able to find taller MOOG coil springs and front airbags, cranked everything apart, and got those pieces installed.

You can see that at this point with the added spring height but no change to any of the I-beam pivot points, the camber is extreme.

KIMG0371.jpg

The next step was to remove the suspension mounts. This was a true pain, as there were many frame rivets to remove. Depending on the accessability, I would drill, grind, hammer, cold chisel, or simply swear at for long enough to remove. I would consider it a solid success if I came home from work, spent all evening, and got only one removed. I blocked it out, but there were somewhere between 16 and 20. Anyway, after getting the pivot points removed, I made some drawings describing the desired changes needed to drop the pivot points 2″ lower, then took the parts to a fabricator. I weld myself, and made the grill guard, and all other metal modifications on the Turtle, but I wanted really great welds on these parts, so we paid to have someone with more skills do the modification. Plus, it was pretty darn magical to just drop the parts off and pick up the finished pieces a few weeks later. So, some of the suspension pieces back from the welder:

1440187262716

Painting, almost ready to install. I had ordered new MOOG bushings for all the pivot points, so these were installed at this point too.

1440192040722

Except for reusing a few special Ford bolts, the bolts and frame rivet locations were replaced with 1/2″ grade 8 hardware. Some current pictures of the completed front suspension.

Here is a photo of the dropped sway bar pivots with the new greasable bushings installed, again, everything is grade 8 hardware. I never buy anything else (except maybe stainless for chassis fixturing or the interior).

kimg0182

New Bilstein shocks were ordered for all four corners. The stock fit for the rear has enough travel to handle the 2″ lift, so we got the heavy-duty RV ones, and that was easy. We had to calculate the new front geometry to size the front, and went extra fancy with the front shocks and got an external reservoir setup. They look cool! (I ordered them from shockwarehouse.com, part number 25-177480 and 24-184663.)

Here is the front suspension a year into our travels. I was replacing the brake pads, so I took the opportunity to clean everything up, and also paint the hub with Rustoleum. We have had no problems with the suspension thus far.

kimg0047

The lift was added to enable us to have the taller tires, and to have more ground clearance. There have already been a number of cases where we figure we would have likely damaged something on the underside if we did not have the clearance we have. Additionally, with the clearance and narrow tires, we have made it through some pretty deep snow without problems. It has proven to be a successful modification. Plus, it makes the Turtle look cool!

Andy Wears Shorts in the Snow: Christmas In South Dakota

Happy New Year, everyone! Woo hoo!

2016 was a super exciting year in the Turtle, and the coming year should be equally full of challenges, victories, and vistas (and frisbee sessions for Scouty).

img_6685

Before I get into our plans for the upcoming months, let’s catch up with some photos of what we’ve been up to since we left Yellowstone National Park last month! Since that very chilly week living in single-digit temps, we’ve learned a bunch about what we needed to do in order to better winterize the Turtle. So before we left Montana, we headed back to Mom’s house in Bozeman and got busy buttoning everything up with layers of insulation over the windows, extra curtains to divide the colder cab and loft from the warmer living portions of the Turtle, and some modifications under the hood.

Naturally Andy was in charge of the under-the-hood tasks, and he spent the week in Mom’s garage finalizing work on the second alternator. With that new addition we can charge our house batteries while we drive, as the solar panels aren’t getting a lot of sun in these winter months. Not surprisingly, this guy took the opportunity for a wiring project and really brought it to the next level. Give an engineer an electrical mission, and he’ll buy all the toggle switches Home Depot has in stock and create a panel worthy of the dashboard of a UFO. I still need to take a photo of the installed panel, but the process picture gives you a pretty good idea of the extent to which this guy takes on a project!

img_6628

Meanwhile, in between my winterizing duties, I got an extra week to hang out with my mom, sister, brother-in-law, nieces and nephews. We crafted, played video games, and I took on a request for a Photoshop job: Clive wanted to see himself in his “boat” on the water. . . “with a beard!” Turns out that kid could totally pull off a beard.

Even Gracie appreciates how awesome these kids are.

The snow continued during our stay, much to Scout’s delight. This border collie LOVES snow! He leaps through the drifts with abandon, and runs back and forth between us, trying to encourage us to run along with him.

img_6680

Gracie, on the other hand, finds the warmest covered spot and settles in.

img_6690

After getting used to living as locals, it was hard to leave all my favorite people. It was such a treat that we were able to spend so much time with them though. In the Pre-Turtle days, we were typically limited to a week each year at most for visiting family. So I can’t get too greedy when I just got to hang around for a whole couple of months!

Once the improvements were complete, and I felt confident that the kids were ready to love The Legend of Zelda without further encouragement from their auntie, we left Bozeman. After a quick stop in Billings to see Blake, Martha, Harper, and Grant, we then made our way toward South Dakota. We drove by Little Bighorn Battlefield right before it closed for the day, and took a brief walk through the grounds as the chilly winter sun set.

Then with the heater on full blast, we moved on to Gillette, WY for the night where I got so unbelievably sick. (I’ll only include this because I promised in a previous post that I wouldn’t overlook the portions of full-time vandwelling that are challenging, and this was just AWFUL.) I’ve gotten sick a few times since we moved into the Turtle, but they were mostly mild illnesses that were inconvenient but tolerable. I’ve never gotten violently ill while living in the Turtle until that night in Gillette, and it definitely was more challenging than getting sick in a house.

I thought I had food poisoning, as I got sick so abruptly, but in retrospect I think it was likely a severe flu. I was vomiting so much all night (essentially into a pit toilet) that I got massively dehydrated, and unfortunately since we were in freezing temperatures our water tank had frozen and cracked and we had been carrying water around in jugs. As luck would have it we were low on water that night, so I was rationing water and sucking on ice cubes and trying not to step on Andy on the pull-out couch as I got up every 20 minutes to vomit. And the next day we had to move along, so I was sleeping fitfully on a bed rocking and bumping at 65 mph on the freeway. Glamorous!

So, there you go. Full-time vandwelling is not all roses. But for the record, I’m not trading it for anything!

At any rate, while I was in my sicky fog Andy got us to Spearfish in time for Christmas with his family. Much to Scout’s delight, the ground was covered in snow, with a whole bunch more in the forecast.

img_7103

And much to Andy’s delight, there were plans to assemble a Lego train which would travel around the Christmas tree! I’m not sure how many total man hours were spent around the table between Will, Ellie, Andy and myself, but Andy outshone us all with his dedication to the cause, as well as his impressive Lego skills.

Between the four of us we created quite a spectacular Christmas train, if I do say so myself.


Ellie and I worked on Rudolph’s Christmas Car which led the way, and created bunches of Lego presents. Will put together the engine, the middle cars, the flatbeds, and made a magnificent cubist Christmas tree. Andy made a tippable car that he’d originally intended for imaginary molten metal, but that Ellie and I filled with our gifts instead. He also made a caboose equipped with a crane to hoist and deliver the packages, and it really works, and it’s awesome.

Each day we were surprised by the dramatic change in weather. One day: blizzard. (Andy wore shorts all day.)

The next day: sun.

The next day: more snow.

The next day: more sun!

Snow.

Sun.

You get the idea.

Highlights of our time in South Dakota also included:

  • Testing out the newly-wired Hella lights. . .
  • Learning about the difficulties of dumping tanks in winter when all the RV sites for miles around are closed for the season. . . (For those interested parties, it includes making friends with the on-site owner of a closed RV site and graciously being given permission to use the facilities if you can find it and not break anything, digging through the snow until you find the port, boiling hot water, filling a container with hot water, pouring it over the frozen cap until you can open it, taking a photo while your significant other waits for your assistance.)

img_7137

  • Being co-planner for a stuffed animal beach wedding. . .
  • Waiting to see how Andy will alter the “LOVE” Valentine’s decorations his sister put on the mantle. . .
  • Towing stranded passengers out of a snow drift. . .

img_7195

  • Finding Gracie tucked into cozy spots on the coldest days. . .
  • Scout just driving around town. . .

img_7226

  • And knowing Christmas is officially over when you see the Christmas tree ablaze.

img_7206

Coming up: We’re done with snow and are going to Mexico!

P.S. If you enjoy following along with our blog, don’t forget to click the “Follow” button, and you’ll get an email whenever we post! 🙂