Renovation

Let’s Refurbish a Van – Part 4: Curtains

Of all the updates one can make to an RV, in my opinion the most drastic change for the least amount of effort is the curtains. It’s a way to infuse color, pattern and texture into the small space, especially in a vehicle like the Turtle, which has zero wall space for art. We almost have zero wall space for walls! Even if you aren’t a world class seamstress, it’s a simple shape to tackle, and honestly nobody even notices if your hemlines wobble a bit. I really encourage you to give it a try!

IMG_3047

When we got the Turtle, I knew I wanted to plan all my color choices around the curtains. It’s the best place for statement patterns, and I love-love-love a bright and colorful interior space, so I wanted to see what was available before making further paint or fabric decisions. Actually, it was the first decision I made at all, and I think I had the fabric in hand within the first week of owning the Turtle! I love a whimsical graphic print, and the green shade is so friendly and cheerful.

IMG_0108

When picking your curtain fabric, I highly recommend choosing outdoor fabric. This may sound obvious, but the selection of outdoor fabric is often pretty slim, and the allure of an entire store full of pattern and color choices seems like a fine trade-off for less sturdy material. But the outdoor fabric won’t fade as quickly as other fabric. It’s also mold and mildew resistant, which doesn’t seem like a big deal until you’re boondocking on the Oregon coast and the hygrometer reads 93% humidity and the windows are weeping and mold is knocking at the door. The last thing you want is to find your curtains flocked with green fuzz! Ours stood up to the damp like a champ.

Something to keep in mind about outdoor fabrics, though, is that due to their durability, they are slightly more stiff, and don’t bunch or ripple like regular fabrics. But if you take that into consideration, you can work around it by reducing the ripple a bit or giving your curtain rod span a few extra inches to account for the thickness when the curtains are pulled open.

IMG_3219

IMG_3228.JPG

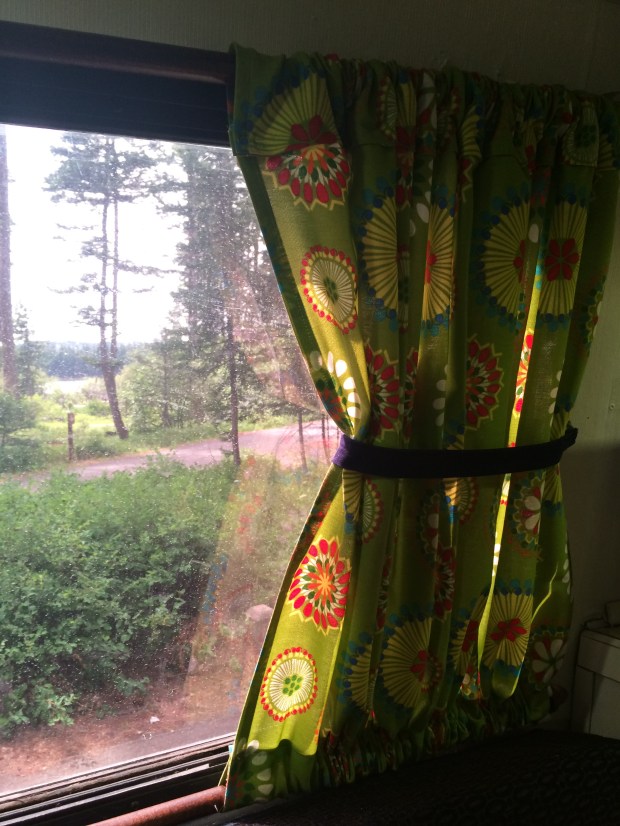
As you can see, I opted for a gentle ripple, and at the top and bottom it’s still pretty thickly bunched. Additionally, since we don’t have a ton of room on either side of the windows in the Turtle to add rod span, that extra fabric to make the ripples does take up a little window space when they’re pulled open. So it’s good to pick the fabric you like, then decide how you’re going to mount the rods and how much the ripple will affect the length of each panel.

With that in mind, it’s time to determine yardage so you can buy that awesome fabric you found! What I needed to consider with our curtains was the fact that the Turtle’s walls are curved, so I’d need rods on the top and bottom to avoid them hanging far from the wall at the bottom. (I’d actually recommend this even for straight walls, as it keeps more light out and doesn’t blow around.) So I hemmed pockets on top and bottom, and made a double-fold hem on all sides. The double-fold isn’t necessary, but it’s a nice detail. Just fold the hem over, press it with an iron, then fold it over again, press it, pin it, sew it down! Do this to all four sides before sewing the pockets so the rods can slide through.

IMG_3233

Then fold the top and bottom pockets over, press them, pin them, sew them! This part can be tricky if you’re using two rods, as it needs to be nearly perfect so that the curtains stay taut but don’t pull on the rods or just not fit altogether. Even after explicit measuring, I ended up spending some quality time with my seam-ripper as I tried to get the fit just right.

IMG_3220

Oh, did I mention I had a hard time getting the fit right? Yes I did. It was difficult getting them to not balloon out, and when I took them in they strained the rods since they were a little too short. In the end, I had to make another pocket and sew it to the top of the curtains. This made it easier because I could adjust the pocket right on the rods and pin it in place before sewing it. If I did it again, I’d just plan on approaching it that way to save a headache! Luckily I love the way it looks, and if anyone asks, you can tell them I totally did it on purpose.

IMG_3232

IMG_3229

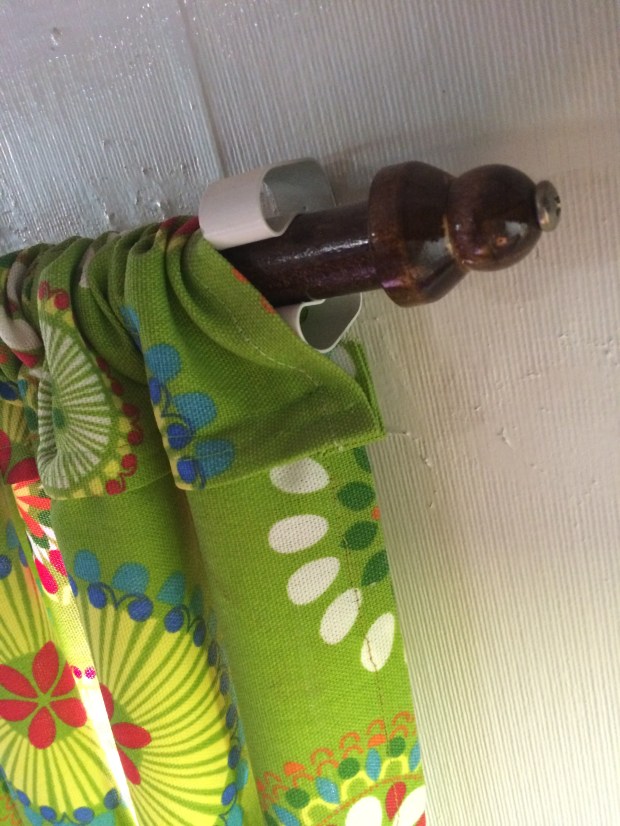
For the rods, I bought some dowels from Home Depot and some wood end pieces from JoAnne for the finials. Cheap! Andy sanded, stained and varnished them for me, and screwed the finials into the dowels. The benefit of doing it this way was that we could cut them to the exact size we needed inexpensively, and the wood end pieces already had holes through them, so screwing them in was really simple.

IMG_3217

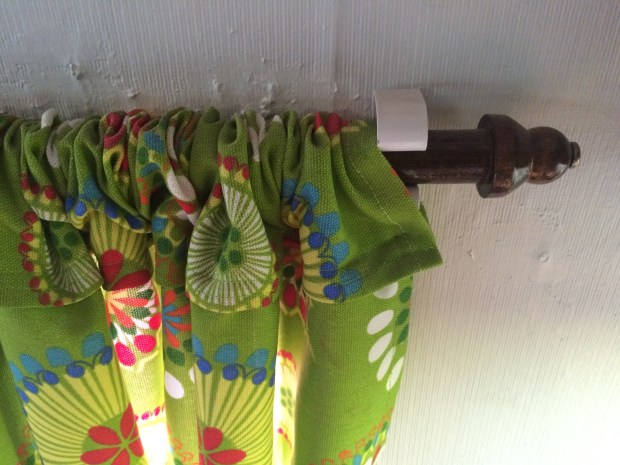
Andy’s genius came in handy as we tried to figure out a way to mount the rods. He found some utility tool hangers at Home Depot that fit our rods perfectly and hold onto them tightly enough that they don’t slide back and forth. We painted them white, and done!

IMG_3218

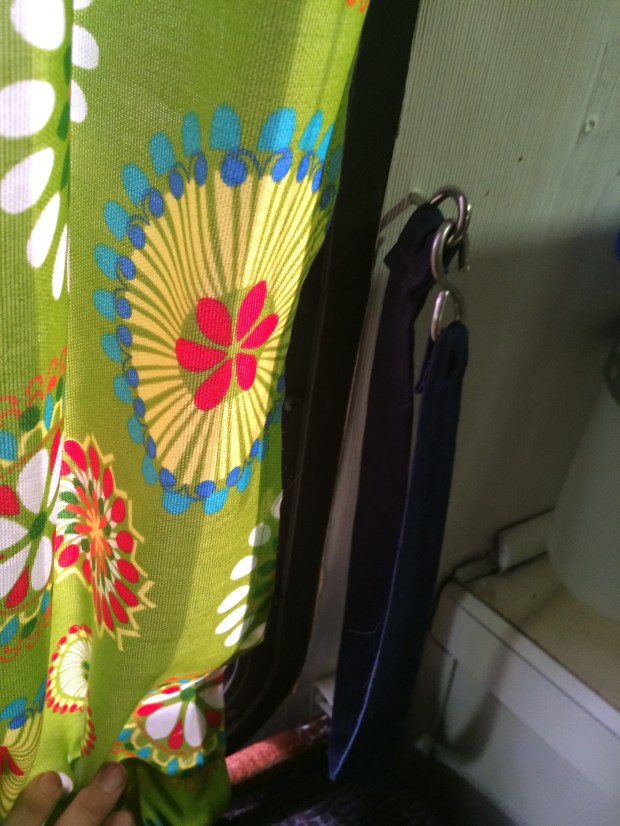
For the tie-backs, I just sewed a strap with some navy fabric I found in the remnant bin at Mill End, and attached one end of each to some stainless steel eye screws I’d screwed into the wall.

IMG_3222

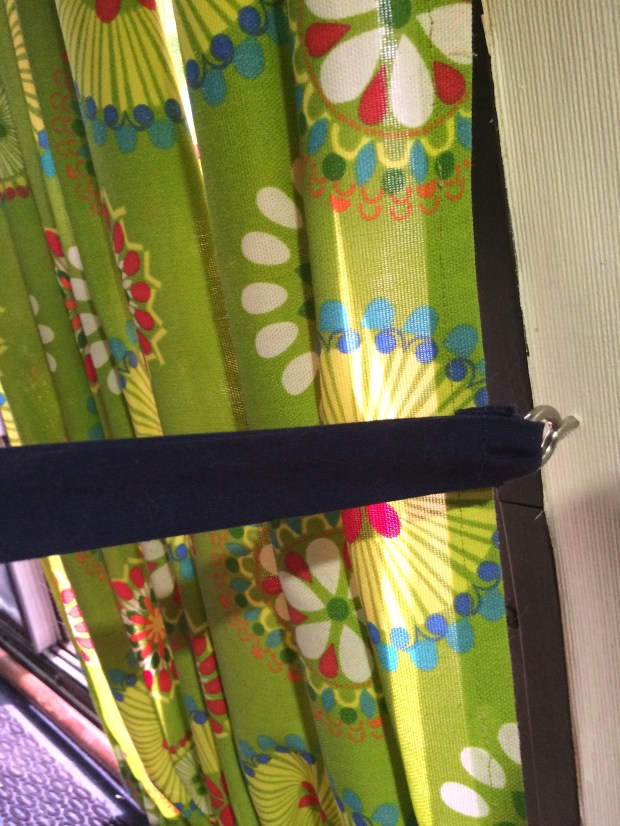
The other end I attached to stainless steel S-hooks.

IMG_3223

They wrap around the panels to hold them back, and then when the curtains are open, we just re-hook it so it stays out of the way (and so Gracie isn’t as tempted to bat it around).

IMG_3234

And there you have it! Inexpensive custom curtains that make a statement, liven up your small space, and are a nice splashy backdrop for pictures of your pets.

IMG_2948

If you have any questions about the process, let me know! As with any How-To post, I’d be happy to explain any parts in greater detail to help get you started on your own project. 🙂

A Very Montana Summer

Greetings from Montana!

It’s been a while since we checked in here, and today is a great day to update the blog as it’s stormy and raining outside here in Seeley Lake. Andy is busy working, and I’m doing my best to keep Gracie from trying to curl up on top of my keyboard as I type this. If any portion of this blog isn’t up to standards, you can take it up with her.

IMG_2971

We’ve traveled a fair distance (by Turtle standards anyway) since our last post in South Dakota! We made it to Billings after a quick overnight in Gillette, and headed to Riverfront Park right when we got into town so Scout could catch some sticks in the Yellowstone River.

IMG_2326

Then we went to Scheels to ride the ferris wheel! If you’re ever passing through Billings, be sure to check out this perplexing sporting goods store. It’s a mix of an outdoor store and a carnival, and just hilariously bizarre. We rode the 3-story ferris wheel, saw animatronic presidents, got our pictures taken with some wild animals, and also got our fishing licenses.

IMG_2328

Then we spent a few days with our friend Grant, who I went to high school with, and who is staying in Billings for the summer. We went to Alive After 5, rode our bikes all around town, and sat on the patio at Thirsty Street for a beer. Check out this place for sure; not a lot of places in downtown Billings have patios, and their patio gets great sun, plays good music, and the beers are super tasty!

IMG_2371

IMG_2375

We did a lot of bike riding, even though the temp was in the 90’s the whole time we were there! We had to pull over one day so I could run around in some sprinklers for a while. We took the dogs to Pioneer Park, had nachos on the patio at The Granary, and stayed up late playing games and gabbing outside in the grass. Fun times with Granty!

IMG_2430

One night we also came across this extraordinary line of garbage cans, which Andy was so taken with we had to take a photo with them. It really was an impressively long line of pristine garbage cans. (It doesn’t take much to keep the three of us entertained.)

IMG_2344

We also spent a few days with Blake and Martha, who always show us a great time! We went to a Mustangs game, and Andy offered to hold little Harper’s mitt for her. . . then wore it the whole game. She was too busy with her ice cream sandwich to mind.

IMG_2451

We had lots of great meals, the boys stained the deck, and Martha and I snuck out again for a beer while the boys watched Harper. I secretly think they just wanted to watch Mickey Mouse Clubhouse and Harper is a good patsy.

Then we moved on to Bozeman to visit my mom and sister Kari’s family for a few weeks. We even timed it just right (accidentally) so we were able to see my Grandma and Uncle Brian while they were in town visiting!  They were only able to stay for a day and a half, but we got to spend lots of time sitting around sipping coffee and sharing stories. What a treat! Plus Grandma finally got to meet Gracie and Scout, who had never made the trip to Newberg with us when we would visit her there. I only realized after they left that I never got a photo of all of us together! Bummer. So instead, here’s a photo of a Bozeman sunset.

IMG_2486

We also got to see a new baby Lipizzan pony! My sister and her friend and all their kids were going to see her, and Andy and I jumped right on that bandwagon. She was so sweet and funny, leaping around at top speed on those spindly little legs. Lipizzans are a special breed of horse with a fascinating history that we learned about from their owner while we were there. They are dressage horses who are super nimble and can perform some incredible dance moves cued only by tiny twitches in their rider’s bum and legs. Crazy!

IMG_2515

Then we went to the Museum of the Rockies, where there was a Pompeii exhibit that we really enjoyed. And their dinosaur bone collection is simply incredible.

That weekend, David and Kari invited us to an evening fishing trip up Hyalite Canyon. We picnicked, Scout swam, and David kept very busy helping the kids bait the hooks and reel in all the fish they were catching! The beginning of our trip was quiet on the fish front, but after we moved to another spot by the dam we all had better luck.

IMG_2567

Scout and Gracie love being at my mom’s the most, as they get lots of attention and total run of the place.

My niece Bella and I went for pedicures one day, and both of us are now sporting some killer sparkles. Bella even has fireworks on hers!

IMG_2677

When we got back to their house, the kids had an impromptu clothes-on pool swim.

IMG_2693

We ate like kings while we were at Mom’s, as she’d just cleaned her BBQ, and Andy installed a few parts to get it looking and working like new! So there were lots of fancy dinners off the grill, including a feast of salmon, steak, and chicken with ginger asparagus and grilled polenta for just the three of us. We could get used to spoiling ourselves like this.

On our way out of Billings toward Seeley Lake, we stopped for the night in a gorgeous spot in the middle of nowhere, and also made some fishing stops along the way.

IMG_2891

We decided to reach Seeley via Garnet, so we could visit the Garnet Ghost Town. The roads there are treacherous, and when we saw the caution sign, we decided to see what the Turtle was made of and just go for it! (Ok, Andy decided. I just said yes and wiped off my sweaty palms.) There were some seriously steep hills that were knuckle-biters. Andy was thrilled.

Neither of us had been to Garnet Ghost Town in over a decade, so we were excited to visit. We got there Saturday evening, and after the first 15 minutes, we were the only ones there! It made it really easy to use your imagination and picture what the town was like during the mining boom, when all the buildings were still standing. But the remaining buildings are well preserved, and they provide lots of information about the town and residents’ lives there.

IMG_2914

You can boondock at the ghost town for free, so of course we did that! We returned to the town the next morning to see the inside of the buildings that had been closed by the time we arrived the day before, and then drove on into Seeley Lake in time to celebrate the 4th of July with the other 3,000 people who come yearly for the parade and fireworks! We just happened to be boondocking right on the parade line, so we were able to easily pop our camp chairs up and watch the festivities with zero preparation or stress.

IMG_2992

After the holiday visitors took off we had our pick of the camp sites, so here we are now right on Seeley Lake. We hiked around the campground and harvested the abandoned piles of wood the holiday crowd left at their sites, so we’re all set to stay here for the next four days! In the next post, you can look forward to some sweet woodcarving projects, much like this impressive hot dog stick Andy made yesterday! We’ve got the time and plenty of sticks, so we’ll see what we come up with. . .

IMG_3066


Scout and Gracie Take On South Dakota (Also, Amy and Andy go to Devils Tower)

Well here we are in South Dakota! We spent a week in Billings with some friends, Blake and Martha, and had a month’s worth of fun in that one week!

We met little Harper for the first time, climbed up the Rims, had relaxing chats in Blake and Martha’s sunny back yard, took some nostalgic drives around town, the boys almost watched Blake’s dog get smashed, Martha and I snuck out to watch some bluegrass, and Andy and I were taken to many of the tasty new spots that have sprouted up in Billings since I grew up there. (The last time I was in Billings, the exciting action in the restaurant scene was the second Chinese spot to arrive in town. Yikes.)

New and delicious places of note: Cafe Zydeco for Cajun food, Carters for a very cramped but cozy Missoula-esque brewery experience, Angry Hanks for a more modern and airy brewery experience. . . and while we’re on the subject, let’s never forget Great Harvest for a killer sandwich on freshly baked bread, and of course the best sweet in history, Caramel Cookie Waffle. Okay, so next time you’re in Billings, if you go hungry, you can’t blame me!

Image Sources

On our way out of Billings and into South Dakota, we went just a little out of our way to go see the first National Monument, Devils Tower.

0429161427a

Fun fact for us nerds: Originally the spelling was Devil’s Tower, with an apostrophe, but while signing the documents to make it a National Monument, Teddy Roosevelt accidentally omitted the apostrophe. Nobody ever corrected it, so the official spelling is now Devils Tower. The more you know!

It’s a really amazing natural formation with a few theories regarding how exactly it was formed. There is a 1.3 mile walking path around the monument, and with us taking our very sweet time, stopping to watch the squirrels and climb around on the boulders, it only took us about an hour. It’s really neat to see how different the formations are on all sides.

There are a number of Native American tribes living near the tower, and it’s considered a sacred site where they worship and perform dance rituals. I loved seeing all the prayer bundles hanging from the trees.

0429161457

In the photo below, if you look closely on the tipped-over column, you can see some teeny-tiny people making their way up the side of the formation. Devils Tower is a popular spot for climbers. Crazy!

0429161459a


Not to be outdone, Andy also found a miniature Devils Tower and climbed it.

0429161524d

Ok, enough about Devils Tower. On to South Dakota!

0429161538e

We are presently staying at Andy’s sister Maggie’s house outside of Spearfish, and our new backyard is surrounded by trees, spring flowers, and deer families. It’s absolutely gorgeous. Plus we’ve had lots of sunshine and barefoot days!

0503161825

If you’ve been following along with us on our adventures, you can probably guess who’s having the best time in our new spot:

0503161245a

Yes, Scout and Gracie are absolutely loving life out here. These kids have the run of the place!

Gracie climbs trees and tags along with us on walks through the hills.

0503161829f

And Scout has two best buddies, Will and Ellie, who love to throw his frisbee and play with him all day long. He’s going to leave here spoiled!


Then again, so are we! We’ve been having so much fun with everyone here. But there’s so much to cover, we’ll just have to save that for the next post. . .

(Oh, and if you want to stay apprised of what we’re up to in this crazy Blue Turtle, don’t forget to click the “Follow” button on our page, and you’ll be notified every time we post! We like to have our friends all accounted for.) 🙂

Let’s Refurbish a Van – Part 1: Flooring

Well, it’s been raining virtually nonstop for the last few weeks in Portland, and Sauvie Island seems as if it’s ready to admit defeat and just merge with the Columbia River and call it a day. So I’m working from the island today, appreciating how warm and dry I am inside, and thinking about how just a year ago I was dreaming of this very scenario, feeling like the day would never come!

*Newly-formed lakes and sunken pumpkins on Sauvie Island not pictured. It has been raining so hard, one photo would send my phone right into a bag of rice.

These days, as we sit in the Turtle, eating dinner at the table or climbing up the ladder into our cozy lofted bed, we sometimes take for granted how much work actually went into this project. Because we gave ourselves such a tight deadline, we didn’t have time to stop and appreciate each accomplishment as it was crossed off the list, because there was another line item right below it requiring immediate attention. The moment we crossed one finish line, we’d look up and see there was another lap ahead of us!

IMG_3452A portion of the list. 

If you’re thinking of taking on a similar project, or if you’re just curious how we got from Point A to Point B, here I’ll be discussing our process, and what we learned along the way. I will admit, our experience was made much easier due to Andy’s crazy number of useful skills! But if you’re like me and aren’t handy with welding, car mechanics, woodworking, and wiring lighting (among Andy’s many other contributions), don’t despair! The most inspiring thing about Andy is that when he comes across a job that requires skills he doesn’t have in his personal toolbox, he does research online, buys books, and reads the blogs of others who are skilled in that field. He then gets the needed tools for the job, and just gives it a go. Personally, I tend to get intimidated by new large-scale tasks that feel like they should require a professional. But throughout this project, following Andy’s lead, I found myself feeling empowered and excited to see what I could learn and accomplish. If I can fiberglass and epoxy a floor, anyone can!

KIMG0095The quality of this photo is terrible, but the cuteness is top shelf.

Our first goal in the refurbishment was to strip down the interior of everything we wanted to update. This included nearly all soft surfaces, as the Turtle is 30 years old and these tend to hold on to dirt and odor. . . and the design sensibilities of 1985.

So as it was the first change we made to the Turtle, for this portion of the blog, let’s discuss flooring.

KIMG0023
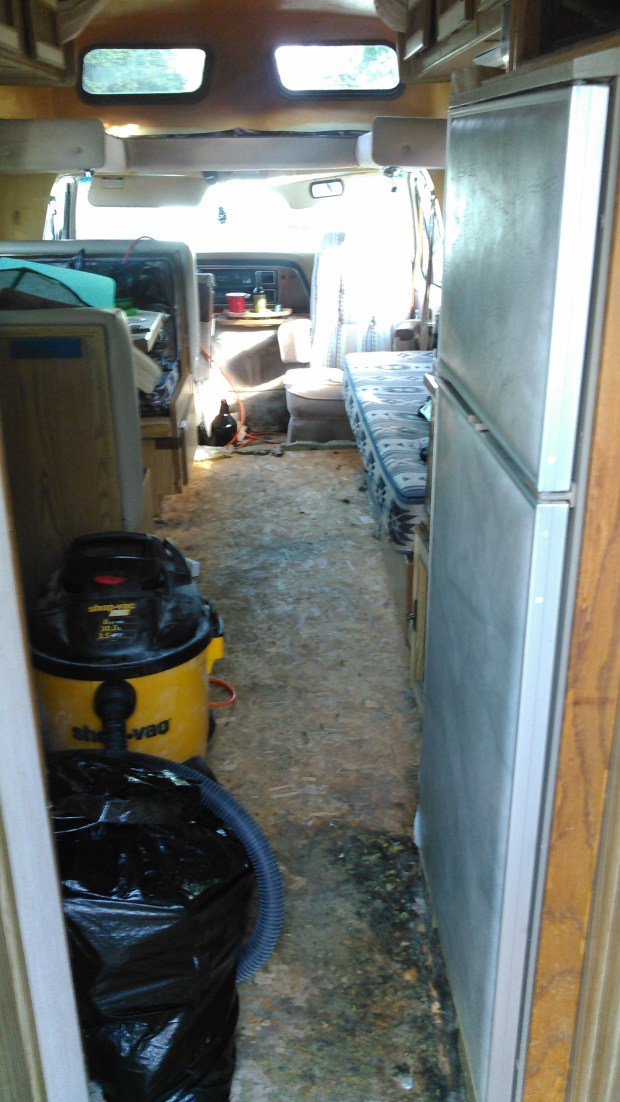
This is one of the only photos we have of the carpet before Andy pulled it out – just a teeny slice visible in the bottom left corner. But you get the idea. 

KIMG0020A bit more carpet shown here. We just got so excited to get started, we didn’t get a whole lot of “before” photos before things started changing!

First, Andy ripped out the carpets and the subsequent one million carpet staples. I’d like to say I’m exaggerating the number, but I kind of am not. I worked on just a 30″x30″ portion and the resulting blisters were highly impressive.

KIMG0050

KIMG0041

Underneath the carpet was the OSB flooring we were expecting to find. Due to its age and thickness, it tended to sag quite a bit when walked on, so Andy proposed reinforcing it with sheets of fiberglass cloth and epoxy. At this point, I’m going to use the pronoun “we” when I discuss our work on this project, because I now am a fully qualified epoxy applier, and proud of it! Though of course Andy did much of the up-front work before training me—but I felt very pleased with myself when I realized that I can now strengthen any old floor I like!

In a few areas, the flooring had rotted out pretty significantly. Ever the optimist, Andy was pleased that it was an easy early indicator of where we had leaks that we needed to fix, before finding out the hard way when the rain hit! So he cut out the soft blackened area and replaced it with another piece of OSB that he cut to fit.

So, in small increments, we 😉 laid sheets of fiberglass cloth over the floor of the turtle and rolled thin layers of epoxy over it with a small roller, eventually covering the full surface area and applying additional layers in the weaker spots. Between each layer, we sanded it down to keep it nice and smooth, as portions of the fiberglass tend to raise up a bit here and there.

IMG_0383Halfway epoxied. (Guess which half!)

It was so smooth and shiny that Andy originally wanted to leave it as it was. Truthfully, it really had a neat industrial quality to it, but as it was going to be our home, I was hoping for something a little warmer. He cared less than I did about this issue, so we agreed to find flooring to install over the OSB.

After researching a number of ideas for the flooring surface, we decided on vinyl stick-on tiles. They’re fairly durable, inexpensive, and if any damage is done to a portion of the floor, we can just pull it up and lay a new one in its place. Considering the fact that we plan to play hard while on our adventures, neither of us wants to tiptoe around the Turtle trying to keep it pristine. But we also don’t want to take all this time just to trash it either! So it seemed like the best route.

The majority of the options we found were square parquet-style tiles, which we liked, but I had my heart set on long planks. After some research, we found exactly what we were looking for at Lowes: cherry “wood” planks with some textured striations to give it a more realistic wood feel. They sell them both by the box as well as individually, and are relatively easy to cut to size.

IMG_1794-001

IMG_1714

IMG_2059

Aside from the fact that the Turtle has some ca-raaazy angles, installation was fairly painless. I’d imagine if you have a more uniform and rectangular vehicle, you’d have an easier time than we did. The Turtle, though, is made up of friendly-looking but unpredictable curves and turns, so both we and the box cutter were put to the test.

But we got it done, and there you have it! Brand new floors. They’ve been holding up great, and with all the rain and mud we’re experiencing out here lately, I’m so appreciating the ease of hard surfaces as opposed to a muddy carpet to clean! And with the recent addition of a few navy runners, it really feels like home.


The Turtle “After”

So now is the point where we get to show the result of a year of hard work on our tiny home! I’m typing this while drinking coffee at the table and listening to the rain on the roof while keeping nice and warm inside the Turtle. Looking back at the “before” photos, it feels a little unbelievable! This crazy old van is now our cozy home.

I was going to post side-by-side “before and after” photos today, but realized that since I took the “after” photos on a grey and rainy afternoon, the impact doesn’t do it justice, as the “before” pictures were taken on a bright sunny day! So that post is on the horizon.

Here we are!

IMG_3057
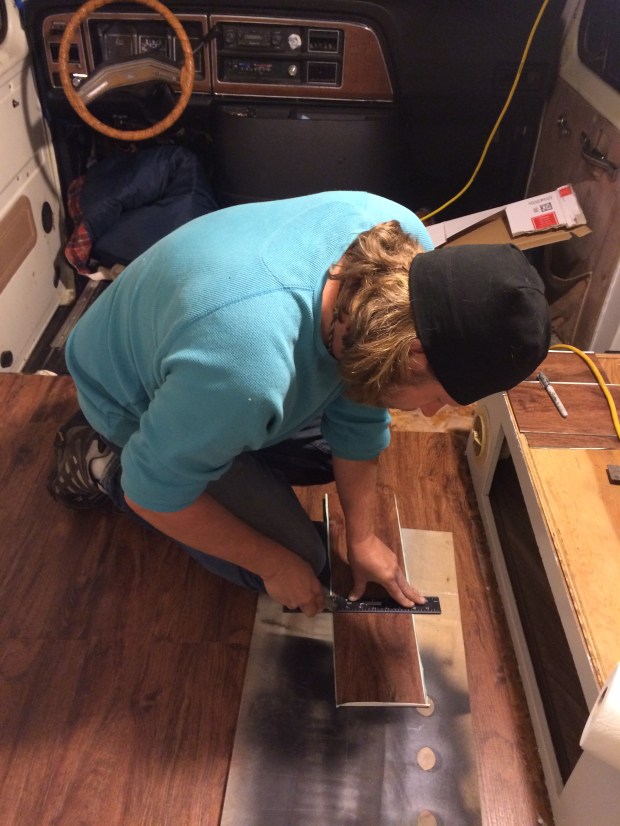
It kind of feels like a boat. I like that.

IMG_3093
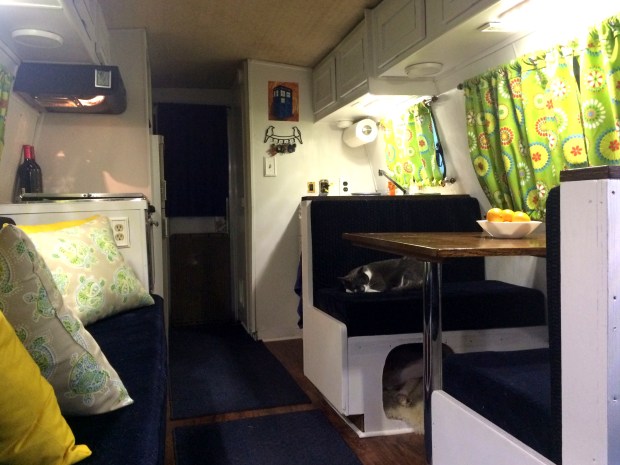
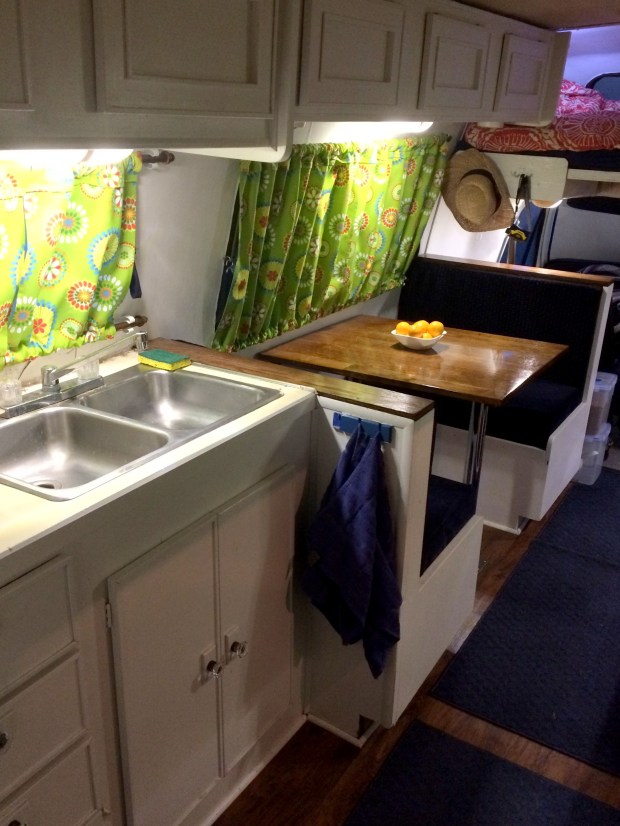
Kitchen and Dining Room 

IMG_3092

IMG_3080

IMG_3056Bunk beds!

IMG_3064
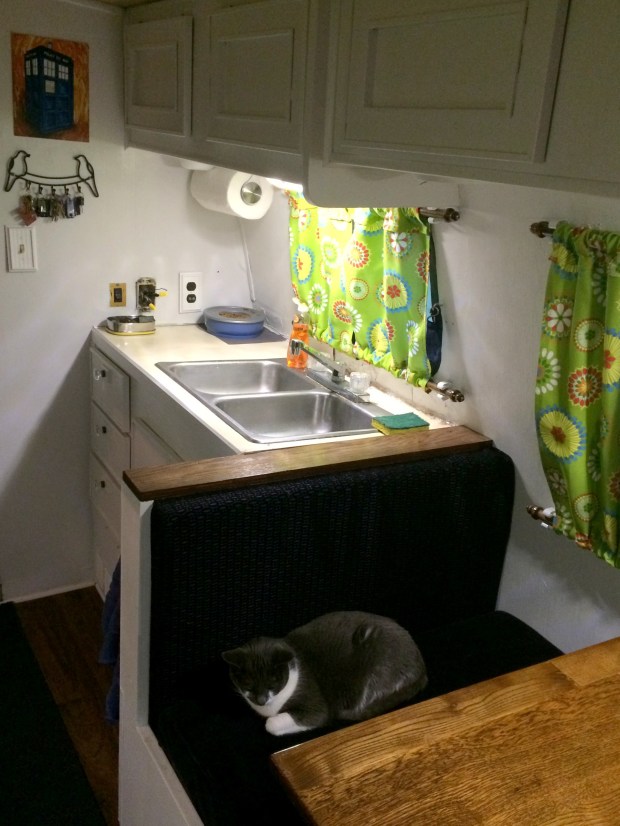
Love the Tardis painting by my talented brother-in-law David

IMG_3047Andy cut down and refinished an old desk he’s had for years to make the table

IMG_3096We love the no-spill bowls for the pets

IMG_3125Andy picked this fabric! We promise not to over-do the turtle references, but it was super cute and coordinated nicely with the other prints

IMG_3085Maximizing the limited closet space

IMG_3106Nothing we own can be larger than 10″H x 9″D

IMG_3102

IMG_3110

IMG_3120
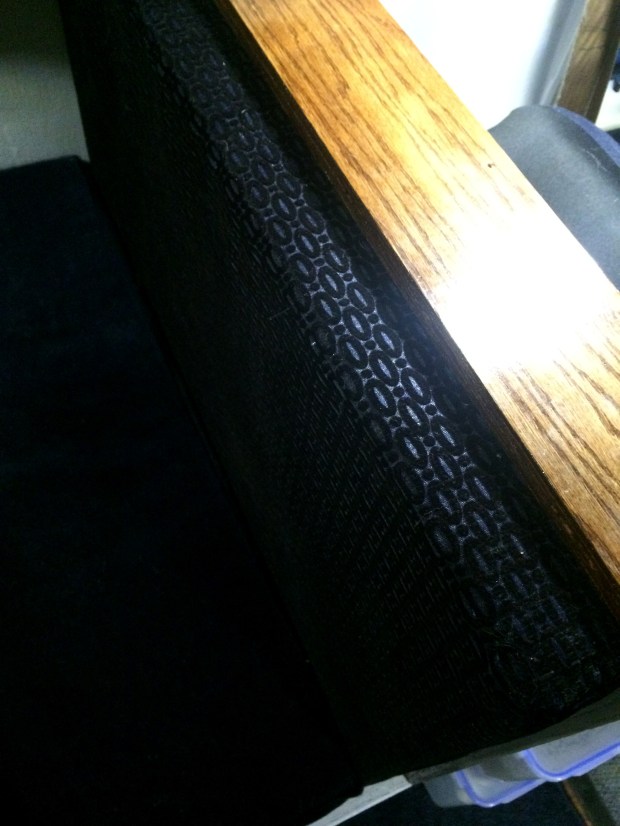
I love the wood Andy installed next to the new upholstery pattern. 

And there we have it! I’ll post more pictures soon!