updated

Let’s Refurbish a Van – Part 8: Hood Scoops (By Andy)

A post by Andy

{Modified the title theme some. We think of ourselves much more as a big van than a small RV. I now want to start prefacing this and future posts to be more representative of our self-image.}

So, to the meat of the subject. I just finished our hood scoops! Why did I make hood scoops? Well, for one, they look pretty cool and I needed a prominent place to put my new go-fast emblems that I ordered from Amazon.

KIMG0530

Mainly, we are trying to get as much power out of the engine so we can get our heavy old self up the high steep hills. In that vein, I have been playing with the spark timing, carb mixture, and intake airflow. By tweaking and adjusting these parameters we are working to get the most power and efficiency out of our old engine. Specifically, advancing the timing can get the engine to produce more power, but too much spark advance causes engine problems—pinging and preignition. If the engine is cooler, one can run with more advance. Another way to look at it is that with a given timing advance, if the engine and intake air get hotter, then the timing is too far advanced.

Maybe a side note about my “go-fast” emblems. Car companies try to sell cars. Sometime fancy cars come with racing stripes, cool graphics, and badges on the side about engine stuff. A joke among car people is the question “How much horsepower do the stripes add?” The answer is, of course, none. But… they do look cool. Look around, they are everywhere: M3, AMG, Hemi, 440, HiPo. The only thing the badge or stripes could actually do is add an immeasurably small increase in drag, or some unneeded paint weight. They are simply for the people in the car next to you. All the same, they look sporty, so I bought some that state the displacement of our engine and say it is “High Performance”. What I’m saying here is they do nothing, but they truly do look great!

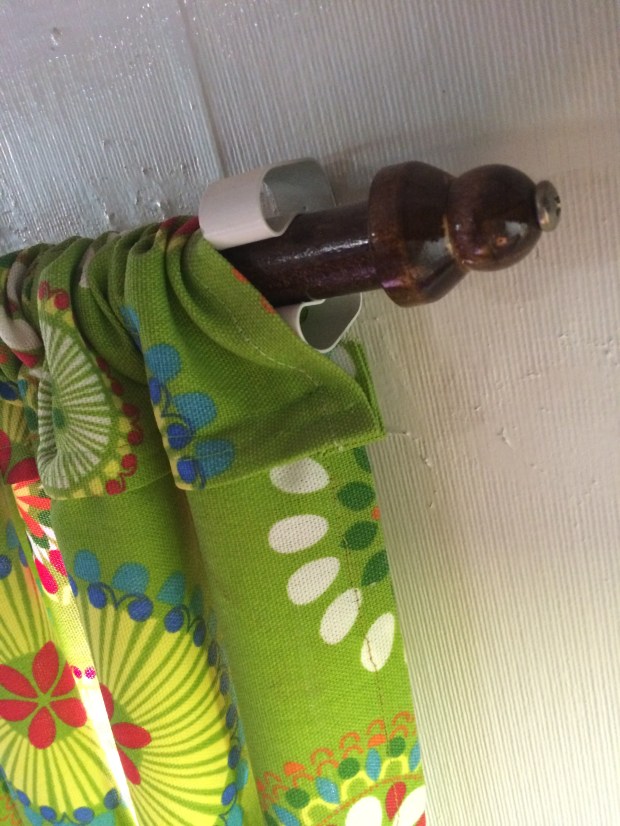
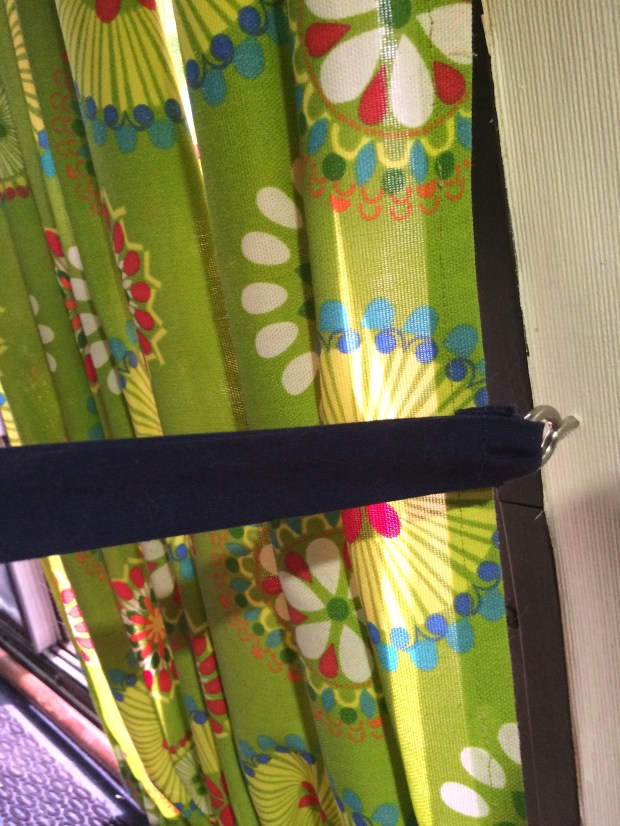
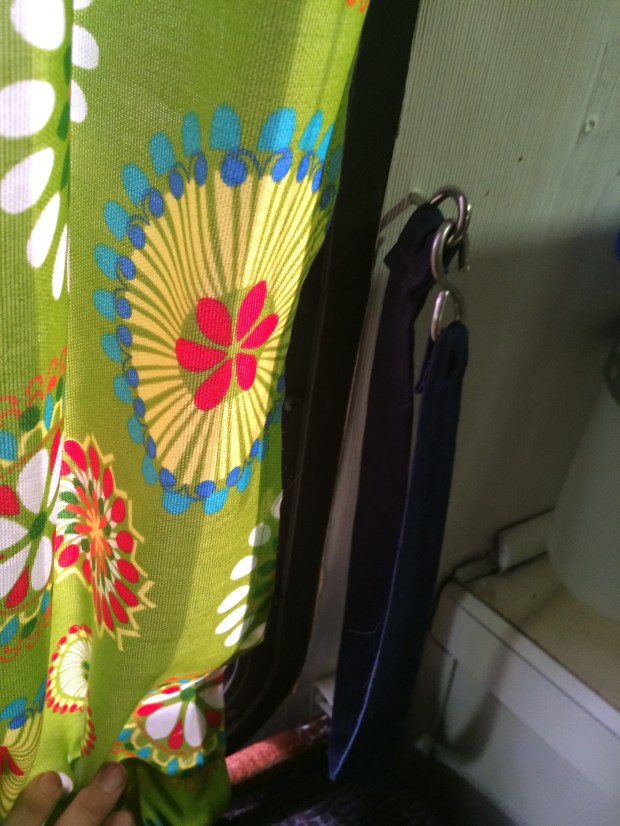
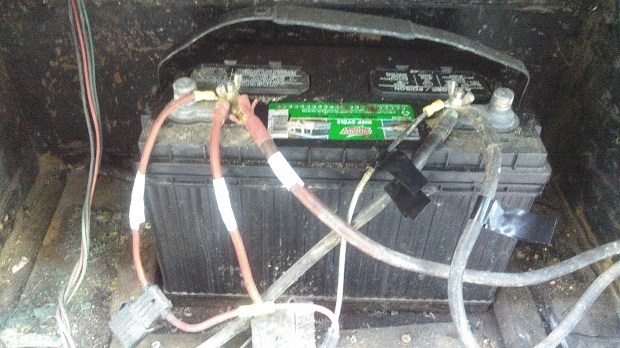
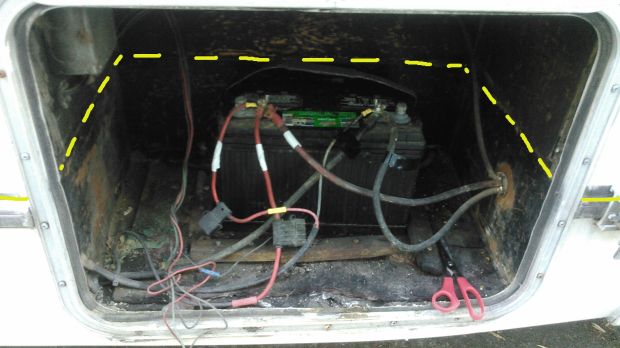
So, I wanted more air to get in and out of the engine compartment to cool the engine, and have the air flowing into the air cleaner be as cool (and dense) as possible. To make sure I had an understanding of the pre-hood-scoop environment, I first taped the probe end of my digital temperature gauge to the air cleaner. Over a few weeks in different driving conditions and different altitudes, we took notes about the temperature measurements of the air cleaner and air filter. You can see the wire to the probe, and the tape holding it in one location.

KIMG0451

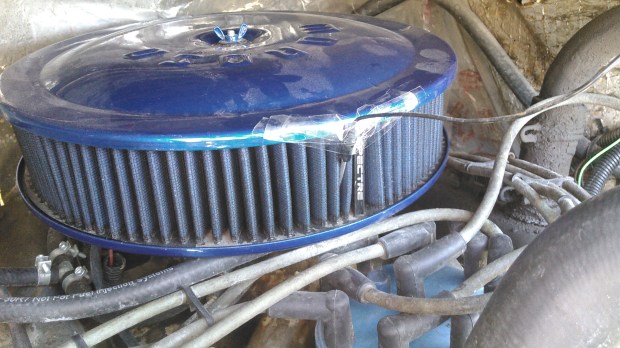
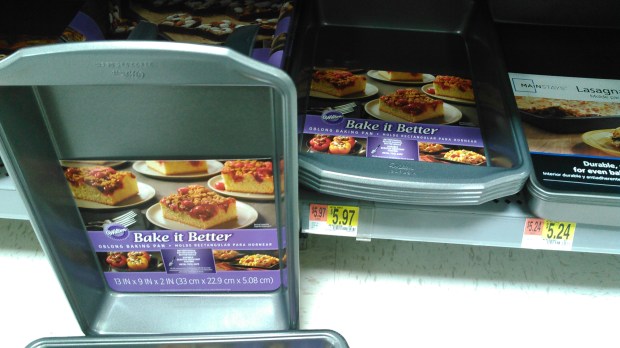
Overall, we are in the 150º–160ºF range under the hood after the engine gets warmed up and when the ambient temperature is in the 70º–80ºF range. So, to get more outside air in and more inside air out we need some kind of venting. I looked online, and $50+ plastic vents and scoops can be found, but they were not really van-sized, and seem flimsy. Metal ones can also be found, but are more expensive, and again, really don’t fit. Apparently there is an untapped market of people who want to mod 1985 Ford vans! (Investors be wary—the market may be small.) I finally hit on the idea that rectangle cake pans are about the size I wanted, and they are inexpensive, and they are made of metal designed to withstand 500ºF+. Going with this thought, while we were camping in El Malpais National Monument, I made some cake pan-sized cardboard mockups and spray painted them with a blue that I had.
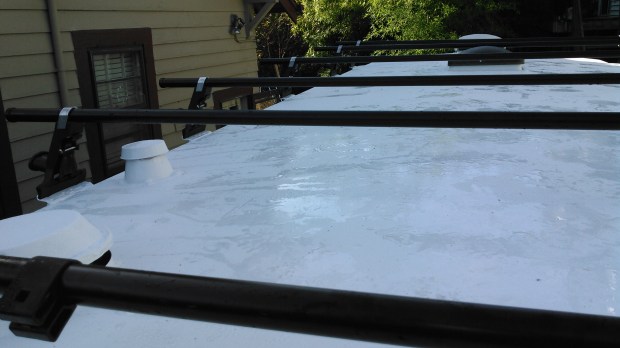
Test fitting…

I thought that looked good, so a few days later when we were in a town, we got some cake pans.

KIMG0454

KIMG0455

One morning, a few weeks later, when we where camping at the Great Salt Lake, I got out the pans, tin snips, sandpaper, and primer, and got to work remaking our sweet cake pans into even sweeter performance hood scoops (please note the word play).

Here they are.

Test fitting.

We stashed them away for a bit and traveled onward. Another week later we had a free day while visiting our friends the Higdems in Kimberly, ID. I measured, moved, marked, measured, and measured and marked again. Then I started drilling holes in the hood.

Lots of little holes now!

After fitting and drilling the mounting holes, I now knew what piece of the hood (bonnet, for any Brits out there) to cut out. Out with the jig saw.

Another side note here: When putting the Turtle together, we set ourselves up with a few DeWalt cordless tools and the battery charger that plugs into a 12V cigarette lighter. The tool charger is now wired to our solar-charged batteries, so we are using the sun’s energy to drill, cut, and modify our hood. It feels fun to know that when working on projects such as this!

For the final install, I put down a small bead of RTV sealant, aligned the scoops, and screwed in the 6 screws per scoop that I had already pre-drilled. After the RTV cured a bit, I got out our boat paint and went at it.

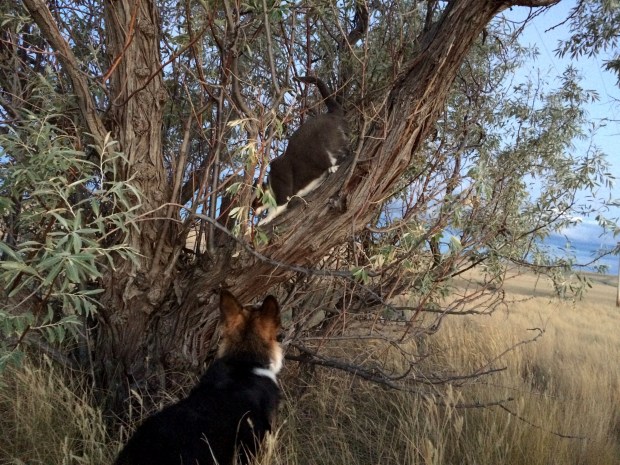
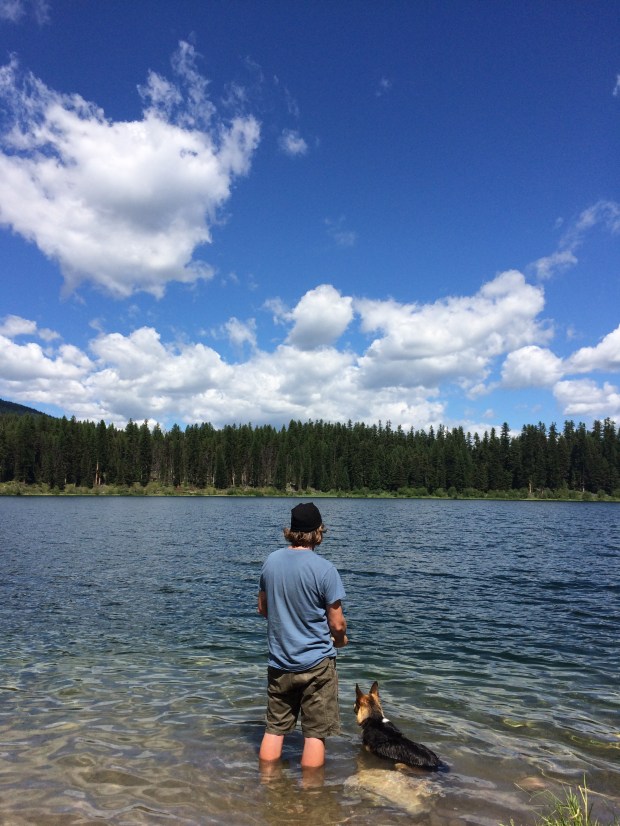
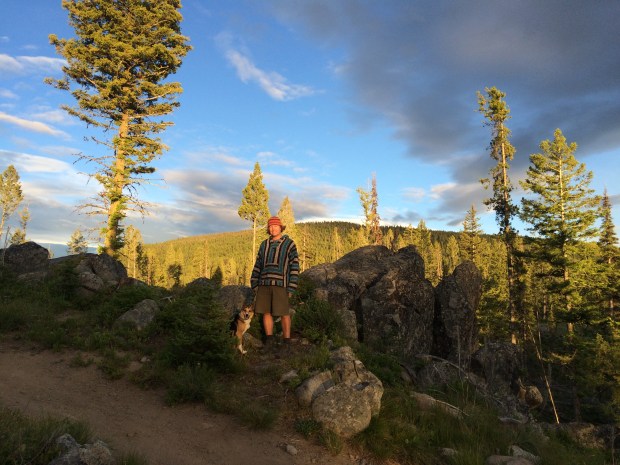
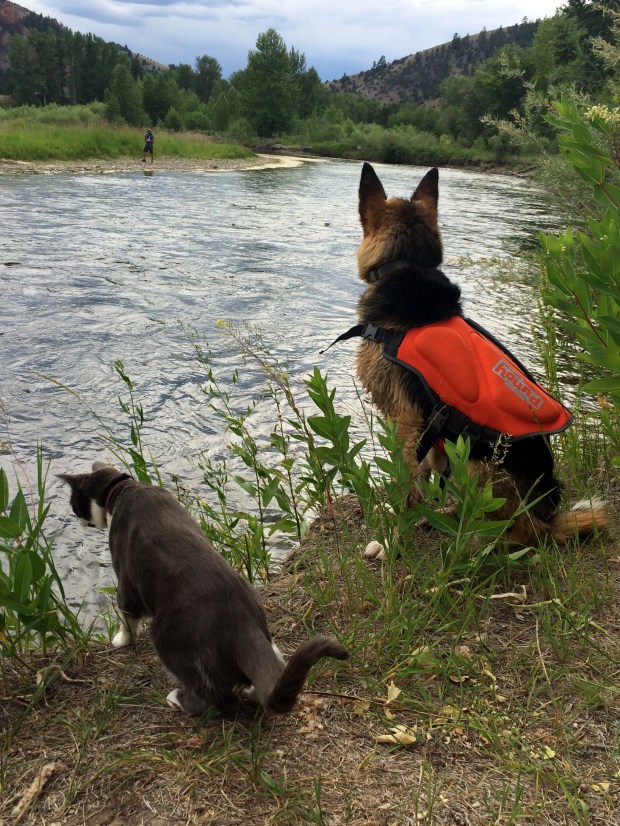
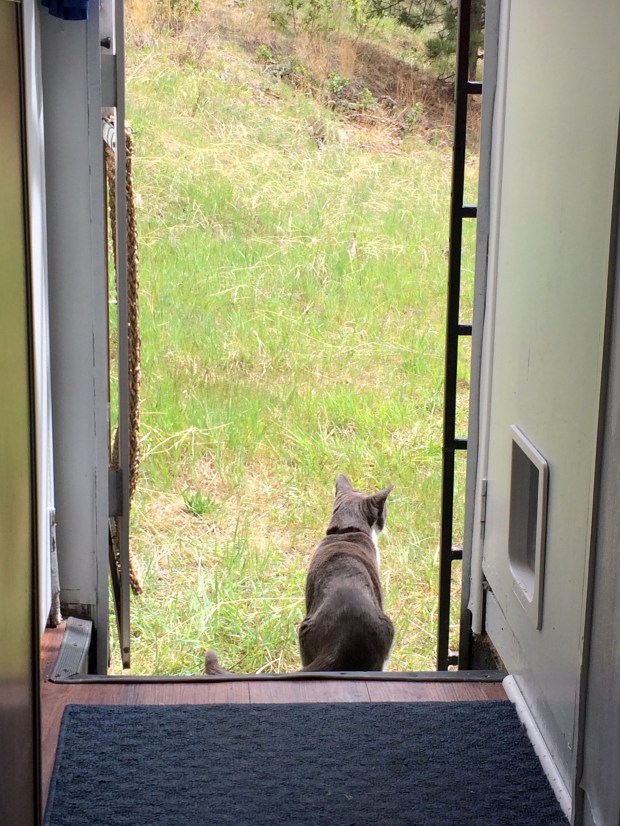
Included above is, obviously, a photo of what Scout and Gracie were doing at the time. A few days later, at Dave and Ryann’s place, I added more RTV to smooth the transition and put on more paint to finish it all off.

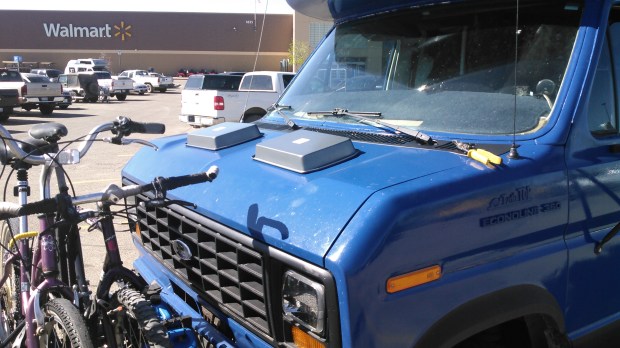
All finished now, after the last painting and with the great go-fast badges installed.

We should call this the conclusions section of the post, for you science people out there. Well, they have been on now for a week, and we don’t move fast, so we have only driven a few hundred miles. We will need to collect more data, but so far the maximum under-hood temperature we have seen in 135ºF, and most of the time it has been in the 100º-120ºF range (and we are actually in hotter weather than when we took our non-hood scoop measurements). We have also driven through crazy heavy rain and, as expected and hoped for, the small amount of water that enters through the scoops has no adverse effects on the engine. Generally, a pretty solid success, and I have since advanced the ignition timing just a bit with no pinging.

Oh, maybe a cost breakdown. The sum total of the cake pans, primer, quantity of screws, RTV, and paint used is less than $20. The go-fast badges were $11 each. Dave suggests I sell it as “The whole project was less than 45 dollars.” I think I shall adopt that tract!

All that for less than 45 dollars!!!

Let’s Refurbish a Van – Part 7: Our Batteries Phase 1 (By Andy)

A Post by Andy

{Note: The work detailed in this part of the post was completed over the summer of 2015, before we moved into the Turtle. I am just getting to writing the post now.}

So, we like to have our computers run, have lights, have the controls for our fridge work, have a charged Wi-Fi hotspot, and have our furnace fan powered to keep us warm. For all this we need electricity, and since we want to be off-grid, we need batteries. We started with this:

HouseBattery

If you are familiar with the Turtle, this compartment is behind the largest access door on the passenger side- the door with the vent in it. In the following photo, I put in a dotted line where the plane of the floor on the inside intersects the compartment.

firstbattery_floorline80

The walls of the compartment above the floor line are plywood, and bump up under the couch inside. The sides and bottom below the line are made of heavy steel. I have deduced the compartment was originally designed for a generator, as there was old 120V AC wiring running to it, an unconnected fuel line that ran into the back, and the door vent.

gimpprocessedimage95

I had a hard time figuring out what all the wires were hooked to, as it was a bit haphazard in the compartment. In the above picture, (1) is a port that goes outside, below the floor of the Turtle. The wires there threaded out of the box, ran a short distance under the Turtle’s floor, then threaded up through the floor to the old inverter. There is a second hole (2) that the wires from the old 100W solar panel and the wires between the battery and main 12V distribution panel were run. (3) is the unused electrical box that had 120V AC wires run to the compartment where the shore power cable is housed.

Maybe I should back up a bit and throw out a few concepts and definitions and explanations for the terms we will be using.

  • Battery: A thing that stores electricity in chemical bonds. Here, we are just referring to 12V lead-acid batteries.
  • 12V/12VDC/DC: 12 Volt Direct Current (DC). This is what cars use for their electricity for headlights, the radio, starting, etc. It is the kind of power all the batteries we talk about will produce.
  • 120v: 120V Alternating Current (AC). This is what is in your house and in businesses you know, the typical wall plug Amy and I look for at restaurants to plug our computers into. It’s generally 120, 121, or whatever it takes.
  • Current: The flow rate of electricity.
  • Voltage: The force pushing the electricity through the wires.
  • Inverter: An electrical box that changes 12VDC to 120VAC. It changes car electricity to house-hold electricity. This is so we can plug our AC computer cords into our DC batteries.
  • Converter: An electrical box that changes 120VAC to 12VDC. The opposite of the above—pretty much a garage battery charger that you use to get your car started after you leave the lights on.
  • Charge Controller: An electrical box that changes the output of the solar panels into DC voltage, hopefully charging the house batteries.
  • House Battery: Now, I probably use this too freely. When I talk about house batteries, and I mean batteries dedicated to our living compartment. If I say house (or household) electricity, I mean 120 V AC. Got to figure this out… but, house batteries are 12V batteries separated from the car system, and dedicated to lights and heat and powering the inverter in the house part of a van. One should be able to run these dead flat, and the car will still start, as they are fully independent circuits.
  • Starting Battery: The batteries under the hood, used for starting the car, sparking the gas when the engine is running, running a radio (if you had a functional one), and lighting the headlights.
  • Shore power: Kind of a boat term, but a source of 120V AC electricity you can plug into. When you pull up at a friend’s house, and pull out your extension cord, and plug into their electricity, they are your “shore power”. (Thanks Alex and Julie, Kari and David, Connie, Mag and John, Dave and Ryanne, Mike and Becky, Blake and Martha, Roger and Mary, Chris, Dad…)

Now, back to the good stuff! To start the battery box rebuilt and modification, I first labeled the wires and removed the old battery. I then cleaned the compartment with baking soda and water to neutralize the sulfuric acid and prevent further corrosion. Lucky, the metal compartment is super stout, so it was still in great shape. As usual, after a final thorough cleaning,  I caulked the seams and painted the compartment with black Rustoleum. I can’t find a picture of the completely empty, cleaned and freshly painted compartment, but trust me, it looked good!


After getting the compartment beautified, I cut and painted a plywood plate to fit into the bottom, bolted and glued it to the metal base of the box, and mounted battery trays to it. I painted up everything with oil-based paint and used stainless steel hardware to affix everything.

Since we had just gotten the Interlux blue boat paint, I practiced the painting technique on the top surface of the plywood base, so it is the same shiny blue as the Turtle exterior. In the following photos, you can see the two new Fullriver 115Ah 12V DC sealed AGM batteries that we started with in there, but just patched into the cleaned up existing wiring we are reusing at this point.


I decided to go with Absorbed Glass Matt (AGM) batteries. They cost a bit more than flooded batteries, but they do not spill, they will not develop corrosion at the terminals, and can be mounted sideways, if that configuration seems important. Additionally, they do not require venting, so they can be safely installed inside the living compartment, if that is necessary. Here is the site. We have been happy with this choice, and as you will find out in future posts, choosing AGM sealed batteries will allow us to make some future cold-weather modifications.

As to wiring, I was just starting to adopt the boat convention for new circuits and runs I would rewire. The convention is as follows: For 12VDC, yellow is ground, and red is positive. For 120V AC, the wires are white, black, and green for ground. Examples of the wires are here:


The reason behind adopting this convention is that at a glance, you can tell which circuit they are supposed to be wired to. Additionally, the boat 120V cable is stranded, as opposed to the household solid copper wire. Stranded wires should always be used in a vibration environment. Logically, then, a van should have no solid copper wires (though most RV builders do actually use cheaper solid copper for the 120V runs). As you might have observed, we have concluded that one should think of their van as a boat, and look to boat paints, wires, latches, and hardware for the upgrades and work. Though the boat cable is a little more expensive, it is paired and tinned for corrosion resistance, and gives a real nice finished look. Additionally, it can be purchased in any gauge.

So, at the end of our Phase 1 battery configuration we had our two new AGM batteries with a combined storage of 230Ah at 12V installed and secured, with the connections cleaned up. With this battery pack, we simply used the old converter to charge them when we were connected to shore power, and the old inverter to make our 120V for our computers when off-grid. At this point in our journey I also had just finished the install of our 300W of solar to charge the batteries (we will cover the panels and solar charging and solar controller in a different post).

That’s Phase 1 for you!

Let’s Refurbish a Van – Part 6: Roof Rack (by Andy)

A post by Andy

{Note: The work detailed in this post was completed over the summer of 2015, before we moved into the Turtle. I am just getting the time to write the post now.}

So, we have stuff to carry. And we want a place to store our solar panels. And we want to stay cool. And, if possible, look cool. So, we need to put together a roof rack…

Here are a few pictures of the old RV when we got it. It had an aluminum ladder that was old and worn, along with the typical RV aluminum tube luggage rack at the back- all bits with some of the mounts loose. We also had a big plastic storage box bolted to the top, but it was cracked and would certainly leak. As you can see, there was also one solar panel and a mount for what I’m pretty sure was a TV antenna. Good stuff, but it was all pretty worn, as it had all traveled for close to 30 years and more than 250 thousand miles.


We wanted our rack and top equipment to do a few things for us:

  1. Have a dry and accessible place to store camping and fishing and other fun gear, out-of-season clothing, and some spare parts and equipment.
  2. Have the rack removable, so we can maintain and fix the roof when the need arises.
  3. Have a location to mount the planned solar panels.
  4. Design the rack to provide us shade.
  5. Have a system that we can change, add more solar to, move things around, etc.
  6. Be able to fill and seal up all the holes prior people made when mounting things to the roof, and have a system where moving forward we will not be drilling into the roof any more.

Anyway, roof racks look great! I hear they can be useful too. In truth, we have pretty limited room and storage inside, so having a bit of room up top for our extra supplies and garage-like stuff was essential for a successful voyage.

So, to the step of getting the old stuff off and sealing up the holes. Pretty much unbolt the bolts and pry everything else off. I then used fiberglass impregnated epoxy body filler for all the big holes (I love epoxy!), maybe adding wire to support it as it cured. I then added Geocel Proflex on the seams. I read about and tried a few things, but to date, it is my go-to for exterior sealing. Here is a link.

For the (many) smaller holes, I would first clean and fill with the Geocel, then screw in a stainless steel screw the size of the hole, then cover the head of the screw with another layer of Geocel. It is a technique I read about on the internet, and it seems to have worked well so far. Again, it is not worth buying any hardware but stainless or grade 8. It does cost a little bit more, but use the savings you get for doing this yourself to get the good hardware. Plus, you don’t have to worry about some interior rust and redoing the work down the road. After sealing the holes, I put down Rustoleum on all the modified spots. The following pictures show the antenna hole through the roof, and some of the removed parts scattered in the yard.

We were lucky enough to have a friend who worked for Yakima who gave us a VIP discount card for one purchase. With the card, we got 12 A1 rain gutter towers, 6 78″ crossbars, 12 wide body rain gutters, end caps, two 12-peice lock core sets, a Loadwarrior basket, and some cargo nets. A truly impressive amount of wonderful Yakima pieces at a great savings. Boxes and boxes of sweet components!

From REI, Amy and I used our one-item 20% member discount and each of us bought a Skybox Pro 12, shipped to the Portland REI for free. We got the long and narrow boxes to configure end-to-end, and not take up too much roof area width-wise. We effectively have the roof racks for 4 vehicles, all to put up top the Turtle. It added up to a lot of initial investment, but it has been working well, and added an important comfort to be able to store a reasonable amount of things to make our small world flexible, and I think it actually has a sleeker look being made from components—as opposed to a custom-fitted rack. Since we were doing all the work ourselves, we decided to invest a bit more on some nice new hardware. After popping down to REI and loading our new Skyboxes (in their own boxes) onto the top of the old Scout, we stopped for a bite in downtown Portland. Seems fairly reasonable to me, but I imagine to some people we made a sight…

The sky boxes, along with the other hardware, sat in the house for quite awhile. After stripping and sealing the roof, it was only logical to finish painting the Tutle blue, then do the white roof paint, and then finally get to the point where we could install the new roof rack. Consequently, this is what our place looked like for quite an amount of time. (As you can see, our front room was used to store a number of Turtle parts until they were ready to install.)

The pictures are few here, but after most of the painting was finished, I mounted the wide body mounts. I measured, marked, measured again, checked, and had the geometry figured out. On the corner of the Turtle roof, I would drill my two holes, fill with Geocel, cover the mounting surface with Geocel, align the bracket, screw in two (you guessed it) stainless steel lag bolts, then cover the seam and outside with Geocel. After it all cured, we repainted with the Interlux. It looked nicer with the black brackets and shinny bolts before the sealant and paint, but I didn’t want to risk it. And, just so you know, the asymmetric spacing along the length of the roof is due to needing to align the crossbars so they will not interfere with a roof vent when open, but also allow for the mounting points of the skyboxes. Here are the brackets installed:

kimg0798

It is a nice feeling to know that at any point we could unlock (all keyed alike, now) the 12 towers, unscrew, and remove the whole rack if we had to do some maintainence on the topside. Anyway, the pictures are limited at this point, but following are some involving the tower, crossbar, and rack install.

kimg0804

You might notice that the Yakima basket lost out to the solar panels. The basket is in the storage unit presently, and it would be great to get it up there at some point. When we were building and installing the rack, though, the geometric logistics were far too difficult for the time allocated. Anyway, to install the solar panels, I bolted two pieces of 12′ 6061 T6 aluminum square tubing to the crossbars with stainless steel carriage bolts and nuts fitted through the Yakima Universal Snaparounds.

I picked up used ones super cheap here. By the way, ReRack in Portland are nice people and can save you some money on roof racks, so check them out if you are in the area. Back to topic, after getting the aluminum properly spaced and installed, I then drilled and screwed the solar panel brackets to the the aluminum. That step was a breeze. Solar panels installed, photo taken probably a month in.

kimg0938

As to keeping it all cool. We planned on (and did), paint the roof surface with a couple of coats of Interlux topsides white boat paint. We actually painted the roof vent covers white as well. The assumption is that paint will reflect much of the sun’s heat, and be able to withstand the UV rays. So far, everything looks pretty good up there. We have some cracks in the paint where the caulking we used was not completely cured before we painted (I don’t blame the paint, we had time constraints), so we have some washing and fixing of some seams to do. Otherwise, all looks pretty good. A common approach for keeping a bit cooler is to have a couple of roofs, effectively carrying your own shade along with you.

The above old-school Rovers have a second roof with an airgap for passive cooling in the hot sun. (Side note, did anyone notice the tall skinny tyres the rovers are running on?) With the spacing added from the rack towers, and mounting the solar panels and boxes above the crossbars, we have a impressive air gap and continous shade on over 50% of the roof.

Currently, there is a middle strip free for walking, in which I will fit an additional panel at some point, then simply make some cheap synthetic or plywood panels and paint them white to increase our shade to close to 100%. So far, though, we have been to the Badlands of South Dakota in the summer, and have stayed with the ambient temperature with thoughtful venting and minimal electric fans.

To me, the goal is not to be cooler than the outside, all we need to do is not be hotter than the ambient temperature in all kinds of weather.

kimg0184

Oh, almost forgot, we want to access the roof! We need to clean the solar panels, get stuff into and take stuff out of the boxes, check on all the paint and seals, and most importantly, be able to climb up and yell with arms outstretched like you are in a movie! Anyway, the ladder…

We actually bought a car roof rack ladder as a start. The almost $200 ladder (seems crazy) was well worth the money, in the time saved. It always feels pretty weird to buy something new, remove it from the box, then start cutting it right away. So, the ladder, welding, adding more rungs for the proper length, and fixing the folding function.

Some close-to-final pictures here. We started with a 9-rung foldable ladder, and ended with a 12-rung rigid ladder that bolts to the bumper and the top rack. Again, it was designed to bolt to the bumper and rack, so it is removable…

I’m pleased with the removability of the ladder, because we crushed it a bit when we backed into a tree one day, about a week after it was finished and installed. The ladder was subsequently unbolted, straightened, and remounted. From the side, it now does have a bit of ripple (below the designed joint and by the spare tire)—this is what we call life.

kimg0186

To sum up a bit, up in the boxes right now we have a few fishing poles, extra wire and parts and unfinished projects, cloth for sewing projects, extra window insulation, snow shoes and masks and fins, river tubes, my old tent. A pair of driving lights I have yet to wire up. Some cheap speakers I plan on installing in the doors. You get the picture. We call it our attic.

img_1863

We have a completed rack now. It holds our solar panels, is our attic, and still has room to exapand.


A Quick Photo Catch-Up

Wow, what a busy month it’s been! We’ve been super-duper on the go, so instead of trying to document all the fun in words I’ll do a quick photo-heavy catch-up instead. And actually, we’ve been so busy that I haven’t even been taking many photos! So that helps expedite things, doesn’t it?

We left Seeley Lake in July and drove up to Great Falls, Montana, where Andy grew up. His parents both still live there, so we were looking forward to spending some time with them, and I was excited to be taken on the Hometown Tour. (Don’t quiz me on it though; we were so busy we didn’t even find time to drive by his old house! Next time.)

Northern Montana is as beautiful as you’ve heard it is.

IMG_4314
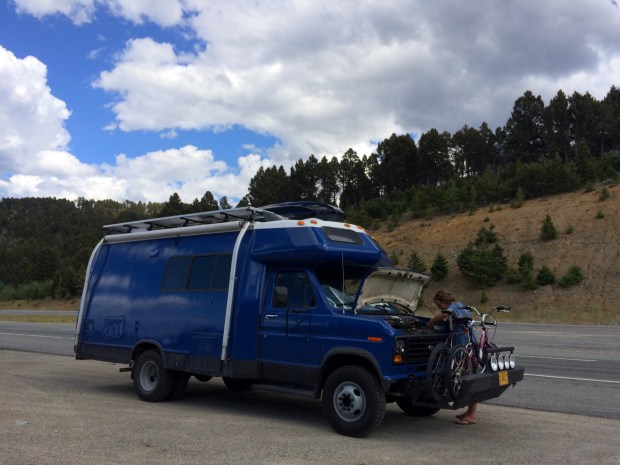
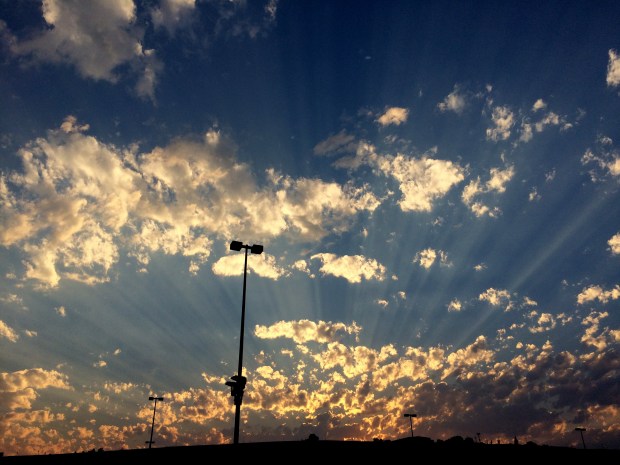
This picture was literally taken from the Home Depot parking lot. 

We spent much of the time at Andy’s dad’s place outside of Great Falls, and were treated to one beautiful sunset after another, along with lots of delicious home-cooked meals and great conversations!

A wonderful bonus surprise during this trip was the discovery that Andy’s dad is a fabulous and inspiring artist. I’ve always been taken with Andy’s Renaissance man-ness, and it turns out it’s inherited! From sketches to paintings to carvings, the house is a veritable art gallery.

IMG_4438

Though Andy had to work much of our time there, we managed to get outside a fair amount, helping Andy’s dad with some upkeep on the cabin he built some time ago. The location is wonderfully silent and overlooks fields, the Sun River and lines of lush trees.

While I stained the cabin, I got the feeling that I was being watched. I turned around expecting to see Scout pleading for frisbee time, but instead I was startled to see a herd of cows closely watching my every move!

IMG_4405

They stood over me and oversaw my work until the sun set. It was hilarious.

Scout and Gracie also enjoyed their time in the Montana outdoors. Gracie was stuck in the Turtle for a number of days while Andy worked, so the moment she got a taste of freedom, that girl was up a tree!

IMG_4527

Here they are modeling the new curtain I made while we were in Bozeman, which blocks off the front of the Turtle and keeps the back nice and cool! Andy’s brilliant idea + my love of sewing. You’re welcome, Gracie and Scout.

IMG_4237

After lots of swimming with Andy’s mom, lots of pizza dinners in town (a Goodman family tradition), and lots of inspiring sunsets, we left Great Falls on our way to Boise. We only broke down once!

IMG_4577

On the way, we stopped at Kimberly, Idaho to visit the Higdems. This time Andy didn’t have to work the whole stay, so we got lots of time with them to visit. They’re a hard-working pair, and it was the height of harvest time, so we got to watch them in action as they took care of the animals and crops. We also were lucky enough to be gifted bunches of fresh veggies to take with us on the road! What a treat.

A quick stop at the Snake River Canyon on our way out of town for a great view and some sweaty palms (guess whose). It’s unbelievably high up!

We didn’t fall off the bridge, and shortly afterward we made it to Boise!

IMG_4642

Every year my college girlfriends, Beth and Lexie, and I meet up for our Girls Trip! This year we met in Boise because Lex was moving to town for Grad School. Exciting! So we rallied the troops to help her get moved in, complete some Craig’s List furniture transactions, and tell the same old jokes a hundred times and still find them clever and hilarious.

IMG_4632

And of course, we had to help her find the good spots for an after-class brew. It takes research!

IMG_4640

Beth left way too soon. But as always it was fun and fulfilling to see each other again and give each other a hard time and just laugh like maniacs together. Andy and I stayed in town for the rest of the week while he worked and spent his evenings at his college buddy Dave’s place. So they got some great friend time too, and caught up in the evenings on his back patio. They had a pretty ok view.

IMG_4677

Meanwhile, Lex and I ran more errands. And ate more yummy food at the cute local restaurants. Again, research.

Dave let the three of us tag along to an evening work event at the zoo. We got to feed a giraffe! And we saw a snow leopard chase its tail! And if you’ve never heard of a Maned Wolf, you should really look it up when you get a chance. What a crazy, cool imaginary animal.

The time to move along snuck right up on us. It’s always hard leaving anywhere we go, but especially when the place is home to our best buddies. But when the next destination is where you will meet up with your other buddies, it makes the sting a little easier to bear. 🙂

So on we drove to Missoula, to meet our Portland friends Kelly and Jason for a week of Montana shenanigans! And of course, more Montana sunsets.

IMG_4034

Huckleberry Heaven: Seeley Lake, MT

Of all the places we’ve been so far, never have we been so perfectly in the right place at the right time! That’s right, huckleberries are ripe early this year and we’re camped out right in the middle of a huckleberry field!

IMG_3344

If you’ve ever eaten fresh huckleberries, you will agree that this is likely the most magical part of our journey yet. If, tragically, you haven’t had the pleasure, do yourself a favor and come to Seeley Lake right away and I will treat you to the yummiest berry you have ever tasted. Of course I can’t tell you where the berries are—when you have a good huckleberry spot, you keep that information locked in a vault! I probably wouldn’t have even told Andy if he hadn’t been with me when we found them.

Ok, I probably would have. We’ll assume I would have. 😉

It all started at our camp site at Big Larch. We were walking Scout down to the water for some swimming, when Andy saw a ripe huckleberry on a bush along the path. We were so excited! Huckleberries usually aren’t ripe until mid-August! After a (quick) swim, we rushed back to the Turtle and got a couple Nalgenes and outfitted them with paracord and duct tape to make hands-free berry pails.

IMG_3112

We picked like crazy, but the spot was pretty thin. We worked for about an hour to end up with a few handfuls of berries, but it was worth it!

IMG_3120

Now that we knew there were ripe berries to be found, we were on the lookout. In between Berry Bush Searches, we enjoyed our camping spot: riding bikes, fishing, collecting firewood, and late nights stargazing and chatting by the fire. And of course, cooking up our berries into fresh huckleberry pancakes!

Gracie climbed trees pretty much the entire time. Our neighbors all thought she was hilarious. (I often forget how rare it is to see a house cat roaming around a campsite. We think it’s pretty normal these days!) I tried to get a photo of her up a tree, but the only one I was quick enough to capture was this one, and she’s mostly behind it!

IMG_3247

I did get a great video of her racing up a tree and bounding off, but I don’t know how to upload videos to the blog yet. And it’s gorgeous outside so I’ll teach myself on a rainy day! You can see it via our Instagram though: #blueturtlecrossing

After a week at Big Larch, we left to meet up with Andy’s family at a cabin in Seeley for the week. We had an awesome time! We fished and swam in the Clearwater River running behind the cabin.

We took a day trip up to Rainy Lake (not rainy this year, woo hoo!). We picnicked, fished, kayaked, and caught crawdads*.

*Andy and his dad caught crawdads. I did my best, but mostly terrified everyone at random intervals by shrieking whenever one raced through my fingers as I tried to scoop him up.

IMG_3403

We took a day trip to Lake Elsina where we fished, built fairy houses, floated, caught frogs, and sketched.

And to top it all off, while on a hike to find a fishing spot we stumbled across a huge huckleberry field covered with ripe berries! There are camp sites there, so Andy and I plunked our tent down to save the spot and we got to work collecting berries. The whole family helped, and during our stay at the cabin we had huckleberry pancakes, huckleberry bars, and huckleberry cocktails. It was pretty freakin’ fancy.

I love huckleberries more than any fruit on the planet. They’re small, but pack an incredibly intense sweet flavor. Yes, they’re related to blueberries, but there’s no comparison! They like blueberries’ much more stylish and exotic cousin, who has loads of exciting stories to tell and a great sense of humor. And looks great in hats.

IMG_3742

Based on our huckleberry discovery alone, we decided to stay another week! Our site is beautiful, overlooking the lake, and we’d love it even if it weren’t surrounded by ripe berries. . . but they really do put this place over the top.

IMG_3584

We’re definitely making the best of it—every day we’re out collecting berries!

Huckleberries look like small blueberries, with the same “bull’s eye” at the base, but their color can range from black to blue to purple to red. And unlike the copycat bushes we’ve been seeing next door to the real bushes, the leaves are staggered—not paired. Don’t forget to push the leaves back to check underneath – that’s where most of the berries are hiding! We’ve found a wide array of colors and sizes here, and they all taste spectacular.

We’ll walk down the road, with Scout leading the way and Gracie following close behind, and settle into a nice spot.

Gracie rolls in the dirt and perches on logs while Scout leaps through the bushes and grazes. Andy taught him to pick berries right off the bush, and now he happily helps himself! (Another funny video of Scout picking berries at #blueturtlecrossing, or if you’d like, you can follow us on Instagram at @amycsummers)

Every day we make a huckleberry dish; the most decadent so far was the huckleberry sangria I made two nights ago. It was divine. A friend of Andy’s caught and delivered four delicious cutthroat trout right to our site the other night, so we cooked that up on the fire with our sangria and felt very spoiled indeed. Thanks Joe!

IMG_3764

We’re heading to Great Falls in a few days, so I’ve got to go back to berry picking now! My goal is to fill the freezer before we leave—we’ve got a 1 1/4 gallons so far, so I’ve got work to do!

Wahoo!

IMG_3766

Let’s Refurbish a Van – Part 4: Curtains

Of all the updates one can make to an RV, in my opinion the most drastic change for the least amount of effort is the curtains. It’s a way to infuse color, pattern and texture into the small space, especially in a vehicle like the Turtle, which has zero wall space for art. We almost have zero wall space for walls! Even if you aren’t a world class seamstress, it’s a simple shape to tackle, and honestly nobody even notices if your hemlines wobble a bit. I really encourage you to give it a try!

IMG_3047

When we got the Turtle, I knew I wanted to plan all my color choices around the curtains. It’s the best place for statement patterns, and I love-love-love a bright and colorful interior space, so I wanted to see what was available before making further paint or fabric decisions. Actually, it was the first decision I made at all, and I think I had the fabric in hand within the first week of owning the Turtle! I love a whimsical graphic print, and the green shade is so friendly and cheerful.

IMG_0108

When picking your curtain fabric, I highly recommend choosing outdoor fabric. This may sound obvious, but the selection of outdoor fabric is often pretty slim, and the allure of an entire store full of pattern and color choices seems like a fine trade-off for less sturdy material. But the outdoor fabric won’t fade as quickly as other fabric. It’s also mold and mildew resistant, which doesn’t seem like a big deal until you’re boondocking on the Oregon coast and the hygrometer reads 93% humidity and the windows are weeping and mold is knocking at the door. The last thing you want is to find your curtains flocked with green fuzz! Ours stood up to the damp like a champ.

Something to keep in mind about outdoor fabrics, though, is that due to their durability, they are slightly more stiff, and don’t bunch or ripple like regular fabrics. But if you take that into consideration, you can work around it by reducing the ripple a bit or giving your curtain rod span a few extra inches to account for the thickness when the curtains are pulled open.

IMG_3219

IMG_3228.JPG

As you can see, I opted for a gentle ripple, and at the top and bottom it’s still pretty thickly bunched. Additionally, since we don’t have a ton of room on either side of the windows in the Turtle to add rod span, that extra fabric to make the ripples does take up a little window space when they’re pulled open. So it’s good to pick the fabric you like, then decide how you’re going to mount the rods and how much the ripple will affect the length of each panel.

With that in mind, it’s time to determine yardage so you can buy that awesome fabric you found! What I needed to consider with our curtains was the fact that the Turtle’s walls are curved, so I’d need rods on the top and bottom to avoid them hanging far from the wall at the bottom. (I’d actually recommend this even for straight walls, as it keeps more light out and doesn’t blow around.) So I hemmed pockets on top and bottom, and made a double-fold hem on all sides. The double-fold isn’t necessary, but it’s a nice detail. Just fold the hem over, press it with an iron, then fold it over again, press it, pin it, sew it down! Do this to all four sides before sewing the pockets so the rods can slide through.

IMG_3233

Then fold the top and bottom pockets over, press them, pin them, sew them! This part can be tricky if you’re using two rods, as it needs to be nearly perfect so that the curtains stay taut but don’t pull on the rods or just not fit altogether. Even after explicit measuring, I ended up spending some quality time with my seam-ripper as I tried to get the fit just right.

IMG_3220

Oh, did I mention I had a hard time getting the fit right? Yes I did. It was difficult getting them to not balloon out, and when I took them in they strained the rods since they were a little too short. In the end, I had to make another pocket and sew it to the top of the curtains. This made it easier because I could adjust the pocket right on the rods and pin it in place before sewing it. If I did it again, I’d just plan on approaching it that way to save a headache! Luckily I love the way it looks, and if anyone asks, you can tell them I totally did it on purpose.

IMG_3232

IMG_3229

For the rods, I bought some dowels from Home Depot and some wood end pieces from JoAnne for the finials. Cheap! Andy sanded, stained and varnished them for me, and screwed the finials into the dowels. The benefit of doing it this way was that we could cut them to the exact size we needed inexpensively, and the wood end pieces already had holes through them, so screwing them in was really simple.

IMG_3217

Andy’s genius came in handy as we tried to figure out a way to mount the rods. He found some utility tool hangers at Home Depot that fit our rods perfectly and hold onto them tightly enough that they don’t slide back and forth. We painted them white, and done!

IMG_3218

For the tie-backs, I just sewed a strap with some navy fabric I found in the remnant bin at Mill End, and attached one end of each to some stainless steel eye screws I’d screwed into the wall.

IMG_3222

The other end I attached to stainless steel S-hooks.

IMG_3223

They wrap around the panels to hold them back, and then when the curtains are open, we just re-hook it so it stays out of the way (and so Gracie isn’t as tempted to bat it around).

IMG_3234

And there you have it! Inexpensive custom curtains that make a statement, liven up your small space, and are a nice splashy backdrop for pictures of your pets.

IMG_2948

If you have any questions about the process, let me know! As with any How-To post, I’d be happy to explain any parts in greater detail to help get you started on your own project. 🙂

A Very Montana Summer

Greetings from Montana!

It’s been a while since we checked in here, and today is a great day to update the blog as it’s stormy and raining outside here in Seeley Lake. Andy is busy working, and I’m doing my best to keep Gracie from trying to curl up on top of my keyboard as I type this. If any portion of this blog isn’t up to standards, you can take it up with her.

IMG_2971

We’ve traveled a fair distance (by Turtle standards anyway) since our last post in South Dakota! We made it to Billings after a quick overnight in Gillette, and headed to Riverfront Park right when we got into town so Scout could catch some sticks in the Yellowstone River.

IMG_2326

Then we went to Scheels to ride the ferris wheel! If you’re ever passing through Billings, be sure to check out this perplexing sporting goods store. It’s a mix of an outdoor store and a carnival, and just hilariously bizarre. We rode the 3-story ferris wheel, saw animatronic presidents, got our pictures taken with some wild animals, and also got our fishing licenses.

IMG_2328

Then we spent a few days with our friend Grant, who I went to high school with, and who is staying in Billings for the summer. We went to Alive After 5, rode our bikes all around town, and sat on the patio at Thirsty Street for a beer. Check out this place for sure; not a lot of places in downtown Billings have patios, and their patio gets great sun, plays good music, and the beers are super tasty!

IMG_2371

IMG_2375

We did a lot of bike riding, even though the temp was in the 90’s the whole time we were there! We had to pull over one day so I could run around in some sprinklers for a while. We took the dogs to Pioneer Park, had nachos on the patio at The Granary, and stayed up late playing games and gabbing outside in the grass. Fun times with Granty!

IMG_2430

One night we also came across this extraordinary line of garbage cans, which Andy was so taken with we had to take a photo with them. It really was an impressively long line of pristine garbage cans. (It doesn’t take much to keep the three of us entertained.)

IMG_2344

We also spent a few days with Blake and Martha, who always show us a great time! We went to a Mustangs game, and Andy offered to hold little Harper’s mitt for her. . . then wore it the whole game. She was too busy with her ice cream sandwich to mind.

IMG_2451

We had lots of great meals, the boys stained the deck, and Martha and I snuck out again for a beer while the boys watched Harper. I secretly think they just wanted to watch Mickey Mouse Clubhouse and Harper is a good patsy.

Then we moved on to Bozeman to visit my mom and sister Kari’s family for a few weeks. We even timed it just right (accidentally) so we were able to see my Grandma and Uncle Brian while they were in town visiting!  They were only able to stay for a day and a half, but we got to spend lots of time sitting around sipping coffee and sharing stories. What a treat! Plus Grandma finally got to meet Gracie and Scout, who had never made the trip to Newberg with us when we would visit her there. I only realized after they left that I never got a photo of all of us together! Bummer. So instead, here’s a photo of a Bozeman sunset.

IMG_2486

We also got to see a new baby Lipizzan pony! My sister and her friend and all their kids were going to see her, and Andy and I jumped right on that bandwagon. She was so sweet and funny, leaping around at top speed on those spindly little legs. Lipizzans are a special breed of horse with a fascinating history that we learned about from their owner while we were there. They are dressage horses who are super nimble and can perform some incredible dance moves cued only by tiny twitches in their rider’s bum and legs. Crazy!

IMG_2515

Then we went to the Museum of the Rockies, where there was a Pompeii exhibit that we really enjoyed. And their dinosaur bone collection is simply incredible.

That weekend, David and Kari invited us to an evening fishing trip up Hyalite Canyon. We picnicked, Scout swam, and David kept very busy helping the kids bait the hooks and reel in all the fish they were catching! The beginning of our trip was quiet on the fish front, but after we moved to another spot by the dam we all had better luck.

IMG_2567

Scout and Gracie love being at my mom’s the most, as they get lots of attention and total run of the place.

My niece Bella and I went for pedicures one day, and both of us are now sporting some killer sparkles. Bella even has fireworks on hers!

IMG_2677

When we got back to their house, the kids had an impromptu clothes-on pool swim.

IMG_2693

We ate like kings while we were at Mom’s, as she’d just cleaned her BBQ, and Andy installed a few parts to get it looking and working like new! So there were lots of fancy dinners off the grill, including a feast of salmon, steak, and chicken with ginger asparagus and grilled polenta for just the three of us. We could get used to spoiling ourselves like this.

On our way out of Billings toward Seeley Lake, we stopped for the night in a gorgeous spot in the middle of nowhere, and also made some fishing stops along the way.

IMG_2891

We decided to reach Seeley via Garnet, so we could visit the Garnet Ghost Town. The roads there are treacherous, and when we saw the caution sign, we decided to see what the Turtle was made of and just go for it! (Ok, Andy decided. I just said yes and wiped off my sweaty palms.) There were some seriously steep hills that were knuckle-biters. Andy was thrilled.

Neither of us had been to Garnet Ghost Town in over a decade, so we were excited to visit. We got there Saturday evening, and after the first 15 minutes, we were the only ones there! It made it really easy to use your imagination and picture what the town was like during the mining boom, when all the buildings were still standing. But the remaining buildings are well preserved, and they provide lots of information about the town and residents’ lives there.

IMG_2914

You can boondock at the ghost town for free, so of course we did that! We returned to the town the next morning to see the inside of the buildings that had been closed by the time we arrived the day before, and then drove on into Seeley Lake in time to celebrate the 4th of July with the other 3,000 people who come yearly for the parade and fireworks! We just happened to be boondocking right on the parade line, so we were able to easily pop our camp chairs up and watch the festivities with zero preparation or stress.

IMG_2992

After the holiday visitors took off we had our pick of the camp sites, so here we are now right on Seeley Lake. We hiked around the campground and harvested the abandoned piles of wood the holiday crowd left at their sites, so we’re all set to stay here for the next four days! In the next post, you can look forward to some sweet woodcarving projects, much like this impressive hot dog stick Andy made yesterday! We’ve got the time and plenty of sticks, so we’ll see what we come up with. . .

IMG_3066


Everything’s Happy Underground

Ben Folds Five reference, anyone? Anyone?

Ok, well before we get underground, we have a few stops to make.

By the time we left Angostura Reservoir, we’d been there almost two weeks! We really, really enjoyed that spot. We have a freezer full of fish, the animals are in top physical condition, and Andy and I are tan and relaxed.

IMG_1975

Additionally, we have an album full of photos of unbelievable views! The summer weather in South Dakota makes for some stunning sunsets and thrilling storms. Unlike the storms we’re used to in Portland, these lasted for hours and hours. We sat outside on multiple evenings, snuggled under the awning in blankets, drinking wine and watching the show.

So cool, right? South Dakota, man. We love it.

Eventually, though, it was time to leave the reservoir. We had other spots on our list to check out, so off we drove to Wind Cave National Park. This park is super neat! Wind Cave is one of the longest caves in the world, and that length counts just the 5% of the cave that has been explored. You get to walk down, down, through winding tunnels that open into big rooms with amazing minerals and rare boxwork formations. A lot of Lord of the Rings references were mentioned by members of our tour group from room to room.

I have very few photos of our cave tours, as they do the experience no justice. Here are two that help you imagine what it’s like, but as with most things, it’s much better in person.

I love spelunking! There’s something so far from normal about climbing deep into the earth and seeing things that were created without any help from humans. If you have any imagination, it will go wild down there! They even have caving tours you can take where you spend four hours crawling on your hands and knees in areas most people don’t get to go, but as a portion of the tour requires you to squeeze under rock with just a 10″ clearance, I passed.

We stayed two nights in the campground at the park, saw fireflies, rode our bikes through the park, listened to rangers tell stories at the amphitheater in the campground, and were gifted some homemade moose dinner by our lovely French neighbors.

As we left the park, we made a number of stops on our way to Jewel Cave. We pulled over in Pringle to see a huge bike sculpture. . .

IMG_2098

We stopped to see Flintstones Bedrock City, and discovered it’s being torn down after 50 years for a Western-themed campground. . .

We visited the National Woodcarving Museum, where you can see charming animatronic carvings made by the man whose talents inspired Walt Disney to ask him to help build Disneyland. . .

We toured the Four Mile Ghost Town, a collection of antique buildings and items set up in a little town, with a cassette tape recording to guide your way. . .

And then after a tasty lunch at Pizzaworks and a beer at Sick-N-Twisted Brewery, we stopped for the evening in the Black Hills. Andy picked a lovely wildflower bouquet, I read my book, Scout played frisbee, and Gracie climbed trees.

The next day, we stopped by Jewel Cave for a tour.

Now let me interrupt myself to point out that, while it took us a day to make it from Wind Cave to Jewel Cave, for those of you planning trips, they’re not a day apart. That’s just Turtle Time. For travelers in a regular vehicle, they’re actually about half an hour apart! We move slowly, but you can easily visit both in a day. And it’s worth it; they’re very different caves.

Jewel Cave is the third longest cave in the world, and is chock full of sparkling formations and stalactites and stalagmites. We took a tour a few years ago, and I was excited to be back to see the shining crystals again. Unfortunately, it was a very popular day to visit the cave, and by the time we got there, the standard tours were all sold out for the day! They did, however, have a Lantern Tour a few hours later, so we got our tickets and had a picnic while we waited.

As our tour group assembled to hear the beginning of the tour and get our lanterns, a storm started to blow in. We hiked single file around the hill to the mouth of the cave, and right as we got inside, the clouds broke and it began pouring! We stood inside the dry cave and lit our lanterns, the thunder booming and the wind pushing the rain sideways in sheets outside. It was so exciting! It felt like being another person in another time. We heard some history of the cave’s discovery from our tour guide, and then walked into the cave.

If you ever want to know how it feels to be Indiana Jones, this is the tour for you! If you grew up watching The Goonies and wanted so badly to adventure underground searching for One-Eyed Willie’s treasure, this is also the tour for you. We just laughed out loud with excitement the whole way. The tour took us  down incredibly steep and narrow steps that descend endlessly, until finally we reached The Heavenly Room. We all sat on rocks and listened to more stories, and then were instructed to blow out our lanterns. The darkness was absolute. It was thrilling.

We had such a great time on that tour! It was a great way to end our time in South Dakota, and we discussed how much we loved it the whole way to Montana.

And here we are now, fishing licenses in hand and ready to spend the summer playing in Montana’s backyard. Bring it on!


Livin’ By A Lake: Why We Heartily Endorse Vandwelling

When we were moving out of our house in Portland and into the Turtle, our friends Rhema and Lisa gifted us a wonderful going-away gift: Lisa’s Sensational Pickled Carrots. She’d popped open a jar during a BBQ at their place a few months prior, and I forgot to eat most of my dinner because I was too busy going back for sevenths and eighths of those carrots! I agree with you that pickled carrots sound different, but I promise, they’re super-duper awesome. Lisa’s crazy in the kitchen.

IMG_3300
Lisa and Andy whipped up some serious turkey and stuffing last Thanksgiving.
Rhema and I helped by making sure the video games were played. 

The only bummer was that since she’d just canned them, we had to wait six whole months before we could eat them! So we put them in a box and labeled it “Do not open until April 21st, 2016.” Before sealing up the box, I thought it would be fun for us to write a letter to our future selves, predicting where we’d be when we opened the box. So we wrote our individual thoughts down, dropped them in, and taped that baby up.

As the date approached, we thought it would be fun to open the carrots when we were somewhere really neat. So as we approached Badlands, we decided that was it. That worked great for me, since I was too excited to wait any longer!

They were SO GOOD. What a fun going-away gift! It was a tasty treat that reminded us of Lisa and Rhema and the fun times in John’s Landing. We miss you guys!

After our snack, we opened up the paper with our predictions. Interestingly, without consulting one another, we both wrote that we’d probably be somewhere in Utah! I suppose because there are so many great parks around there, and we’re both so excited to spend time in that part of the U.S. But in order to have made it that far, we’d have to be covering ground at a much quicker rate than we are currently traveling.

IMG_0509.JPG
This is more the speed we’re interested in.

It was a moment of revelation and reflection for us; one that made us really appreciate an aspect of this lifestyle that we worked so hard to achieve. We wanted to be able to slow down and really enjoy each day of our lives, spending less time paying bills for a house we’re never around because we’re busy at work to pay the bills! Now we get to live virtually anywhere we like, for as long as we like. Unlike vacation time, we don’t feel stressed out trying to fit in all the fun right now. We can take our time and explore a spot at our leisure, take an extra day to do nothing if we choose, and see more of any area that interests us.

This is why we currently live by a lake. (We got here meaning to stay a few days, and we now plan to stay another week, or until this crazy 80-90 degree weather leaves!)

IMG_1872

And this is also why we emphatically hope that people who have the capability to try this lifestyle out will do it! One of the reasons we decided to blog about our adventures was to encourage and support fellow adventure-seekers to see that it’s possible, and more than that, it’s the best decision we’ve ever made. We’re living much more inexpensively, efficiently, thoughtfully, and healthfully. There’s a daily dose of adverbs for ya! Every day is a new experience and just a ton of fun (with a fair amount of work and effort involved, of course). We keep asking ourselves why it took us this long to figure this out! Andy always says he feels like we’re cheating somehow. 🙂

IMG_1686

Let me also acknowledge that I totally get that it’s not a possibility for everyone, and my intention is not to alienate those who aren’t able to make such a drastic life change. And according to lots of people we’ve met along the way, not everyone even wants this life! We get that too. It was hard work getting here, and can still be hard from time to time.

Our hope is that the blog can be both an endorsement for people thinking about this lifestyle, and also just a way to stay in touch with our friends, family, and other tiny house and travel enthusiasts, sharing what we’re up to for all interested parties. I know that for people with kids, it’s a much more complicated undertaking (though not impossible; we’ve met families living on the road!). I also know that we’re fortunate that both of us are able to work remotely, and that’s not true for all professions.

IMG_1812.JPG
A lunch break. Since I’m the only one in this photo, I’ll just go ahead and take credit for the lot.

But we have met a whole bunch of people who have always dreamed of becoming vandwellers or full-time RV’ers, and who could potentially take the plunge, but are still on the fence. When we started out, we had a hard time finding online resources of people who were doing something similar to what we had in mind. So if that’s the case for you, please follow along with us for tips on what’s working for us, or feel free to send us a message and we’ll do what we can to help you along the way! It’s a huge undertaking, but the end result is worth all the hard work. I mean, we get to live by a lake, for free!

For those just following along to see where we ended up and what we’re doing there, here’s a quick photo summary of what we’ve been up to for the last week.

IMG_1782

And if you’re wishing for greater detail on how Scout and Gracie are doing, just take these photos of Scout swimming for sticks and Gracie pouncing on buggies, repeat them to infinity, and you’ll have an idea of how they’re spending their days by the lake. Happy days for our best little friends. Happy days for us.

The Black Hills of South Dakota: Actually Quite Green

We left Spearfish last Friday feeling excited to explore the Black Hills, our list of recommended hikes in hand and a warm and sunny weekend weather forecast displayed on our phones. On our way out of town we stopped for lunch at Barbacoa’s, a tasty Mexican spot downtown. It’s set up like a Qdoba or Taco Del Mar, with a build-your-own style ingredients bar, but it’s way, way better. Super fresh ingredients, good daily specials, and the staff there is so legitimately friendly and helpful that we talk about it during our meal every time we go there!

As we sat on the patio eating our steak tacos, the clouds started rolling in.

IMG_0708

We commented on how dense and beautiful the clouds are in South Dakota, then loaded up and headed into the Black Hills.

IMG_0712

The drive is stunning, with tall, dramatic rock walls and lush green trees. And if Scout is to be believed, the smells are worth trampling your mother in order to get your face one inch farther out the window.

We decided to start with a hike to Devil’s Bathtub. It isn’t marked, so you just turn off onto Cleopatra Pl. just south of Bridal Veil Falls. From the small parking area, you cross the bridge and then follow the trails directly on the other side. There are a number of trails, but we found that you can take whichever you prefer; they all lead to Devil’s Bathtub. We were told that much of the hike traverses the stream, so we strapped on our Chacos and looked forward to a nice cool hike on a sunny day!

I think the earlier mention of the clouds was sufficient foreshadowing to give away what happened next. As we started into the woods, it started raining!

IMG_0755

And it rained the whole hike through, with continuous thunder and off-and-on hailstorms. Not a big deal, but pretty funny considering how perfect the hike is for hot days! Luckily, it was still warm and the hike is easy, so it didn’t interfere with our plans at all. It actually made for a very “enchanted forest” ambiance, which I enjoyed very much.

IMG_0773IMG_0720IMG_0734IMG_0737

As you near the little falls, you come to a beautiful corridor with layered limestone walls. If it had been a warmer day, we could have spent a fair amount of time right there, wading around and enjoying the view.

IMG_0744IMG_0754IMG_0769IMG_0770

By the time we reached Devil’s Bathtub, we were soaked through! There’s a little overhang next to the waterfall that we stood under to take pictures, then we waded out into the shallow water and splashed around with Scout.

IMG_0809IMG_0777IMG_0795IMG_0798IMG_0829IMG_0831

It’s a wonderful hike that I highly recommend to anyone traveling through the Black Hills! Next time, we’ll pack a lunch and spend the day there, weather permitting.

By the time we returned to the Turtle all three of us were drenched, and after drying off and wringing out the dog, we decided to skip the other hikes on our list as the thunderstorm was still booming along. We drove into Lead just as another impressive hailstorm was wrapping up.

IMG_0846

Our cancelled hiking plans left us with some extra time to kill, so we stopped into Dakota Shivers Brewing for a beer. What a cozy little spot in a cozy little town! While it continued to rain, we chatted with a local who had identified us as the occupants of the crazy blue Turtle parked out front. She was charming and fun to talk to, and gave us lots of great travel destinations for our next trip through the Black Hills. So nice!

That night, we parked at a quiet secluded spot on a Forest Service road. Hooray for free camping! As we made our coffee the next morning, Scout and Gracie ran around outside and surveyed our spot.

IMG_0849IMG_0865

It was decided by the committee that we could happily stay in that very spot for the allowed 14-day maximum. But we had to remind ourselves that we generally feel that way about our camping spots, and that our plan to make it to the Badlands by Sunday would make leaving worthwhile.

So off we drove toward Badlands National Park!